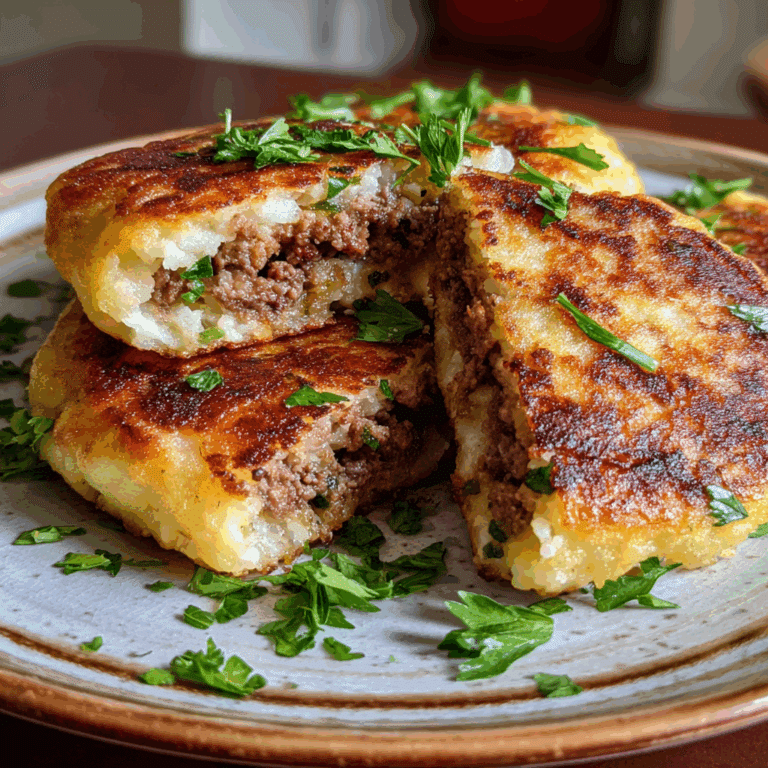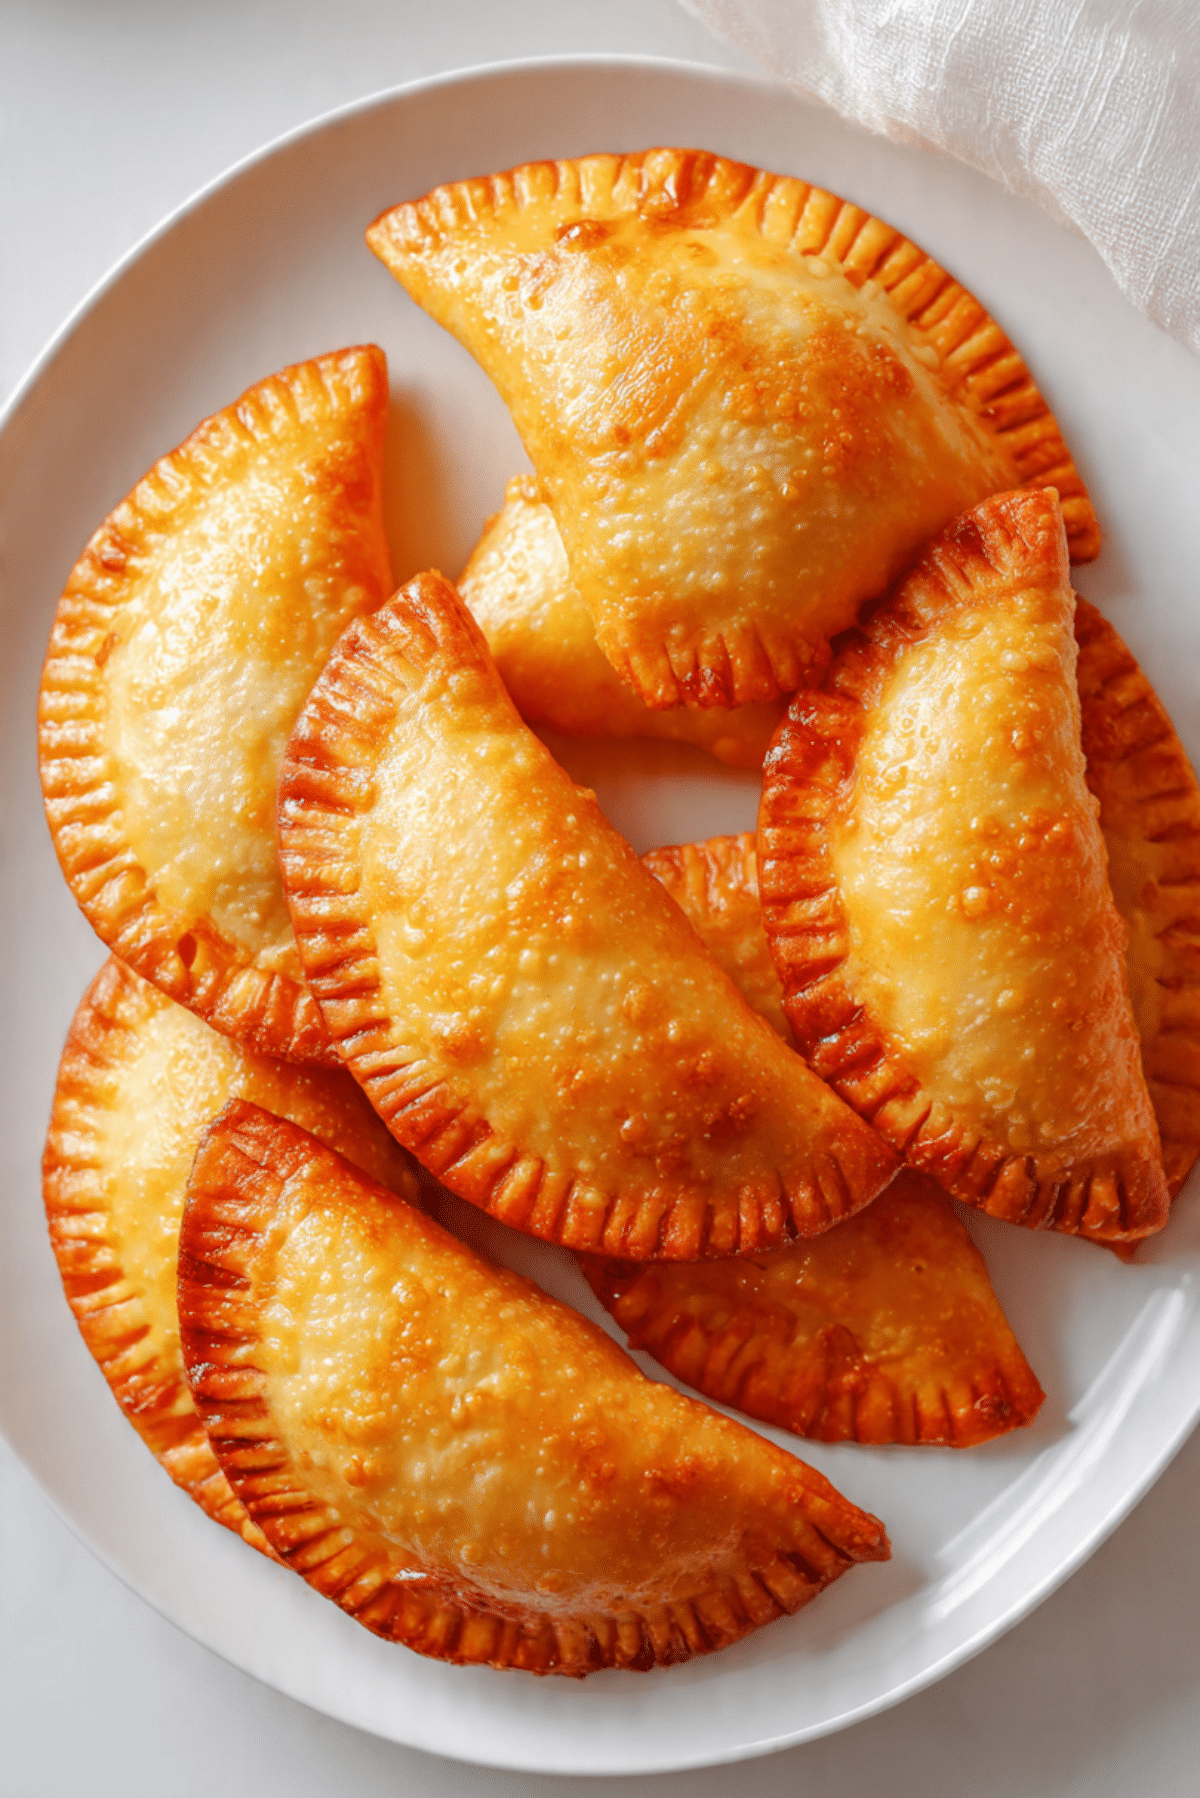
Cheesy Beef Pockets
The moment you pull these golden pockets apart and see that melted cheese stretching through the savory beef filling, you know you are in for something special. They are warm, comforting, and packed with flavor in every bite. Trust me, you’re going to love this. Whether it is a quick dinner or a snack to share, these little pockets never disappoint.
A Cozy Comfort Food That Hits Every Craving
There is something incredibly satisfying about handheld food that combines crispy pastry with a rich filling. These pockets bring together flaky layers and a hearty center, making them both fun to eat and deeply comforting. And now let’s dive into where this kind of dish comes from.
A Look Into the Origins of Stuffed Pastries
Stuffed pastries have been enjoyed across many cultures for centuries. From empanadas to hand pies, the idea is simple, wrap flavorful fillings in dough and bake until golden. This version leans into classic comfort flavors with beef and cheese, creating something familiar yet irresistible.
Why These Pockets Deserve a Spot in Your Kitchen
Before we get into the details, here is why this recipe works so well.
Versatile: You can serve them as snacks, appetizers, or even a full meal
Budget-Friendly: Uses simple and affordable ingredients
Quick and Easy: Straightforward steps with minimal prep
Customizable: Swap fillings or cheeses based on preference
Crowd-Pleasing: A guaranteed favorite for all ages
Make-Ahead Friendly: Can be prepared in advance and baked later
Great for Leftovers: Reheat beautifully without losing texture
Pro Tips That Make Them Even Better
A few small tricks can take your pockets to the next level.
- Do not overfill to prevent leaking
- Seal edges tightly for clean pockets
- Use an egg wash for a golden finish
- Let them cool slightly before serving
Tools That Make the Process Simple
Having the right tools keeps things smooth and easy.
Mixing Bowl: For preparing the filling
Rolling Pin: Helps shape the dough evenly
Baking Sheet: For even baking
Fork: Useful for sealing edges
Brush: For applying egg wash
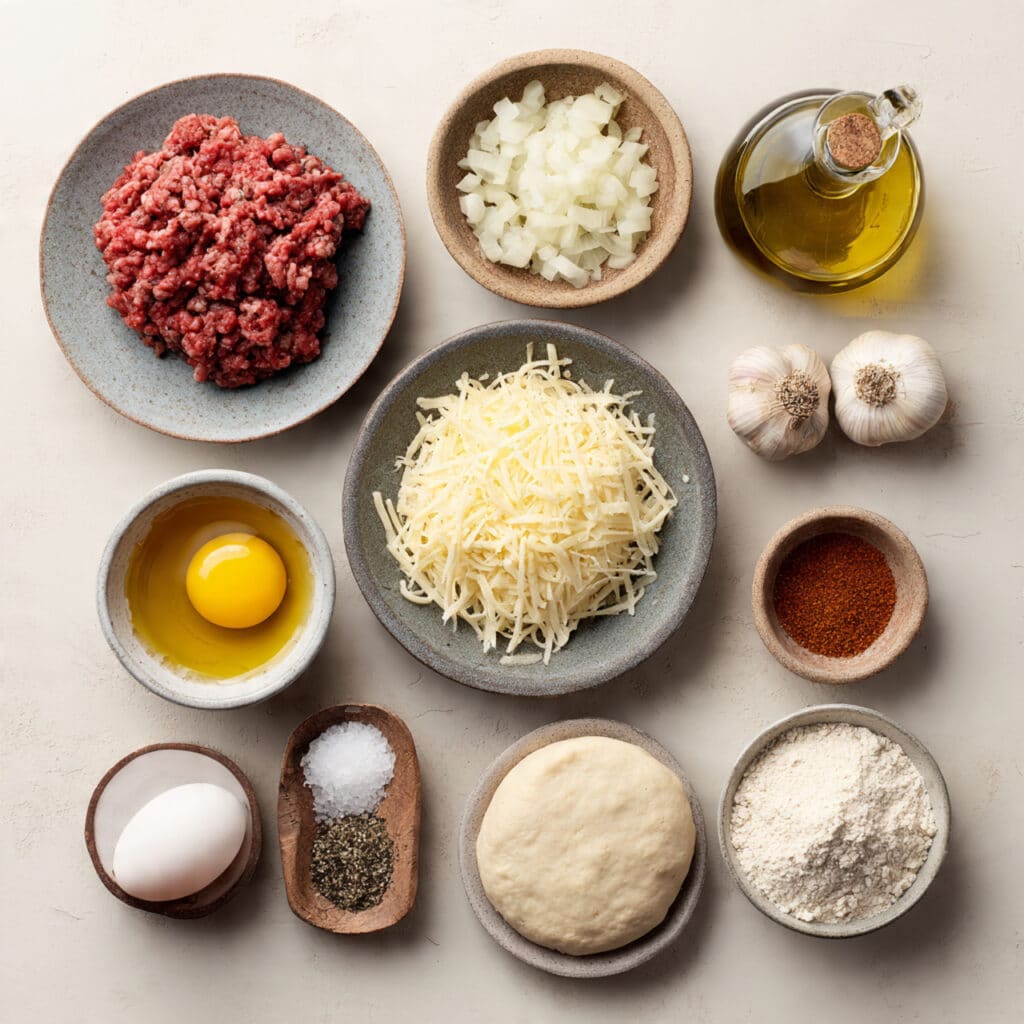
Ingredients That Bring Everything Together
Each ingredient contributes to flavor and texture.
- Ground Beef: 1 pound, provides a rich and savory base
- Shredded Cheese: 1 cup, melts into a creamy filling
- Onion: 1 small diced, adds sweetness and depth
- Garlic: 2 cloves minced, enhances flavor
- Olive Oil: 1 tablespoon, used for cooking
- Salt: 1 teaspoon, balances flavors
- Black Pepper: 1/2 teaspoon, adds mild heat
- Paprika: 1 teaspoon, adds warmth and color
- Prepared Dough: 1 package, forms the pocket exterior
- Egg: 1 beaten, for brushing
Easy Swaps You Can Try
You can adjust this recipe easily.
Ground Beef: Use ground chicken or turkey
Cheese: Swap with mozzarella or cheddar
Paprika: Use chili powder for a spicier kick
Prepared Dough: Use puff pastry or homemade dough
Ingredients That Make These Irresistible
Let’s highlight the stars of the show.
Ground Beef: Brings hearty flavor and satisfying texture
Cheese: Melts into a rich and creamy center
Let’s Make These Step by Step
Here is how everything comes together.
- Preheat Your Equipment: Preheat oven to 375°F (190°C)
- Combine Ingredients: Cook beef with onion, garlic, and spices until browned
- Prepare Your Cooking Vessel: Roll out dough and cut into squares
- Assemble the Dish: Place filling and cheese onto dough, fold and seal edges
- Cook to Perfection: Brush with egg wash and bake for 20 to 25 minutes until golden
- Finishing Touches: Let cool slightly for easier handling
- Serve and Enjoy: Serve warm and enjoy the cheesy goodness
Texture and Flavor You Will Crave Again
The outer layer is crisp and flaky, while the inside is juicy, cheesy, and full of savory flavor. Each bite delivers that perfect contrast that keeps you reaching for more.
Helpful Tips for Best Results
A few helpful reminders can improve your outcome.
- Let filling cool slightly before assembling
- Use parchment paper to prevent sticking
- Space pockets evenly on the baking sheet
What to Avoid While Making Them
Avoid these common mistakes.
- Overstuffing the pockets
- Not sealing edges properly
- Baking at too low a temperature
Nutrition Facts Overview
Servings: 8 pockets
Calories per serving: 260
Note: These are approximate values.
Time Needed From Start to Finish
Prep Time: 20 minutes
Cook Time: 25 minutes
Total Time: 45 minutes
Make Ahead and Storage Tips
You can assemble these pockets ahead of time and refrigerate them until ready to bake. Cooked pockets can be stored in the fridge for up to 3 days and reheated in the oven to keep them crisp.
Serving Ideas That Work Every Time
Serve them with a dipping sauce like ketchup or a yogurt based dip. They also pair well with a fresh salad.
Creative Leftover Ideas
Use leftover pockets as a quick lunch or slice them into smaller pieces for a snack platter.
Extra Tips for Flavor and Ease
Season your filling well and taste before assembling. And let me tell you, it’s worth every bite when everything comes together.
Make Them Look Extra Appealing
Serve on a clean plate with a light garnish and a dipping sauce on the side for a complete presentation.
Variations You Can Try
- Add vegetables like peppers or mushrooms
- Use spicy cheese for extra heat
- Try different dough types
- Add herbs for extra flavor
FAQ’s
Q1: Can I freeze these pockets?
Yes, freeze before or after baking.
Q2: Can I use different meat?
Yes, chicken or turkey works well.
Q3: How do I keep them crispy?
Reheat in the oven instead of microwave.
Q4: Can I make them vegetarian?
Yes, use vegetables and cheese.
Q5: What cheese works best?
Cheddar or mozzarella are great options.
Q6: Can I make them smaller?
Yes, just adjust baking time.
Q7: Do I need egg wash?
It helps achieve a golden finish.
Q8: Can I air fry them?
Yes, adjust time and temperature.
Q9: How do I prevent leaks?
Seal edges tightly.
Q10: Can I prepare filling ahead?
Yes, store it in the fridge.
Conclusion
These cheesy beef pockets are everything you want in a comfort dish, crispy, cheesy, and full of flavor. Once you make them, they will quickly become a favorite in your kitchen.
Print
Cheesy Beef Pockets
Description
Golden crispy cheesy beef pockets filled with seasoned ground beef and melted cheese, perfect as a snack, appetizer, or easy meal.
Ingredients
- 1 pound ground beef
- 1 cup shredded cheese
- 1 small onion, diced
- 2 cloves garlic, minced
- 1 tablespoon olive oil
- 1 teaspoon salt
- 1/2 teaspoon black pepper
- 1 teaspoon paprika
- 1 package prepared dough
- 1 egg, beaten
Instructions
- Preheat oven to 375°F (190°C).
- Cook ground beef with onion, garlic, and spices until browned.
- Roll out dough and cut into squares.
- Place filling and cheese on dough, fold and seal edges.
- Brush with egg wash.
- Bake for 20 to 25 minutes until golden brown.
- Cool slightly and serve.
Notes
- Do not overfill pockets
- Seal edges tightly
- Let filling cool before assembling