Slutty Brownies
There is something wildly satisfying about slicing into a dessert and seeing three irresistible layers stacked together like they were always meant to be. The soft chocolate chip cookie base, the creamy chocolate sandwich cookie center, and that rich, fudgy brownie top come together in a way that feels playful, nostalgic, and honestly a little over the top in the best possible way. Trust me, you’re going to love this. Every bite is chewy, gooey, chocolatey, and completely worth it.
Why These Layers Keep Everyone Coming Back
Some desserts are simple and sweet, and then some desserts walk into the room and instantly steal the spotlight. This one belongs in the second category. It has the kind of texture that makes people pause after the first bite, then immediately reach for another square. You get buttery cookie dough, a creamy cookie center, and a brownie layer that bakes up glossy on top and soft in the middle.
And now let’s dive a little deeper into where this fun dessert fits into the baking world, because part of its charm is how boldly it leans into pure comfort.
A Playful Dessert With Modern Bake Sale Fame
This layered brownie bar is one of those modern American treats that feels like it was built for parties, bake sales, and weekend cravings. It does not come from a centuries-old tradition, but it absolutely earns its place among beloved comfort desserts. Home bakers started loving it because it takes familiar favorites, cookie dough, brownies, and chocolate sandwich cookies, then combines them into one pan.
What makes it memorable is how recognizable every layer feels. There is nostalgia in the cookie dough, comfort in the brownie, and that creamy cookie center adds a familiar bakery case kind of magic. Let me tell you, it’s worth every bite.
Reasons This Dessert Earns a Permanent Spot in Your Baking Rotation
Once you make a batch, it becomes very clear why people keep returning to it. It is easy to share, easy to love, and surprisingly simple for something that looks this impressive.
Versatile: You can bake it for birthdays, potlucks, late-night cravings, or a cozy weekend treat. It fits almost any dessert moment without needing much fuss.
Budget-Friendly: Most of the ingredients are basic baking staples, plus a pack of chocolate sandwich cookies. It looks luxurious without requiring anything fancy.
Quick and Easy: The layering is straightforward, and you do not need advanced baking skills to get a beautiful result. This one’s a total game-changer for beginner bakers.
Customizable: You can swap in dark chocolate chips, use different sandwich cookie flavors, or add a pinch of espresso powder to deepen the chocolate flavor.
Crowd-Pleasing: It is hard to find someone who turns down a chewy brownie layered with cookie dough and cookies. These bars disappear fast.
Make-Ahead Friendly: You can bake the pan a day ahead, let it cool completely, and slice when ready to serve. The flavor gets even better as the layers settle.
Great for Leftovers: If there are any leftovers, they hold up beautifully for snacking the next day. The texture stays rich and satisfying.
Pro Baker Secrets for Better Layers Every Time
Before you pull out the mixing bowls, a few smart baking habits can make the whole process smoother and the final bars even more delicious.
- Room Temperature Eggs: Let the eggs sit out for a bit before mixing. They blend more smoothly into both the cookie dough and brownie batter.
- Line the Pan Well: Use parchment with a little overhang so you can lift the bars out cleanly once they cool.
- Do Not Overbake: The center should still look slightly soft when you remove the pan. Residual heat finishes the job and keeps the brownie layer fudgy.
- Press the Cookie Base Evenly: A level cookie dough layer helps the bars bake evenly and keeps every square balanced.
- Cool Completely Before Slicing: This part matters. Warm bars are delicious, but fully cooled bars slice neatly and show off the layers beautifully.
Kitchen Tools That Make the Process Easy
Now that you know the little tricks that help, let’s talk about the tools that make this bake feel effortless from start to finish.
8×8-inch Baking Pan: This size gives you thick, bakery-style bars with distinct layers.
Parchment Paper: It makes lifting and slicing much easier, especially with a soft brownie top.
Mixing Bowls: You will need one bowl for the cookie layer and one for the brownie batter.
Whisk: Perfect for blending the brownie ingredients into a smooth, glossy batter.
Rubber Spatula: Useful for spreading both layers gently and evenly.
Measuring Cups and Spoons: Important for keeping the texture right, especially in layered bakes.
Cooling Rack: Helps the pan cool more evenly before slicing.
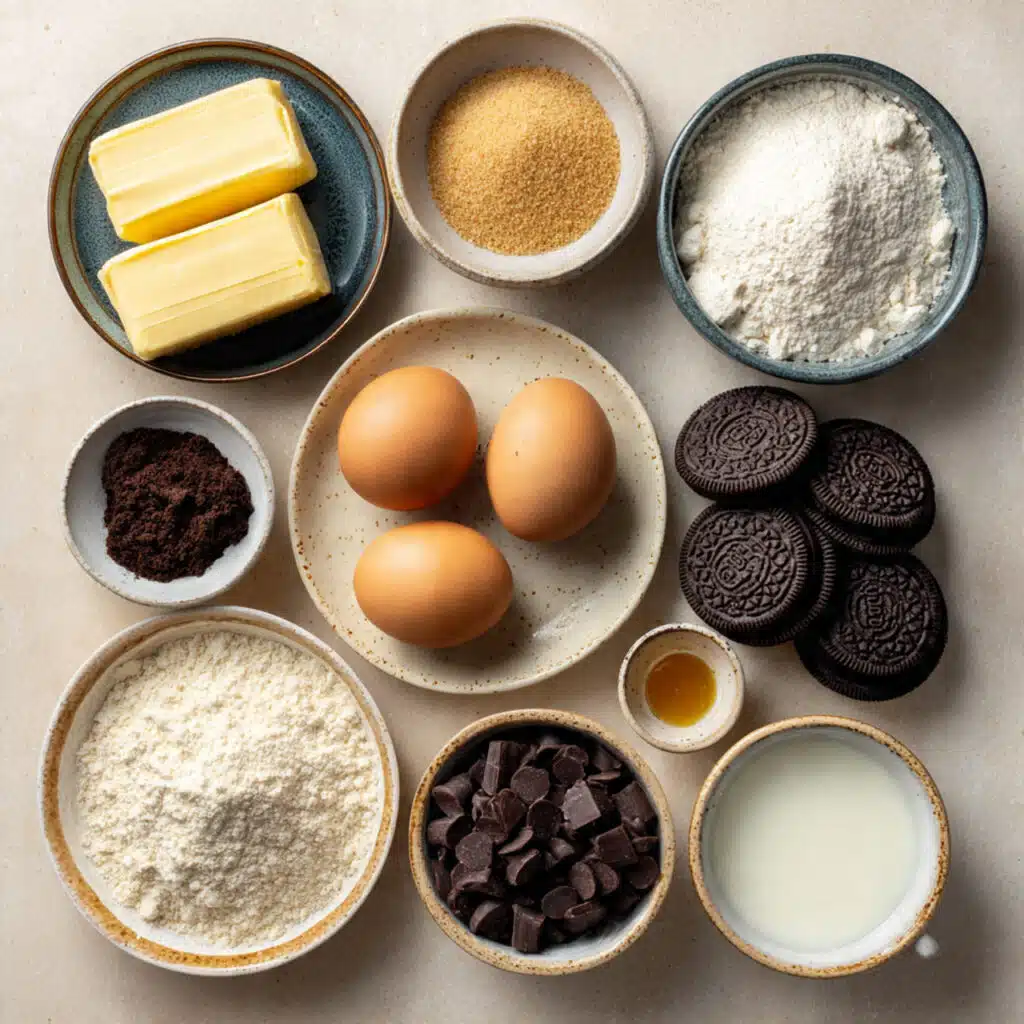
Everything You Need for the Best Batch
The magic here comes from how each ingredient supports the next. Butter brings richness, brown sugar adds chewiness, chocolate sandwich cookies create that creamy center, and the brownie layer pulls everything together with deep cocoa flavor.
- Unsalted Butter: 1 cup, melted and divided, adds richness to both the cookie layer and the brownie batter.
- Light Brown Sugar: 1/2 cup, packed, gives the cookie base a soft, caramel-like chew.
- Granulated Sugar: 1 1/2 cups, divided, sweetens both layers and helps create that shiny brownie top.
- Large Eggs: 3, divided, bind the layers and add structure.
- Vanilla Extract: 2 teaspoons, divided, rounds out the sweetness and adds warmth.
- All-Purpose Flour: 1 1/4 cups, divided, provides structure without making the bars heavy.
- Baking Soda: 1/2 teaspoon, helps the cookie base lift slightly and stay tender.
- Salt: 3/4 teaspoon, divided, balances the sweetness and sharpens the chocolate flavor.
- Semi-Sweet Chocolate Chips: 3/4 cup, folded into the cookie dough for melty pockets of chocolate.
- Chocolate Sandwich Cookies: 16 whole cookies, form the signature creamy middle layer.
- Unsweetened Cocoa Powder: 1/2 cup, gives the brownie layer its deep chocolate flavor.
- Milk Chocolate Chips: 3/4 cup, melted into the brownie batter for extra richness.
Easy Swaps That Still Taste Amazing
One of the best things about this dessert is how adaptable it is. You can make small changes without losing the indulgent spirit that makes it so special.
Unsalted Butter: Salted butter, reduce the added salt slightly.
Light Brown Sugar: Dark brown sugar, for a deeper molasses flavor.
Semi-Sweet Chocolate Chips: Dark chocolate chips, for a more intense chocolate bite.
Milk Chocolate Chips: Semi-sweet chocolate chips, for a slightly less sweet brownie layer.
Chocolate Sandwich Cookies: Vanilla sandwich cookies or peanut butter sandwich cookies, for a fun flavor twist.
Vanilla Extract: Almond extract, use a smaller amount for a different aromatic note.
The Star Ingredients That Make It So Memorable
Some ingredients are doing more than just filling space here. They are the ones that define the whole experience from the first bite to the last crumb.
Chocolate Sandwich Cookies: These bring that creamy center and gentle crunch that softens as the bars bake. They create the surprise middle layer that makes each square feel extra special.
Unsweetened Cocoa Powder: This is what gives the brownie top its deep, almost velvety chocolate flavor. It keeps the richness balanced and prevents the dessert from tasting flat or overly sweet.
Let’s Bake These Rich, Layered Bars
Now comes the fun part, and honestly this is where the whole dessert starts to feel real. You build it layer by layer, and each step brings more of that bakery-style magic to life.
- Preheat Your Equipment: Preheat your oven to 350°F. Line an 8×8-inch baking pan with parchment paper, leaving enough overhang to lift the bars out later.
- Combine Ingredients: In a medium bowl, stir together 1/2 cup melted butter, 1/2 cup light brown sugar, 1/4 cup granulated sugar, 1 egg, and 1 teaspoon vanilla extract. Add 3/4 cup all-purpose flour, the baking soda, 1/4 teaspoon salt, and the semi-sweet chocolate chips. Mix until a soft cookie dough forms. In a separate bowl, whisk together the remaining 1/2 cup melted butter, 1 1/4 cups granulated sugar, 2 eggs, and 1 teaspoon vanilla extract. Whisk in the cocoa powder, remaining 1/2 cup all-purpose flour, remaining 1/2 teaspoon salt, and the milk chocolate chips until smooth.
- Prepare Your Cooking Vessel: Press the cookie dough evenly into the bottom of the lined pan. Take your time here so the base reaches all the corners in an even layer.
- Assemble the Dish: Arrange the 16 chocolate sandwich cookies in a single layer over the cookie dough. Spoon the brownie batter over the cookies, then gently spread it so the top is mostly even.
- Cook to Perfection: Bake for 35 to 40 minutes, until the top looks set and a toothpick inserted near the edge comes out with moist crumbs. The center can still be a little soft, because it will continue to settle as it cools.
- Finishing Touches: Let the pan cool completely on a rack. For cleaner slices, chill the pan for 30 minutes after cooling, then lift it out using the parchment and cut into squares.
- Serve and Enjoy: Serve the bars as they are, or add a scoop of vanilla ice cream if you want to turn dessert into a full event. Either way, expect people to ask for the recipe.
How the Flavor and Texture Build in Every Bite
What makes these bars so addictive is the contrast. The cookie base stays soft and buttery with little bursts of melted chocolate. The middle layer turns tender and creamy, creating a sweet pause between the two richer textures. Then the brownie top comes in dense, fudgy, and intensely chocolatey.
As the bars cool, the layers settle into each other just enough to feel connected while still staying distinct. That means every bite gives you chew, creaminess, and deep cocoa richness all at once. It is sweet, yes, but it is also layered in a way that keeps every square interesting.
Helpful Tricks for a Better Baking Day
A few little details can make this dessert even easier and more reliable, especially if you are making it for guests.
- Use parchment paper well: Let it hang over two sides of the pan so you can lift the bars out without breaking them.
- Spread the brownie batter gently: A light hand keeps the cookie layer underneath in place.
- Cool before cutting: This helps the layers firm up and gives you those clean bakery-style edges.
- Wipe the knife between slices: It makes each square look neater and keeps the layers from smearing.
Mistakes to Skip for the Best Results
Even a simple layered bake has a few spots where things can go off track, so here are the ones worth watching.
- Do not overmix the cookie dough: Too much mixing can make the base tougher than it should be.
- Do not overbake the pan: If the center looks completely dry in the oven, the bars may turn cakey instead of fudgy.
- Do not slice while warm: Warm bars tend to collapse and smear, even though they smell incredible.
- Do not use a larger pan: A bigger pan makes the layers too thin and changes the bake time.
A Quick Look at the Nutrition
These bars are rich and indulgent, so a little square goes a long way. They are meant to be enjoyed slowly, preferably with something hot to sip alongside.
Servings: 16 bars
Calories per serving: 295
Note: These are approximate values.
Time You’ll Want to Set Aside
The process itself is easy, and most of the time is simple oven work and cooling.
Prep Time: 20 minutes
Cook Time: 38 minutes
Total Time: 58 minutes
Make-Ahead and Storage Tips That Actually Help
If you are planning ahead, this dessert works beautifully. You can bake the full pan a day in advance and leave it covered at room temperature once fully cooled. That actually gives the layers a little time to settle, which makes slicing easier.
For storage, keep the bars in an airtight container at room temperature for up to 3 days, or in the refrigerator for up to 1 week. For freezing, wrap individual squares tightly and place them in a freezer-safe container for up to 2 months. To reheat, warm a square in the microwave for about 10 to 12 seconds for that soft, freshly baked feel.
My Favorite Ways to Serve These Bars
These rich squares do not need much, but a good serving idea can make them feel even more special. Serve them slightly chilled for firmer layers, or just barely warm for a softer, gooier texture. A scoop of vanilla ice cream on the side turns them into a plated dessert that feels restaurant-worthy.
They are also lovely with hot coffee, a glass of cold milk, or even a cozy mug of tea if you want something to balance the sweetness. For parties, cut them into smaller bites and arrange them on a platter so guests can grab one without committing to a huge square.
Smart and Delicious Ways to Use Leftovers
If you happen to have extra bars sitting around, they can easily become something new and fun.
Crumble a square over vanilla ice cream for a layered dessert sundae. Chop the bars into chunks and fold them into softened ice cream for a homemade mix-in moment. You can also warm a square and serve it with whipped cream and sliced strawberries for an easy plated dessert.
Another favorite is to tuck a small piece into a lunchbox or afternoon snack plate. It feels like a tiny reward in the middle of the day.
Extra Tips for Flavor, Freshness, and Ease
Sometimes the smallest details are the ones that take a dessert from good to unforgettable. A tiny pinch of espresso powder in the brownie batter can deepen the chocolate without making it taste like coffee. Using good-quality cocoa powder also makes a noticeable difference in richness.
For the cleanest texture, let the melted butter cool slightly before mixing so it does not scramble the eggs. And when storing the bars, place parchment between layers if you are stacking them, which keeps the tops looking neat and glossy.
How to Make These Bars Look Bakery-Worthy
Presentation matters, especially with a dessert that already has such dramatic layers. For the prettiest slices, use a sharp knife and clean it between each cut. That small step makes the layers stand out beautifully.
Arrange the bars on a simple white platter so the dark brownie top and pale cookie center really pop. A light dusting of cocoa powder on the serving plate can look lovely, but keep it subtle. This dessert already knows how to show off.
Fun Twists to Try Next Time
Once you have made the classic version, it is easy to start playing with flavor.
Dark Chocolate Version: Swap both kinds of chocolate chips for dark chocolate chips for a more intense, less sweet finish.
Peanut Butter Style: Use peanut butter sandwich cookies in the center for a salty-sweet variation that feels extra indulgent.
Double Chocolate Chip Base: Add a little extra chocolate chip variety to the cookie dough by using half semi-sweet and half dark chocolate chips.
Holiday Spice Touch: Stir a pinch of cinnamon into the brownie batter for a warm, cozy note.
Mini Bar Bites: Bake the layers in a muffin tin with liners for smaller, party-ready portions.
FAQ’s
Q1: Can I use boxed brownie mix for the top layer?
Yes, you can, but the texture may be a little different. A homemade brownie layer gives you a fudgier finish and better control over sweetness.
Q2: Do I need to chill the bars before slicing?
No, but it helps a lot. Chilling for 30 minutes after cooling makes the cuts cleaner and the layers more defined.
Q3: Can I make these a day ahead?
Absolutely. They hold up very well overnight and are often even easier to slice the next day.
Q4: Should the center still look soft when I remove them from the oven?
Yes, slightly soft is exactly right. The residual heat keeps baking the center as the pan cools.
Q5: Can I use dark cocoa powder?
Yes, though it will create a deeper color and a slightly more intense chocolate flavor.
Q6: How do I keep the top from cracking too much?
Do not overbake, and avoid overwhisking the brownie batter. A few light cracks are normal and still look delicious.
Q7: Can I freeze these bars?
Yes. Wrap individual squares tightly and freeze for up to 2 months.
Q8: What is the best way to reheat one square?
Microwave for 10 to 12 seconds. That is usually enough to soften the brownie layer without drying it out.
Q9: Can I double the recipe?
Yes, bake it in a 9×13-inch pan and increase the baking time slightly, checking near the end.
Q10: What makes these bars different from regular brownies?
It is the layered structure. You get cookie dough, creamy sandwich cookies, and brownie all in one bite, which makes them much richer and more texturally exciting.
Conclusion
This dessert is bold, rich, nostalgic, and completely unapologetic about being over the top. That is exactly why people love it. From the chewy cookie base to the creamy center and fudgy brownie top, every layer brings something special to the table. Trust me, you’re going to love this, and once you share a batch, do not be surprised if people start requesting it again and again.
Print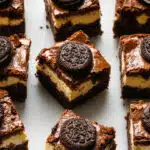
Slutty Brownies
- Prep Time: 20 minutes
- Cook Time: 38 minutes
- Total Time: 58 minutes
- Yield: 16 bars
- Category: Dessert
- Method: Baking
- Cuisine: American
- Diet: Vegetarian
Description
Rich layered dessert bars with a chocolate chip cookie base, a center of chocolate sandwich cookies, and a fudgy brownie topping. These bars are chewy, gooey, chocolatey, and perfect for parties, bake sales, or a cozy weekend treat.
Ingredients
- 1 cup unsalted butter, melted and divided
- 1/2 cup light brown sugar, packed
- 1 1/2 cups granulated sugar, divided
- 3 large eggs, divided
- 2 teaspoons vanilla extract, divided
- 1 1/4 cups all-purpose flour, divided
- 1/2 teaspoon baking soda
- 3/4 teaspoon salt, divided
- 3/4 cup semi-sweet chocolate chips
- 16 whole chocolate sandwich cookies
- 1/2 cup unsweetened cocoa powder
- 3/4 cup milk chocolate chips
Instructions
- Preheat the oven to 350°F. Line an 8×8-inch baking pan with parchment paper, leaving overhang on two sides.
- In a medium bowl, stir together 1/2 cup melted butter, light brown sugar, 1/4 cup granulated sugar, 1 egg, and 1 teaspoon vanilla extract.
- Add 3/4 cup all-purpose flour, baking soda, 1/4 teaspoon salt, and the semi-sweet chocolate chips. Mix until a soft cookie dough forms.
- Press the cookie dough evenly into the bottom of the prepared pan.
- Arrange the 16 chocolate sandwich cookies in a single layer over the cookie dough.
- In a separate bowl, whisk together the remaining 1/2 cup melted butter, remaining 1 1/4 cups granulated sugar, 2 eggs, and remaining 1 teaspoon vanilla extract.
- Whisk in the cocoa powder, remaining 1/2 cup all-purpose flour, remaining 1/2 teaspoon salt, and the milk chocolate chips until smooth.
- Spoon the brownie batter over the sandwich cookies and spread gently into an even layer.
- Bake for 35 to 40 minutes, until the top is set and a toothpick inserted near the edge comes out with moist crumbs.
- Cool completely in the pan on a rack. For cleaner slices, chill for 30 minutes after cooling, then lift out and cut into 16 bars.
Notes
- Do not overbake if you want a fudgy brownie layer.
- Let the bars cool completely before slicing for neat layers.
- Store in an airtight container at room temperature for up to 3 days or refrigerate for up to 1 week.
- Freeze individual bars for up to 2 months and reheat for 10 to 12 seconds in the microwave.
Nutrition
- Serving Size: 1 bar
- Calories: 295
- Sugar: 26g
- Sodium: 180mg
- Fat: 15g
- Saturated Fat: 8g
- Unsaturated Fat: 6g
- Trans Fat: 0g
- Carbohydrates: 39g
- Fiber: 2g
- Protein: 3g
- Cholesterol: 52mg