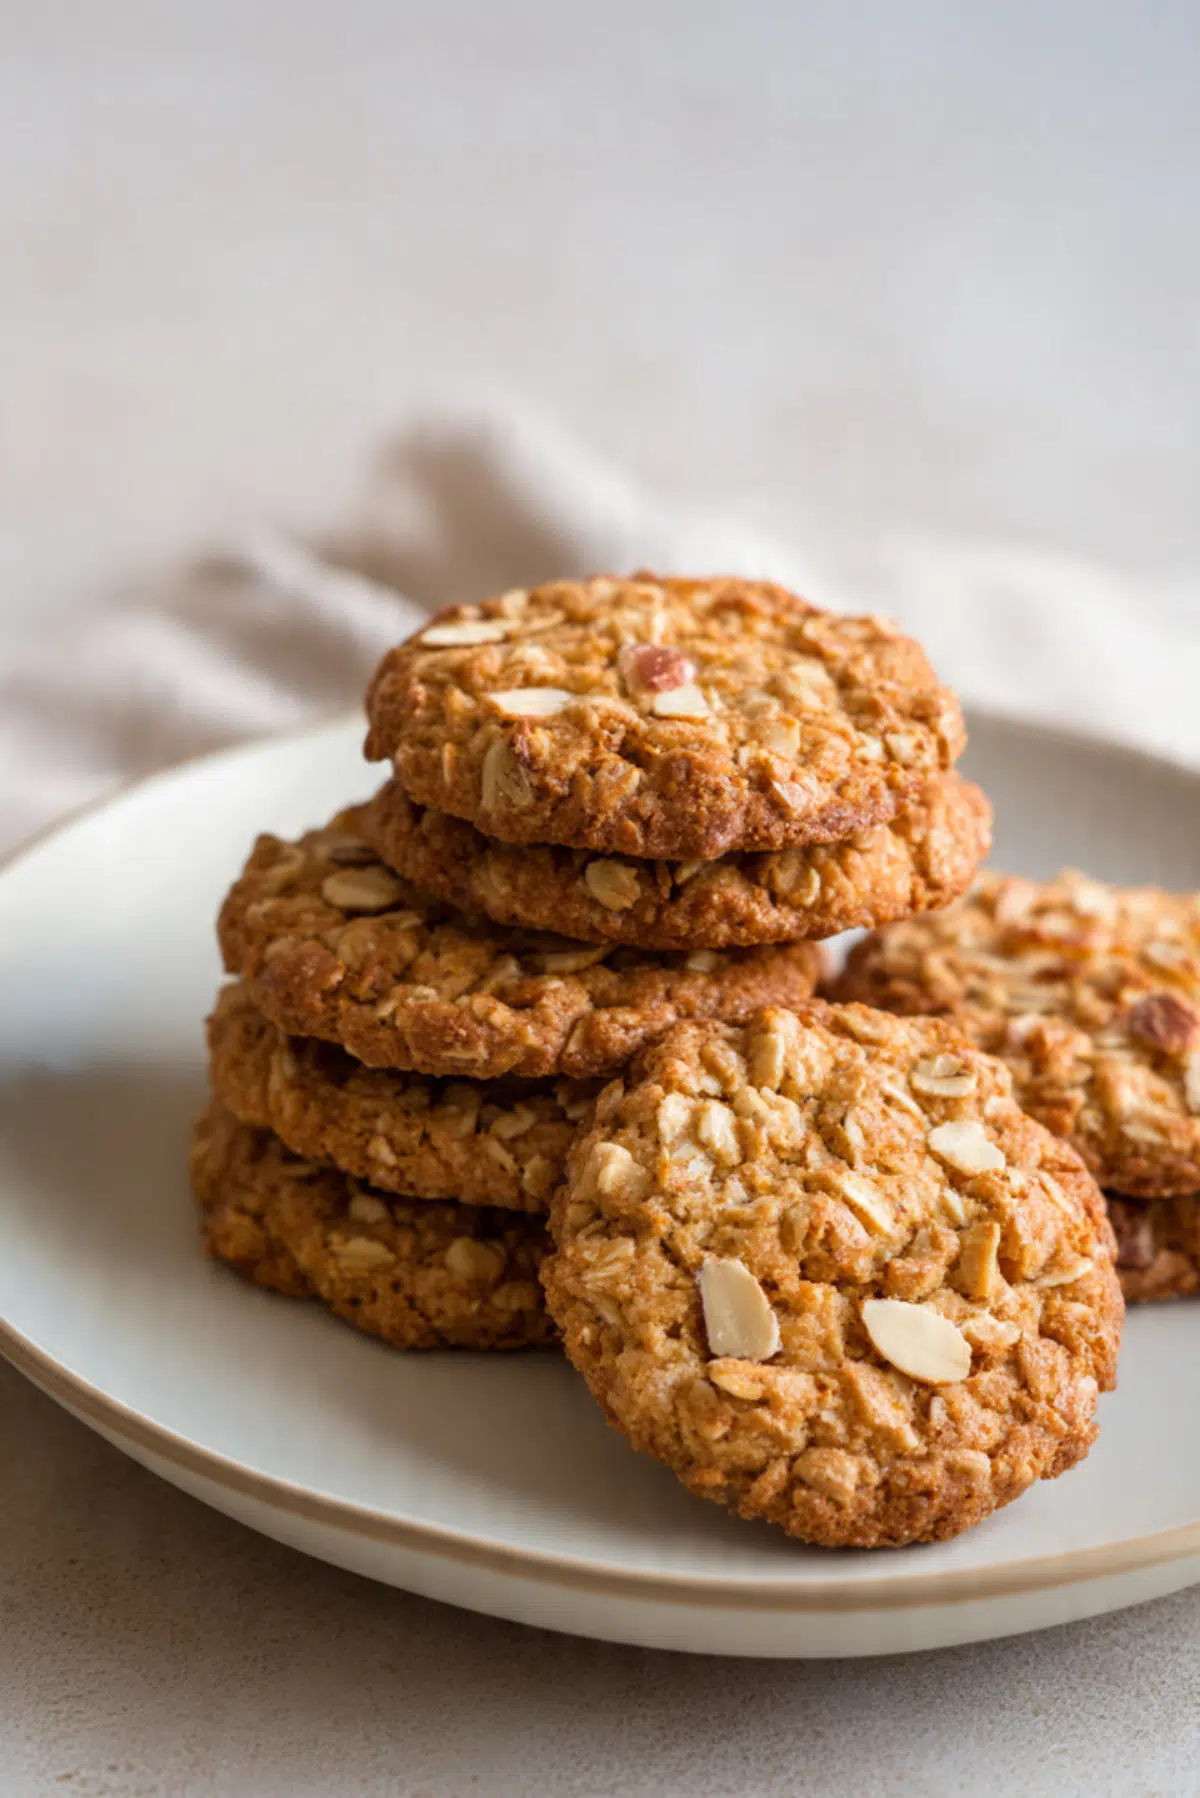
Crunchy Oat & Nut Cookies
There is something instantly comforting about a batch of homemade cookies cooling on the counter, and these crunchy oat and nut cookies really know how to steal the moment. They come out golden, crisp around the edges, and packed with toasty oats, buttery nuts, and that cozy aroma that makes the whole kitchen feel warmer. Trust me, you’re going to love this, especially if you like a cookie with real texture and a satisfying bite.
Why These Cookies Always Disappear First
Some cookies are soft and pillowy, and some are rich and fudgy, but these bring a different kind of joy. They are crisp, deeply nutty, and full of wholesome texture, which makes every bite feel a little more special. The oats give them that rustic charm, while the chopped nuts add a buttery crunch that lingers in the best way.
What makes them extra lovable is how easy they are to enjoy any time of day. They fit right in next to a cup of coffee, a glass of milk, or even tucked into a lunchbox for a sweet little surprise. Let me tell you, it’s worth every bite.
A Little Backstory Behind This Homestyle Favorite
Oat-based cookies have been around for generations, and their appeal comes from simple pantry ingredients turning into something unexpectedly delicious. Oats became especially popular in home baking because they were affordable, filling, and added wonderful texture without much fuss. Over time, bakers started pairing them with chopped nuts, brown sugar, and warm spices to create cookies that felt hearty and comforting.
This style of cookie has that old-fashioned bake sale energy, the kind of treat that feels familiar even if it is your first time making it. It is homey, practical, and deeply satisfying, which is probably why it has stayed beloved for so long.
Why This Batch Earns a Spot in Your Baking Rotation
Before we get into the mixing bowl, it helps to know why this is one of those bakes you come back to again and again.
Versatile: These cookies work as an afternoon snack, a casual dessert, or a little homemade gift. They are simple enough for everyday baking but still feel special when shared.
Budget-Friendly: Most of the ingredients are pantry staples, and even the nuts can be adjusted based on what you already have. You get a generous batch without needing anything fancy.
Quick and Easy: The dough comes together without complicated steps, and the bake time is short. This one’s a total game-changer when you want something homemade without turning the whole kitchen upside down.
Customizable: You can switch the nuts, add cinnamon, or use a different extract for a slightly new twist. The base is reliable, which makes it fun to play with.
Crowd-Pleasing: People love a cookie with crunch, warmth, and a buttery finish. These have broad appeal and that nostalgic flavor that makes everyone reach for one more.
Make-Ahead Friendly: You can mix the dough ahead and chill it until you are ready to bake. That makes it perfect for busy weeks or weekend prep.
Great for Leftovers: They store beautifully and keep their texture well. In fact, the flavor gets even toastier by the next day.
Smart Baker Secrets for Better Texture Every Time
Now let’s talk like real kitchen friends for a second, because a few small choices make a big difference here.
- Toast the nuts lightly: If you have a few extra minutes, toast the nuts before chopping them. It deepens their flavor and makes the cookies taste richer.
- Do not overmix the dough: Once the dry ingredients go in, mix just until combined. That helps the cookies stay crisp instead of turning dense.
- Use room temperature butter: Softened butter creams more smoothly with the sugars, which gives you a more even texture.
- Flatten the dough slightly before baking: Since these are meant to be crunchy, a gentle press helps them spread evenly and crisp up nicely.
- Let them cool completely on a rack: This part matters. They continue to set as they cool, and that final crunch develops beautifully once the steam escapes.
The Kitchen Tools That Make the Process Smooth
A good bake always feels easier when the basics are ready and within reach. You do not need anything complicated here, just a few dependable tools.
Mixing bowls: You will need one for the wet ingredients and one for the dry, which keeps everything easy to combine without overworking the dough.
Electric mixer or sturdy whisk: A mixer helps cream the butter and sugars quickly, but a whisk and a little elbow grease can still get the job done.
Measuring cups and spoons: Accurate measuring matters in baking, especially for flour and oats.
Baking sheet: A sturdy sheet pan helps the cookies bake evenly and develop that golden underside.
Parchment paper: This keeps sticking away and encourages even browning.
Cookie scoop or spoon: Useful for making evenly sized portions so everything bakes at the same pace.
Wire rack: Cooling the cookies on a rack helps preserve that crisp finish instead of trapping steam underneath.
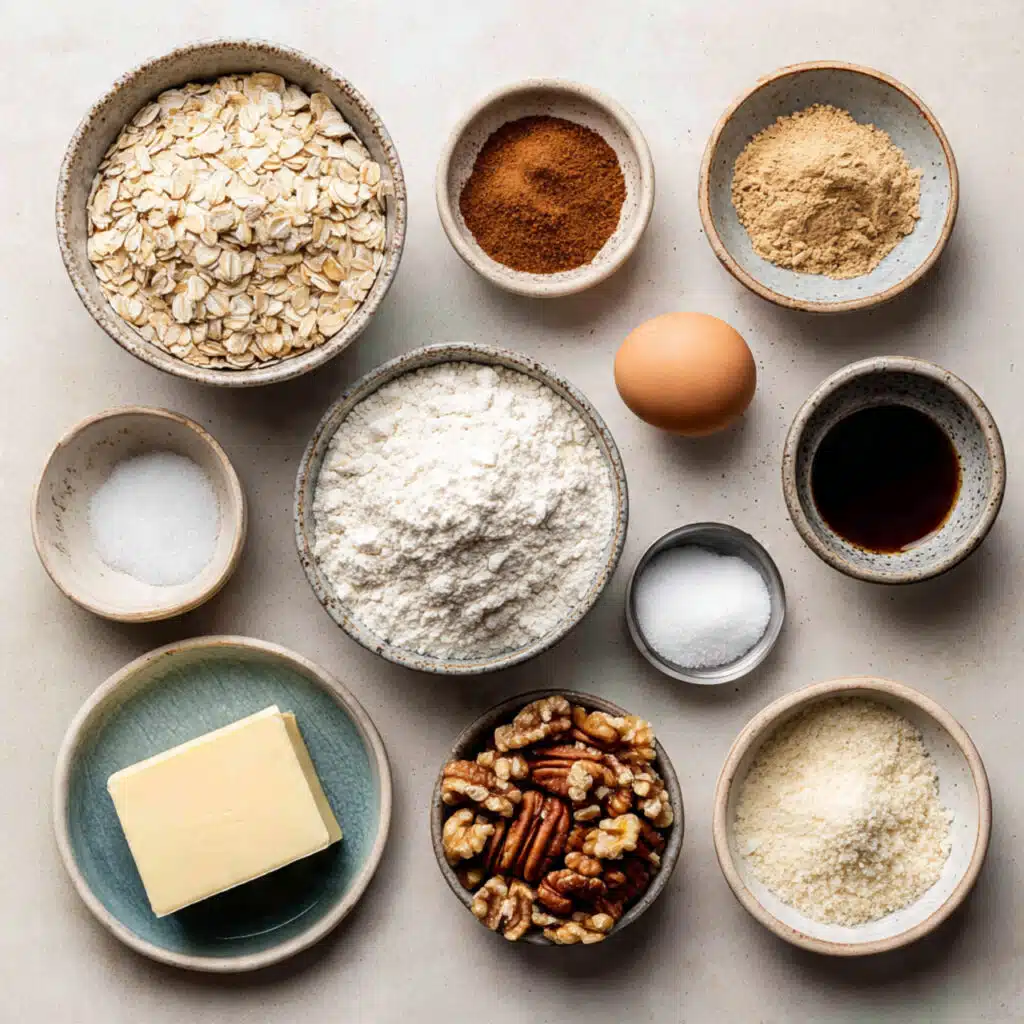
What Goes Into These Golden, Nutty Cookies
And now we get to the heart of it, the ingredients that come together into something warm, crunchy, and deeply satisfying. Each one has a job to do, and together they create that irresistible bakery-style balance of sweetness, nuttiness, and texture.
- Old-fashioned rolled oats: 1 1/2 cups, these bring the signature hearty texture and subtle toasty flavor.
- All-purpose flour: 1 cup, it gives the dough structure so the cookies hold their shape while baking.
- Baking soda: 1/2 teaspoon, this helps the cookies spread just enough and bake up crisp.
- Fine salt: 1/2 teaspoon, it sharpens all the sweet and nutty flavors.
- Ground cinnamon: 1/2 teaspoon, it adds a warm background note that makes the cookies taste extra cozy.
- Unsalted butter, softened: 1/2 cup, this brings richness and helps create those beautifully crisp edges.
- Light brown sugar: 3/4 cup, it adds moisture, caramel notes, and a deeper sweetness.
- Granulated sugar: 1/4 cup, this supports the crunch and gives the cookies a lighter crisp bite.
- Large egg: 1, it binds the dough and adds a little richness.
- Vanilla extract: 1 teaspoon, it rounds out the sweetness and brings that classic cookie aroma.
- Chopped walnuts: 1/2 cup, they add earthy depth and a satisfying crunch.
- Chopped pecans: 1/2 cup, these bring a buttery richness that pairs beautifully with the oats.
Easy Swaps That Still Taste Fantastic
One of the nicest things about a cookie like this is how flexible it can be. You can make small changes without losing the charm that makes it so good.
Walnuts: Use more pecans, or swap in chopped almonds for a firmer crunch.
Pecans: Try hazelnuts or cashews for a slightly sweeter, softer nut flavor.
Ground cinnamon: Replace with a pinch of nutmeg for a warmer, deeper spice note.
Vanilla extract: Almond extract can be used in a smaller amount for a more pronounced nutty aroma.
Light brown sugar: Dark brown sugar works too, and it gives a deeper caramel flavor.
The Ingredients That Truly Make These Shine
As simple as the lineup is, there are a couple of stars that really define the whole cookie experience.
Old-fashioned rolled oats: These are the soul of the cookie. They create that rustic chew-meets-crunch texture and give every bite a hearty, homemade feel.
Pecans: Their buttery flavor softens the sharper edge of the walnuts and adds richness that makes the cookies taste fuller and more layered.
How to Bake Them with Confidence
Now let’s dive into the part everyone waits for, the moment where a few humble ingredients start smelling like something unforgettable. The steps are simple, clear, and easy to follow, so you can move through the process without second-guessing.
- Preheat Your Equipment: Preheat your oven to 350°F (175°C). Line a baking sheet with parchment paper so the cookies bake evenly and lift off cleanly once golden.
- Combine Ingredients: In a medium bowl, whisk together the oats, flour, baking soda, salt, and cinnamon. In a separate large bowl, beat the softened butter, brown sugar, and granulated sugar until light and creamy. Mix in the egg and vanilla extract until smooth, then stir in the dry ingredients just until combined. Fold in the chopped walnuts and pecans.
- Prepare Your Cooking Vessel: Make sure your lined baking sheet is ready and set on a flat surface. This keeps the dough easy to portion and helps the cookies hold their shape before baking.
- Assemble the Dish: Scoop tablespoon-sized portions of dough onto the baking sheet, spacing them about 2 inches apart. Gently flatten each mound slightly with your fingers or the back of a spoon to encourage an even, crisp bake.
- Cook to Perfection: Bake for 12 to 14 minutes, or until the edges are golden brown and the centers look set. For extra crunch, leave them in for the longer end of the baking window, but watch closely so the nuts do not overdarken.
- Finishing Touches: Let the cookies rest on the baking sheet for 5 minutes. This helps them firm up before you transfer them to a wire rack to cool completely.
- Serve and Enjoy: Once cooled, serve them with coffee, tea, or milk and enjoy that crisp, nutty bite. They are wonderfully simple, and somehow they still feel like a treat you would happily reach for again and again.
That Irresistible Crunch and Toasty Flavor
What makes these cookies so memorable is the contrast in every bite. The edges turn crisp and golden, the centers stay just firm enough to feel hearty, and the chopped nuts bring little bursts of buttery crunch throughout. The oats toast as they bake, which adds a warm, almost nutty aroma of their own, while the brown sugar creates a caramel-like depth that settles in beautifully.
As the cookies cool, the texture develops even more. That is when the crunch really lands, and the flavors seem to sharpen into something cozy, balanced, and incredibly snackable.
A Few Helpful Tricks Before You Bake
A good cookie bake gets even better with a little extra know-how, and these small details can really help.
- Chill the dough for 15 minutes: This can help control spreading if your kitchen is warm.
- Use evenly chopped nuts: Similar-sized pieces distribute better and make the texture more consistent.
- Bake one tray at a time: This gives you more even heat and a more reliable crisp finish.
- Cool completely before storing: Warm cookies can trap steam and soften faster in the container.
Common Cookie Mistakes and How to Dodge Them
Even easy bakes can go a little sideways, so here are the big things to watch for.
- Using quick oats instead of rolled oats: Quick oats can make the texture less hearty and more compact. Stick with rolled oats for the best crunch.
- Overcrowding the baking sheet: Cookies need space to spread and brown properly. Give them room.
- Overmixing after the flour goes in: This can make the cookies tougher than they should be. Stir just until everything comes together.
- Pulling them too early: If they are still pale at the edges, they may not crisp up fully. Look for a definite golden rim.
Nutrition Snapshot at a Glance
These cookies feel like a treat, but they also bring a little staying power thanks to the oats and nuts.
Servings: 18 cookies
Calories per serving: 145
Note: These are approximate values.
Time You’ll Want to Set Aside
This is one of those easy bakes that feels rewarding without taking over your whole afternoon.
Prep Time: 15 minutes
Cook Time: 14 minutes
Total Time: 29 minutes
Make-Ahead and Storage Tips That Actually Help
If you like planning ahead, this bake works beautifully. The dough can be mixed and covered in the refrigerator for up to 24 hours before baking, which makes it easy to prep in advance. You can also portion the dough into scoops and chill them on a tray, then bake straight from the fridge with an extra minute or two added to the bake time.
Once baked, store the cookies in an airtight container at room temperature for up to 5 days. To keep them crisp, let them cool completely before sealing them up. For longer storage, freeze the baked cookies in a freezer-safe container for up to 2 months. Reheat them for a few minutes in a low oven to bring back that fresh-baked crunch.
The Best Ways to Serve Them
These cookies are wonderful on their own, but they are also easy to dress up a little. Serve them with hot coffee for a cozy afternoon break, or pair them with cold milk if you want that classic cookie moment. They are also lovely beside vanilla yogurt and fresh fruit for a sweet snack plate that feels a little more special.
For gatherings, stack them on a simple platter with other homemade bakes and let the golden texture do the talking. They bring a rustic charm that always looks inviting.
Clever Ways to Use Leftovers
If you happen to have extras, there are plenty of fun ways to give them a second life. Crumble them over vanilla ice cream for an instant crunchy topping with lots of toasty flavor. You can also crush them and layer the crumbs into yogurt parfaits for a sweet breakfast-style treat.
Another delicious option is to turn them into a cookie crust for mini dessert jars. The oats and nuts make the crumbs extra flavorful, which gives simple desserts a homemade edge.
A Few More Little Details That Make a Big Difference
The best flavor comes from using fresh nuts, especially since nuts can lose their richness if they have been sitting too long. It also helps to measure the flour carefully by spooning it into the cup and leveling it off, rather than packing it down.
If you like a slightly deeper flavor, you can let the dough rest for 20 minutes before baking. That short pause gives the oats a chance to hydrate and brings everything together beautifully.
How to Make Them Look Bakery-Worthy
Presentation is easy here because the cookies already have so much natural charm. For a prettier finish, press a few extra nut pieces onto the tops of the dough balls before baking. That gives the baked cookies a more polished look and hints at all the texture inside.
You can also stack them in small groups on a plate or cooling rack for a warm, homemade feel. Their golden edges and visible oat flakes do most of the visual work for you, and they look especially lovely in soft natural light.
Tasty Variations to Mix Things Up
If you want to play around a little, this dough is very open to small changes that still keep the same cozy spirit.
- Maple Cinnamon Version: Replace the vanilla with 1 teaspoon maple extract and add an extra pinch of cinnamon for a sweeter, warmer finish.
- Almond Oat Cookies: Swap the walnuts for chopped almonds and use 1/4 teaspoon almond extract for a slightly more fragrant nut profile.
- Sunflower Seed Twist: Replace one of the nuts with roasted unsalted sunflower seeds for a different crunch and a nice earthy flavor.
- Coconut Crunch Style: Add 1/4 cup unsweetened shredded coconut and reduce the pecans slightly for a toastier, more textured cookie.
- Spiced Autumn Batch: Add a pinch of nutmeg and a pinch of ginger for a deeper, cozy spice blend.
FAQ’s
Q1: Can I make these cookies without pecans?
Yes, absolutely. You can use all walnuts or replace the pecans with another nut you enjoy, such as almonds or hazelnuts.
A1:
The texture will still be crunchy and satisfying. Pecans add buttery richness, but the cookies remain delicious with other nuts.
Q2: Can I use quick oats instead of rolled oats?
You can, but the texture will change.
A2:
Quick oats make the cookies a bit softer and less rustic. Rolled oats are the better choice for that hearty crunch.
Q3: Why did my cookies spread too much?
This usually comes down to butter that was too soft or a warm kitchen.
A3:
Try chilling the dough for 15 minutes before baking. That helps the cookies hold their shape better.
Q4: How do I make them even crunchier?
A slightly longer bake is the key.
A4:
Bake them until the edges are a richer golden brown, then cool them fully on a wire rack. That is when the crisp texture really develops.
Q5: Can I make the dough ahead of time?
Yes, and it works very well.
A5:
You can refrigerate the dough for up to 24 hours before baking. Just keep it covered so it does not dry out.
Q6: Can I freeze the dough?
Yes, this dough freezes nicely.
A6:
Scoop it into portions first, freeze on a tray, then transfer to a container. Bake from frozen with an extra 1 to 2 minutes.
Q7: Do I need parchment paper?
It helps a lot, but it is not strictly required.
A7:
Parchment encourages even browning and makes cleanup easier. A lightly greased baking sheet can work too.
Q8: What kind of nuts work best here?
Walnuts and pecans are a great combination because they bring both earthy and buttery notes.
A8:
Still, you can use almonds, hazelnuts, or cashews based on your taste and what you have on hand.
Q9: Can I double the batch?
Yes, very easily.
A9:
Just double all the ingredients and bake in batches. It is a great option for sharing or storing extras.
Q10: How should I store them to keep them crisp?
An airtight container at room temperature is best.
A10:
Make sure the cookies are fully cooled first. Any trapped warmth can soften them faster.
Conclusion
These crunchy oat and nut cookies are the kind of bake that brings simple ingredients to life in the most satisfying way. They are crisp, golden, nutty, and full of that cozy homemade flavor that makes a kitchen feel instantly more welcoming. Whether you are baking them for a weekend treat, a snack jar, or just because the mood strikes, this is one of those dependable favorites that always feels worth it. Trust me, once you hear that first little crunch, you’ll know exactly why this batch belongs in your regular rotation.
Print
Crunchy Oat & Nut Cookies
- Prep Time: 15 minutes
- Cook Time: 14 minutes
- Total Time: 29 minutes
- Yield: 18 cookies
- Category: Dessert
- Method: Baking
- Cuisine: American
- Diet: Vegetarian
Description
These crunchy oat and nut cookies are golden, crisp, and packed with hearty rolled oats, walnuts, and pecans. They bake up with buttery edges, a toasty aroma, and a satisfying crunch that makes them perfect for snacking, sharing, or pairing with coffee or milk.
Ingredients
- 1 1/2 cups old-fashioned rolled oats
- 1 cup all-purpose flour
- 1/2 teaspoon baking soda
- 1/2 teaspoon fine salt
- 1/2 teaspoon ground cinnamon
- 1/2 cup unsalted butter, softened
- 3/4 cup light brown sugar
- 1/4 cup granulated sugar
- 1 large egg
- 1 teaspoon vanilla extract
- 1/2 cup chopped walnuts
- 1/2 cup chopped pecans
Instructions
- Preheat the oven to 350°F (175°C) and line a baking sheet with parchment paper.
- In a medium bowl, whisk together the rolled oats, flour, baking soda, salt, and cinnamon.
- In a large bowl, beat the softened butter, brown sugar, and granulated sugar until light and creamy.
- Add the egg and vanilla extract, then mix until smooth.
- Stir the dry ingredients into the wet ingredients just until combined.
- Fold in the chopped walnuts and chopped pecans.
- Scoop tablespoon-sized portions of dough onto the prepared baking sheet, spacing them about 2 inches apart.
- Gently flatten each portion slightly.
- Bake for 12 to 14 minutes, until the edges are golden brown and the centers are set.
- Let the cookies rest on the baking sheet for 5 minutes, then transfer them to a wire rack to cool completely.
Notes
- For deeper flavor, lightly toast the nuts before adding them to the dough.
- Chill the dough for 15 minutes if your kitchen is warm to help control spreading.
- Cool the cookies completely before storing to keep them crisp.
- Store in an airtight container at room temperature for up to 5 days.
Nutrition
- Serving Size: 1 cookie
- Calories: 145
- Sugar: 9g
- Sodium: 70mg
- Fat: 8g
- Saturated Fat: 3g
- Unsaturated Fat: 4.5g
- Trans Fat: 0g
- Carbohydrates: 17g
- Fiber: 1.5g
- Protein: 2.5g
- Cholesterol: 18mg