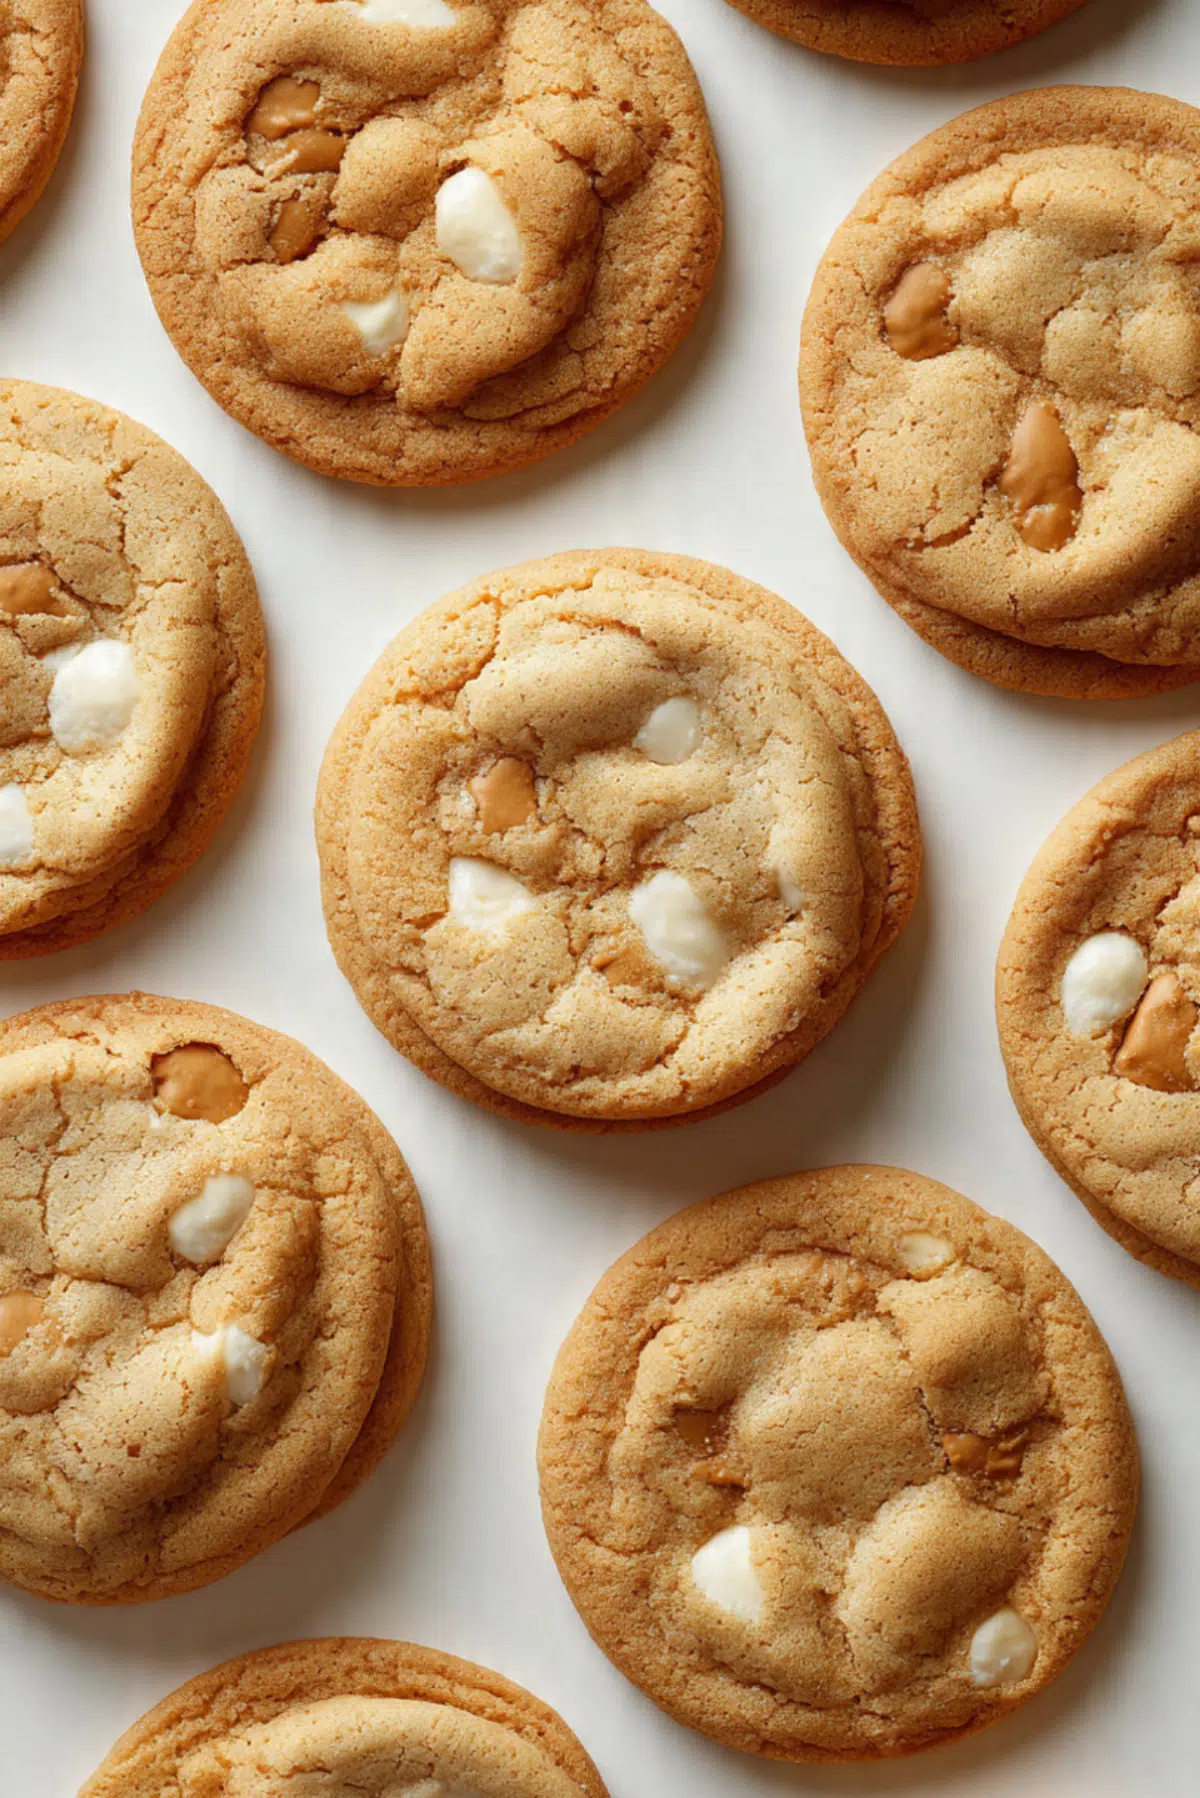
Biscoff Stuffed White Chocolate Cookies
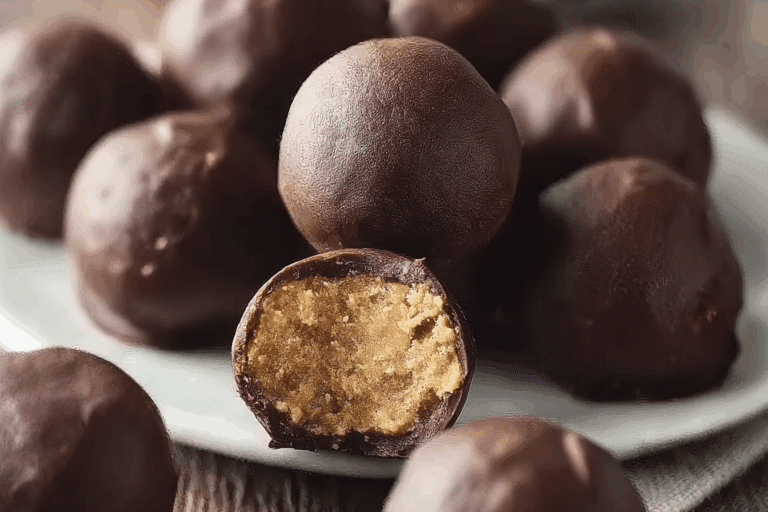
There is something almost unfairly good about breaking open a warm cookie and finding a soft, creamy center waiting inside. That is exactly what happens here. These cookies bake up with lightly golden edges, tender middles, pools of sweet white chocolate, and that dreamy Biscoff surprise tucked right in the center. Trust me, you’re going to love this. The first bite is buttery, rich, and full of caramelized spice, and let me tell you, it’s worth every bite.
Why These Cookies Always Disappear Fast
Some desserts are nice to have around, and some make people hover near the kitchen. These belong firmly in the second category. They feel cozy and bakery-style, but they are also playful enough to make an ordinary afternoon feel a little special.
The contrast is what makes them unforgettable. The outside has that soft, lightly chewy cookie texture, while the middle hides a smooth Biscoff filling that stays luscious after baking. Add creamy white chocolate into the mix, and suddenly this one’s a total game-changer.
The Sweet Story Behind This Cookie Combo
Before we get deeper into the mixing bowl, it helps to know why this flavor pairing works so beautifully. Biscoff spread comes from the flavor of speculoos cookies, those warmly spiced, caramel-like biscuits that have roots in Belgium and are loved far beyond it now.
That signature taste, somewhere between cinnamon biscuit, brown sugar, and toasted caramel, gives these cookies a little personality. Pairing that flavor with white chocolate creates a softer, creamier balance, which makes the final result feel both nostalgic and just a little bit fancy. And now let’s dive into what makes this batch such a reliable favorite.
What Makes This Batch So Worth Baking
This is the kind of dessert you make once, then immediately start thinking about when to bake again.
Versatile: These cookies work for holiday trays, bake sales, weekend treats, or just because you want something warm and homemade. They feel special enough for sharing, but simple enough for a casual baking day.
Budget-Friendly: Most of the ingredients are classic baking staples, and a jar of Biscoff spread stretches surprisingly well across a batch. You get bakery-style cookies without the bakery price.
Quick and Easy: The dough comes together with straightforward steps and no complicated techniques. Once the filling is chilled, the shaping process is easy to get the hang of.
Customizable: You can play with chocolate amounts, cookie size, or even add a little extra cookie butter flavor on top. The base is dependable, which means it is easy to make it your own.
Crowd-Pleasing: Soft cookies with a creamy center tend to win people over very quickly. The flavor is familiar enough to feel comforting, but different enough to get attention.
Make-Ahead Friendly: The dough and filling can both be prepared ahead, which makes baking day much easier. That is especially helpful when you want fresh cookies without rushing.
Great for Leftovers: These stay delicious for days, and they reheat beautifully. A few seconds of warmth brings back that soft texture and gooey center.
Pro Tips for Bakery-Style Results at Home
A few small tricks make a big difference here, especially when you want those thick, soft centers and neat stuffed middles.
- Chill the Biscoff filling: Scoop the spread into small portions and freeze them until firm. This makes stuffing the dough much easier and keeps the center nicely defined.
- Do not overmix the dough: Once the dry ingredients go in, mix just until combined. That helps keep the cookies tender instead of dense.
- Use chopped white chocolate for better pockets: Chips work, but chopped chocolate gives you uneven melty bits that feel more luxurious.
- Slightly underbake: Pull the cookies when the edges are set and the centers still look a little soft. They finish setting on the baking sheet.
- Seal the dough well: Make sure the filling is fully enclosed so it stays inside while baking and does not leak out.
The Kitchen Tools That Make Things Easier
The beauty of this bake is that it does not need anything complicated, but a few tools really help the process feel smooth.
Mixing bowls: You will need one for the dry ingredients and one larger bowl for the butter and sugars.
Hand mixer or stand mixer: Creaming the butter and sugar properly gives the cookies their soft, structured texture.
Baking sheet: A sturdy baking sheet helps the cookies bake evenly without spreading too fast.
Parchment paper: This keeps the bottoms from overbrowning and makes cleanup much easier.
Cookie scoop: Helpful for evenly portioning the dough so all the cookies bake at the same pace.
Small spoon: Perfect for portioning the Biscoff filling before chilling it.
Wire rack: Letting the cookies cool on a rack keeps the bottoms from getting soggy.
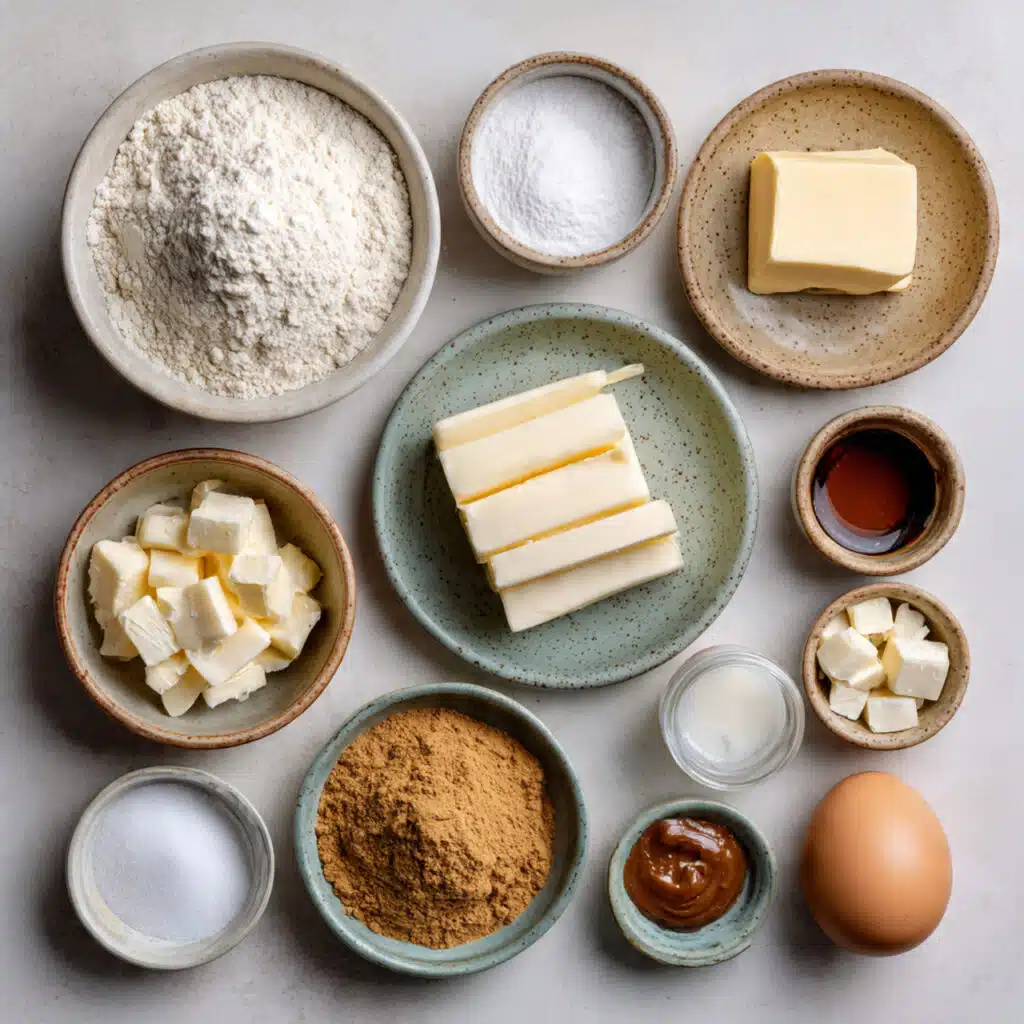
Everything You Need for the Perfect Batch
The ingredient list is simple, but each one plays an important role in building flavor and texture. Together, they create cookies that are soft, rich, and full of cozy sweetness.
- All-purpose flour: 2 1/4 cups, this gives the cookies their structure while still keeping the crumb tender.
- Baking soda: 1 teaspoon, this helps the cookies rise and spread just enough.
- Cornstarch: 1 teaspoon, this keeps the centers extra soft and delicate.
- Salt: 1/2 teaspoon, this balances the sweetness and sharpens the buttery, spiced flavor.
- Unsalted butter: 3/4 cup, softened, this creates richness and helps the dough cream into a smooth base.
- Light brown sugar: 3/4 cup, packed, this brings moisture and a warm caramel note that pairs beautifully with Biscoff.
- Granulated sugar: 1/2 cup, this adds sweetness and helps the edges turn lightly crisp.
- Large egg: 1, room temperature, this binds the dough and gives the cookies structure.
- Vanilla extract: 2 teaspoons, this rounds out the flavor and adds a soft bakery-style aroma.
- White chocolate chunks: 1 cup, these melt into creamy pockets throughout the dough.
- Biscoff spread: 1/2 cup, chilled in small scoops, this becomes the smooth, spiced center hidden inside each cookie.
Easy Swaps That Still Taste Amazing
Once you know the base works, it is easy to adjust a few ingredients depending on what you have on hand.
All-purpose flour: A good measure-for-measure gluten free flour blend can work for a similar texture.
Unsalted butter: Salted butter works too, just reduce the added salt slightly.
Light brown sugar: Dark brown sugar gives a deeper, more molasses-like flavor.
White chocolate chunks: White chocolate chips can be used if that is what you have.
Vanilla extract: Vanilla bean paste adds an even richer aroma.
Biscoff spread: Any smooth cookie butter spread with a similar texture can be used.
The Star Ingredients Doing the Heavy Lifting
A couple of ingredients really define the personality of these cookies, and they deserve a little spotlight before we get baking.
Biscoff spread: This is the heart of the cookie. It brings a silky texture and a warm spiced caramel flavor that melts into the center in the best way.
White chocolate chunks: These add creamy sweetness and mellow out the deeper spice notes, which keeps every bite balanced and soft.
Let’s Bake These Cozy Cookies
Now that everything is ready, this is where the fun starts. The process is simple, and once you shape the first few cookies, the rest comes together naturally.
- Preheat Your Equipment: Preheat your oven to 350°F and line a baking sheet with parchment paper. Scoop 10 to 12 small portions of Biscoff spread onto a plate or tray, then freeze them for about 20 minutes until firm.
- Combine Ingredients: In a medium bowl, whisk together the flour, baking soda, cornstarch, and salt. In a large bowl, beat the softened butter, brown sugar, and granulated sugar until light and creamy. Add the egg and vanilla extract, then mix until smooth. Stir in the dry ingredients just until a dough forms, then fold in the white chocolate chunks.
- Prepare Your Cooking Vessel: Keep the lined baking sheet nearby and clear a little space for shaping. This makes it easier to work quickly once the filling comes out of the freezer.
- Assemble the Dish: Scoop portions of dough, flatten each one slightly, place a frozen scoop of Biscoff spread in the center, then wrap the dough around it and seal well. Roll gently into a ball and place on the baking sheet with space between each cookie.
- Cook to Perfection: Bake for 11 to 13 minutes, or until the edges look set and lightly golden while the centers still look a bit soft. Do not wait for the tops to fully firm up in the oven.
- Finishing Touches: Let the cookies cool on the baking sheet for 10 minutes so they can settle. Add a few extra white chocolate chunks on top while warm if you want that extra bakery-style look.
- Serve and Enjoy: Serve warm for the softest centers and the dreamiest filling, or let them cool completely for a chewy, rich texture that still feels indulgent.
What Makes the Texture and Flavor So Good
What really makes these cookies memorable is the way each layer brings something different. The edges are lightly golden and just a touch firmer, while the centers stay soft and almost plush. Then you hit that smooth Biscoff middle, which feels creamy and rich against the dough.
Flavor-wise, it is all about balance. The butter and brown sugar create a deep, caramel-like base. The Biscoff brings that gentle spiced biscuit flavor, and the white chocolate softens everything with pockets of mellow sweetness. Nothing fights for attention, and that is exactly why the cookies taste so complete.
Little Baking Tricks That Help Every Time
By the time you have mixed the dough, a few extra details can help take the batch from good to unforgettable.
- Chill the dough briefly if it feels too soft: About 15 to 20 minutes in the fridge makes shaping much easier.
- Use a light hand when sealing: Press just enough to close the dough around the center without overworking it.
- Space the cookies properly: Give them room on the tray so they bake evenly and keep their shape.
- Let them rest after baking: This helps the centers finish setting without drying out.
Mistakes That Can Sneak Up on You
Even easy cookies can go sideways with a few small missteps, so it helps to know what to watch for.
- Skipping the frozen filling: Soft filling is harder to wrap and may leak during baking. Chill it well before stuffing.
- Overbaking the cookies: This takes away that soft middle. Pull them when the centers still look slightly underdone.
- Adding too much flour: Packed flour can make the dough dry. Spoon and level it for the best texture.
- Not sealing the dough fully: Any opening can let the filling escape, so check each cookie before baking.
A Quick Look at the Nutrition
These cookies feel indulgent, and they are, but it is still helpful to have a rough idea of what each serving looks like.
Servings: 12 cookies
Calories per serving: 260
Note: These are approximate values.
Timing Your Bake the Easy Way
This recipe fits nicely into an afternoon baking session, especially if you chill the filling while getting the dough ready.
Prep Time: 20 minutes
Cook Time: 12 minutes
Total Time: 32 minutes
How to Prep Ahead and Store Them Well
One of the nicest things about this batch is how well it works around your schedule. You can portion the Biscoff filling and make the dough ahead of time, then keep both chilled until you are ready to bake.
For storage, keep the baked cookies in an airtight container at room temperature for up to 4 days. For longer storage, refrigerate them for up to 1 week, though they are best after a quick warm-up. You can also freeze the unbaked stuffed dough balls for up to 2 months. Bake straight from frozen, just adding an extra minute or two if needed. To reheat baked cookies, warm them in the microwave for about 10 seconds to bring back that soft center.
The Best Ways to Serve These Cookies
These are wonderful on their own, still slightly warm with melty white chocolate and a soft center. That said, they also pair beautifully with a glass of cold milk, a mug of coffee, or a cozy chai latte.
For dessert boards or holiday trays, stack them beside plain butter cookies or darker chocolate treats for contrast. You can even serve them slightly warmed with a scoop of vanilla ice cream if you want something that feels extra special.
Smart and Delicious Ways to Use Leftovers
If you somehow have extras, there are some very good ways to keep things interesting.
Crumble a cookie over vanilla yogurt for a sweet snack with texture. Chop one into chunks and fold it into softened ice cream for a quick homemade cookie swirl. You can also sandwich a little extra cookie butter between two cookies for a seriously rich dessert treat.
A Few More Helpful Notes from the Kitchen
Sometimes the smallest details make baking feel much more relaxed, and this recipe has plenty of room for that kind of ease.
Let the butter soften naturally rather than melting it, since that helps the dough hold its shape better. Use room temperature egg for smoother mixing. And if you want neater looking cookies, gently reshape them with a round cutter right after baking while they are still warm and soft.
Make These Look as Good as They Taste
These cookies already have that cozy golden look, but a few little presentation touches make them even prettier. Press a few white chocolate chunks into the tops before baking or just after they come out of the oven. That creates those lovely bakery-style pockets on the surface.
Serving them on a simple plate while one or two are broken open nearby makes the filling the star. The creamy center and pale chocolate against the golden cookie create a soft, inviting contrast that looks every bit as good as it tastes.
Fun Ways to Change Up the Batch
Once you have baked the original version, there are plenty of ways to play with the idea.
Add cinnamon to the dough: A 1/2 teaspoon gives the whole batch a warmer spiced note.
Make them extra chunky: Increase the white chocolate to 1 1/4 cups for more creamy pockets in every bite.
Use mini cookies: Make smaller dough portions with tiny centers for bite-sized treats that are perfect for sharing.
Sprinkle with flaky salt: A light sprinkle on top adds contrast and makes the sweetness pop.
Turn them into cookie bars: Press half the dough into a lined pan, add the chilled spread in spoonfuls, cover with the rest of the dough, and bake until golden.
FAQ’s
1. Can I make the dough ahead of time?
Yes, absolutely. You can make the dough up to 24 hours ahead and keep it covered in the refrigerator until you are ready to shape and bake.
2. Do I have to freeze the Biscoff filling?
Yes, it really helps. Freezing makes the filling much easier to wrap in dough and helps keep it centered during baking.
3. Can I use white chocolate chips instead of chunks?
Yes. Chunks melt a little more beautifully, but chips still work very well and keep the process simple.
4. Why did my filling leak out?
This usually happens if the dough was not fully sealed or the filling was too soft. Make sure each dough ball is closed tightly before baking.
5. Can I freeze the baked cookies?
Yes, the baked cookies freeze well for up to 2 months. Let them cool completely first, then store them in an airtight container.
6. How do I get thicker cookies?
Chill the dough briefly before shaping and avoid flattening the dough balls too much. That helps the cookies stay thicker in the oven.
7. Can I make these without cornstarch?
Yes, but the cookies may be a little less soft in the center. The cornstarch helps create that tender texture.
8. What is the best way to reheat them?
A quick 10 second warm-up in the microwave usually does the trick. The center softens again and the cookie tastes freshly baked.
9. Can I add nuts?
Yes, chopped toasted pecans or walnuts could be lovely here, though the original version is wonderfully balanced as it is.
10. How should I measure the flour?
Spoon the flour into the measuring cup and level it off. Scooping directly into the flour bag can add too much and make the cookies dense.
Conclusion
These cookies are everything a cozy homemade treat should be, soft, sweet, rich, and just a little bit surprising in the middle. They feel bakery-worthy without being fussy, and once you taste that creamy spiced center with the white chocolate, it is hard not to reach for another. Trust me, you’re going to love this, and this one’s a total game-changer for anyone who likes a cookie with a little extra magic tucked inside.
Print
Biscoff Stuffed White Chocolate Cookies
- Prep Time: 20 minutes
- Cook Time: 12 minutes
- Total Time: 32 minutes
- Yield: 12 cookies
- Category: Dessert
- Method: Baking
- Cuisine: American
- Diet: Vegetarian
Description
Soft and chewy white chocolate cookies with a creamy Biscoff center, baked until lightly golden at the edges and tender in the middle. These bakery-style cookies are rich, cozy, and perfect for anyone who loves a sweet surprise inside.
Ingredients
- 2 1/4 cups all-purpose flour
- 1 teaspoon baking soda
- 1 teaspoon cornstarch
- 1/2 teaspoon salt
- 3/4 cup unsalted butter, softened
- 3/4 cup light brown sugar, packed
- 1/2 cup granulated sugar
- 1 large egg, room temperature
- 2 teaspoons vanilla extract
- 1 cup white chocolate chunks
- 1/2 cup Biscoff spread
Instructions
- Preheat the oven to 350°F and line a baking sheet with parchment paper. Scoop 10 to 12 small portions of Biscoff spread onto a plate or tray and freeze for about 20 minutes until firm.
- In a medium bowl, whisk together the flour, baking soda, cornstarch, and salt.
- In a large mixing bowl, beat the softened butter, brown sugar, and granulated sugar until light and creamy.
- Add the egg and vanilla extract, then mix until smooth.
- Add the dry ingredients and mix just until a dough forms. Fold in the white chocolate chunks.
- Scoop portions of dough and flatten each one slightly. Place a frozen scoop of Biscoff spread in the center, wrap the dough around it, and seal well. Roll gently into a ball.
- Arrange the stuffed dough balls on the prepared baking sheet, leaving space between them.
- Bake for 11 to 13 minutes, until the edges are lightly golden and the centers are still a little soft.
- Let the cookies cool on the baking sheet for 10 minutes, then transfer to a wire rack.
- Serve warm or at room temperature.
Notes
- Freeze the Biscoff filling before shaping for the easiest assembly.
- Do not overbake, the cookies will continue to set as they cool.
- For a bakery-style look, press a few extra white chocolate chunks onto the tops while the cookies are still warm.
- The unbaked stuffed dough balls can be frozen for up to 2 months.
Nutrition
- Serving Size: 1 cookie
- Calories: 260
- Sugar: 20g
- Sodium: 140mg
- Fat: 13g
- Saturated Fat: 8g
- Unsaturated Fat: 4g
- Trans Fat: 0g
- Carbohydrates: 33g
- Fiber: 1g
- Protein: 3g
- Cholesterol: 35mg