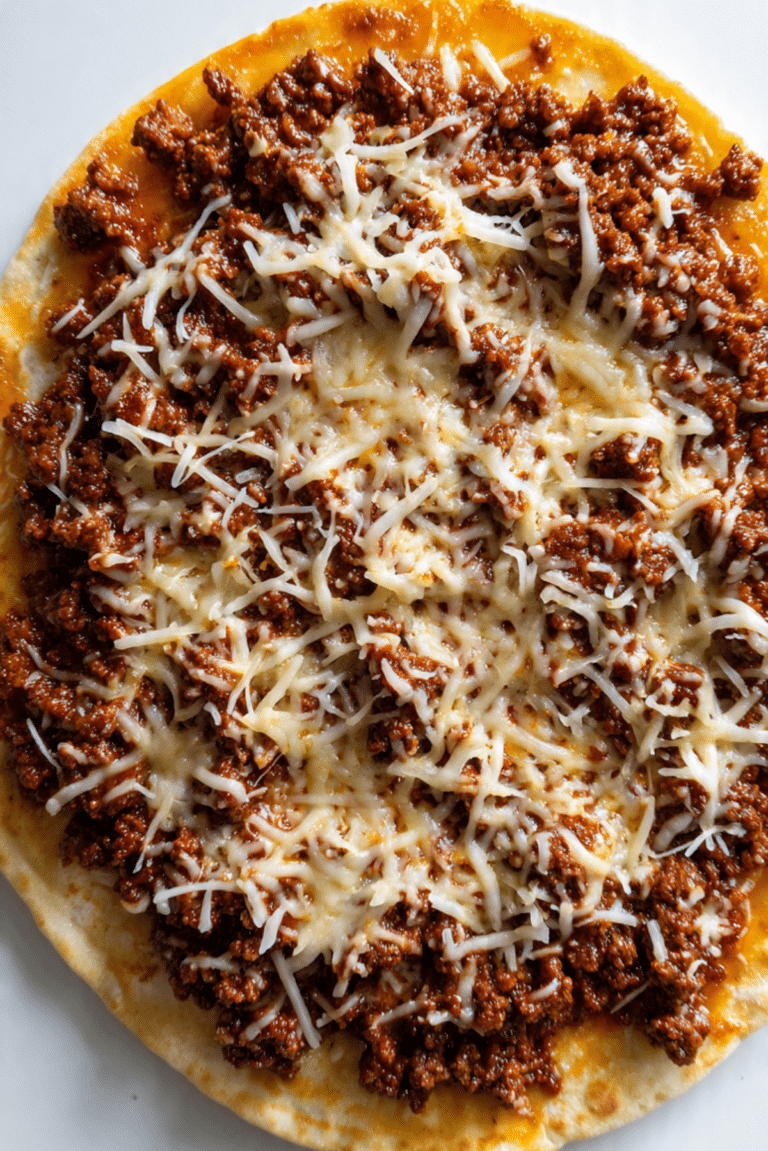
Pita Pizza
There’s something deeply satisfying about a crispy, cheesy pizza that takes less time to make than waiting for delivery. This Pita Pizza brings together all the best parts of pizza night — golden crust, gooey cheese, fresh toppings — without the stress or mess. Quick, flavorful, and endlessly customizable, it’s the ultimate weeknight win that turns pantry staples into pure comfort.
Behind the Recipe
Pita pizza was a discovery born out of urgency and a pizza craving that couldn’t wait. I had some pita bread, leftover marinara, and a block of cheese — and within minutes, magic happened. The edges got beautifully crisp, the cheese melted perfectly, and suddenly this humble setup became a go-to solution for lazy nights, busy afternoons, or impromptu snacks. It’s the kind of recipe you turn to again and again because it just works.
Recipe Origin or Trivia
The concept of using flatbreads as a pizza base isn’t new. It actually predates modern pizza, tracing back to Mediterranean and Middle Eastern cuisines where pita and other flatbreads were topped with herbs, oils, and simple ingredients. The modern pita pizza has gained popularity as a quick fix, especially in homes where time and energy are short, but cravings still run high. It’s a clever twist on tradition, offering the essence of pizza with a fraction of the effort.
Why You’ll Love Pita Pizza
This isn’t just a shortcut — it’s a smart, delicious, and satisfying way to enjoy pizza any time.
Versatile: Choose your own toppings, sauces, and cheeses to match any mood or fridge contents.
Budget-Friendly: No need to order out — all you need are a few basic ingredients.
Quick and Easy: Ready in under 15 minutes from prep to plate.
Customizable: Go classic, vegetarian, spicy, or even dessert-style with the same base.
Crowd-Pleasing: Kids love it, adults crave it, and everyone can build their own.
Make-Ahead Friendly: Assemble them in advance and bake when hunger strikes.
Great for Leftovers: Use up extra veggies, meats, or cheeses before they go bad.
Chef’s Pro Tips for Perfect Results
Even quick recipes have their tricks. Here’s how to make your pita pizza extra craveable:
- Lightly brush the pita with olive oil to prevent sogginess and encourage crispness.
- Preheat your oven and baking sheet to ensure the bottom gets nicely golden.
- Don’t overload with sauce — a thin layer helps keep the crust crisp.
- Use whole milk mozzarella for maximum melt and flavor.
- Add fresh herbs after baking to preserve their flavor and color.
Kitchen Tools You’ll Need
This is a low-equipment recipe, which makes it even better. Here’s what you’ll need:
Baking Sheet or Pizza Stone: Helps the pita crisp up evenly.
Parchment Paper: Prevents sticking and makes cleanup a breeze.
Brush or Spoon: For spreading sauce and oil.
Oven or Toaster Oven: Essential for crisping and melting that cheesy goodness.
Pizza Cutter or Sharp Knife: To slice into perfect wedges.
Ingredients in Pita Pizza
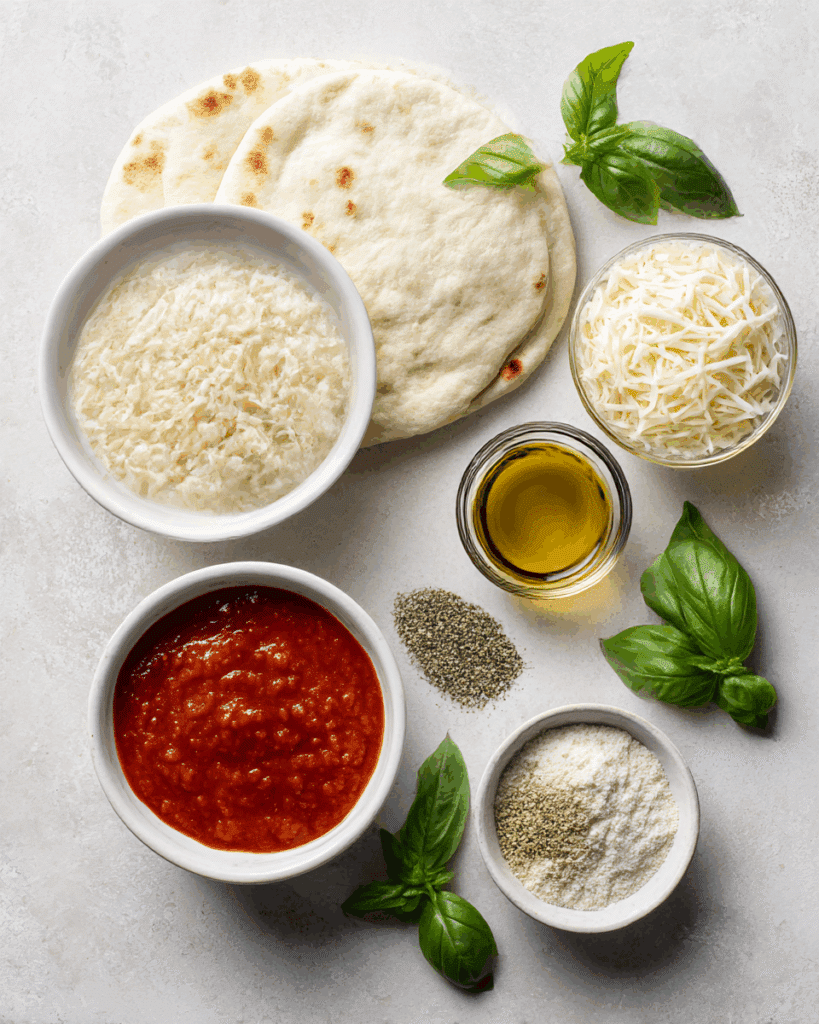
Each ingredient plays its part in building the perfect bite — crispy, melty, and full of flavor.
- Pita Bread: 2 rounds. The base of your pizza, crispy and chewy all at once.
- Shredded Mozzarella Cheese: 1 cup. Melts beautifully and delivers that classic stretch.
- Tomato Sauce: ½ cup. Rich and tangy, it forms the flavor foundation.
- Fresh Basil Leaves: A handful. Brings a burst of color and fresh flavor.
- Olive Oil: 1 tablespoon. Brushed on the pita for golden crispness.
- Garlic Powder: ½ teaspoon. Adds depth and aroma.
- Dried Oregano: ½ teaspoon. Gives that classic pizza shop flavor.
Ingredient Substitutions
Missing something? No problem. Swap and save with these easy subs:
Pita Bread: Use naan, tortillas, or any flatbread.
Mozzarella Cheese: Try provolone, cheddar, or a vegan alternative.
Tomato Sauce: Use pesto, BBQ sauce, or even hummus.
Fresh Basil: Sub with arugula, parsley, or dried Italian herbs.
Olive Oil: Any neutral oil will work in a pinch.
Ingredient Spotlight
Pita Bread: This round flatbread is the perfect quick crust. It crisps up beautifully and holds just the right amount of toppings.
Mozzarella Cheese: The gold standard for pizza. It melts into stretchy, bubbly goodness that holds all the flavor together.
Instructions for Making Pita Pizza
This process is as simple as it gets, but the result is next-level satisfying. Here’s how to do it:
- Preheat Your Equipment:
Preheat your oven to 425°F. Place a baking sheet or pizza stone inside to heat up. - Combine Ingredients:
Lay out your pita rounds and brush each lightly with olive oil. Sprinkle with garlic powder and dried oregano for extra flavor. - Prepare Your Cooking Vessel:
Place the oiled pita rounds on parchment paper for easy transfer. - Assemble the Dish:
Spread a thin layer of tomato sauce over each pita. Top with shredded mozzarella and fresh basil leaves. - Cook to Perfection:
Carefully transfer the pizzas to the preheated baking sheet or stone. Bake for 8–10 minutes, until the edges are crispy and the cheese is bubbling and golden. - Finishing Touches:
Remove from the oven and let rest for a minute. Add more fresh basil if desired. - Serve and Enjoy:
Slice and serve immediately — hot, melty, and oh-so-satisfying.
Texture & Flavor Secrets
The outer edges crisp up into a golden crunch while the center stays slightly chewy. The cheese pulls in long, gooey strings, while the herbs and spices create a pizzeria-worthy flavor that’s balanced, bold, and downright addictive.
Cooking Tips & Tricks
A few extra pointers to level up your pita pizza night:
- Use whole wheat pita for a nutty, fiber-rich twist.
- Add crushed red pepper flakes for heat.
- Broil the pizza for the last minute if you want extra bubbly cheese.
- Add veggies like bell peppers or olives for extra flavor and texture.
What to Avoid
Even the easiest recipes can go sideways — here’s what to watch for:
- Don’t use soggy pita. Look for fresh, slightly thick rounds.
- Avoid using too much sauce — it’ll make the crust soggy.
- Don’t overcrowd with toppings. Less is more for crispiness.
- Skipping preheating? That’s a one-way ticket to soggy town.
Nutrition Facts
Servings: 2
Calories per serving: 320
Note: These are approximate values.
Preparation Time
Prep Time: 5 minutes
Cook Time: 10 minutes
Total Time: 15 minutes
Make-Ahead and Storage Tips
Pita pizzas can be prepped and refrigerated (uncooked) for up to a day. You can also freeze them assembled for up to 2 months. Reheat from frozen at 375°F until hot and bubbly. Leftovers store well in the fridge and reheat best in a toaster oven.
How to Serve Pita Pizza
Serve with a side salad for a light meal or pair with roasted veggies or soup for something heartier. Cut into smaller wedges for appetizers or party snacks. Add a drizzle of hot honey or chili oil for a gourmet touch.
Creative Leftover Transformations
Use those extra pita pizzas in fun new ways:
- Slice into strips for dipping into marinara or ranch.
- Fold over into a calzone-style sandwich.
- Top with a fried egg for a breakfast twist.
Additional Tips
Want to keep things fresh and flavorful?
- Always use fresh herbs after baking.
- Try flavored pitas like garlic or whole grain for variety.
- Keep some pita, sauce, and cheese on hand for last-minute meals.
Make It a Showstopper
Presentation is simple but powerful. Garnish with fresh basil leaves, a drizzle of olive oil, and a sprinkle of red pepper flakes. Serve on a wooden board with parchment underneath for that casual artisan look.
Variations to Try
Get playful with these pita pizza twists:
- Margarita Pita Pizza: Add fresh mozzarella and tomatoes.
- BBQ Chicken Pita Pizza: Swap sauce for BBQ and add shredded chicken.
- Mediterranean Pita Pizza: Use hummus, olives, red onion, and feta.
- Buffalo Pita Pizza: Toss cooked chicken with buffalo sauce and top with ranch drizzle.
- White Pita Pizza: Use olive oil, ricotta, garlic, and spinach.
FAQ’s
Q1: Can I make this gluten-free?
Yes, use gluten-free pita or flatbread options.
Q2: Is this recipe vegetarian?
Yes, as long as you use vegetarian cheese or dairy-free if needed.
Q3: Can I make it in the air fryer?
Absolutely. Cook at 375°F for 6–8 minutes.
Q4: How do I store leftovers?
Refrigerate in an airtight container for up to 3 days.
Q5: Can I use tomato paste instead of sauce?
Yes, just thin it with a little water and season it well.
Q6: What cheese alternatives work well?
Vegan mozzarella, shredded provolone, or feta all work nicely.
Q7: Can kids help make these?
Totally — it’s a great build-your-own meal for little hands.
Q8: What if I don’t have basil?
Try parsley, spinach, or dried Italian herbs.
Q9: Can I make these ahead for a party?
Yes, assemble and chill them, then bake fresh when needed.
Q10: Do I need to flip the pita before topping?
Nope — just brush with oil and you’re good to go.
Conclusion
With just a handful of ingredients and barely 15 minutes of your time, Pita Pizza delivers a crispy, cheesy, flavorful meal that hits all the right notes. Whether you’re feeding the family, entertaining friends, or just treating yourself, this quick recipe turns everyday ingredients into a slice of happiness. Trust me, you’ll come back to this one again and again.
Print
Pita Pizza
Description
A fast and flavorful pizza made with pita bread, melty mozzarella, and fresh basil. Crispy, cheesy, and ready in just 15 minutes — the perfect quick fix for pizza cravings.
Ingredients
- 2 pita breads
- 1 cup shredded mozzarella cheese
- 1/2 cup tomato sauce
- A handful of fresh basil leaves
- 1 tablespoon olive oil
- 1/2 teaspoon garlic powder
- 1/2 teaspoon dried oregano
Instructions
- Preheat your oven to 425°F and place a baking sheet or pizza stone inside.
- Brush pita rounds lightly with olive oil. Sprinkle with garlic powder and oregano.
- Place pitas on parchment paper. Spread a thin layer of tomato sauce over each one.
- Top with shredded mozzarella and a few fresh basil leaves.
- Carefully transfer to the hot baking sheet and bake for 8–10 minutes until golden and bubbly.
- Remove from oven, garnish with more basil, slice, and serve immediately.
Notes
- Use whole wheat or garlic pita for extra flavor.
- Top with red pepper flakes for a spicy kick.
- Swap mozzarella with your favorite melting cheese.
- Broil for 1–2 minutes for extra bubbly cheese.