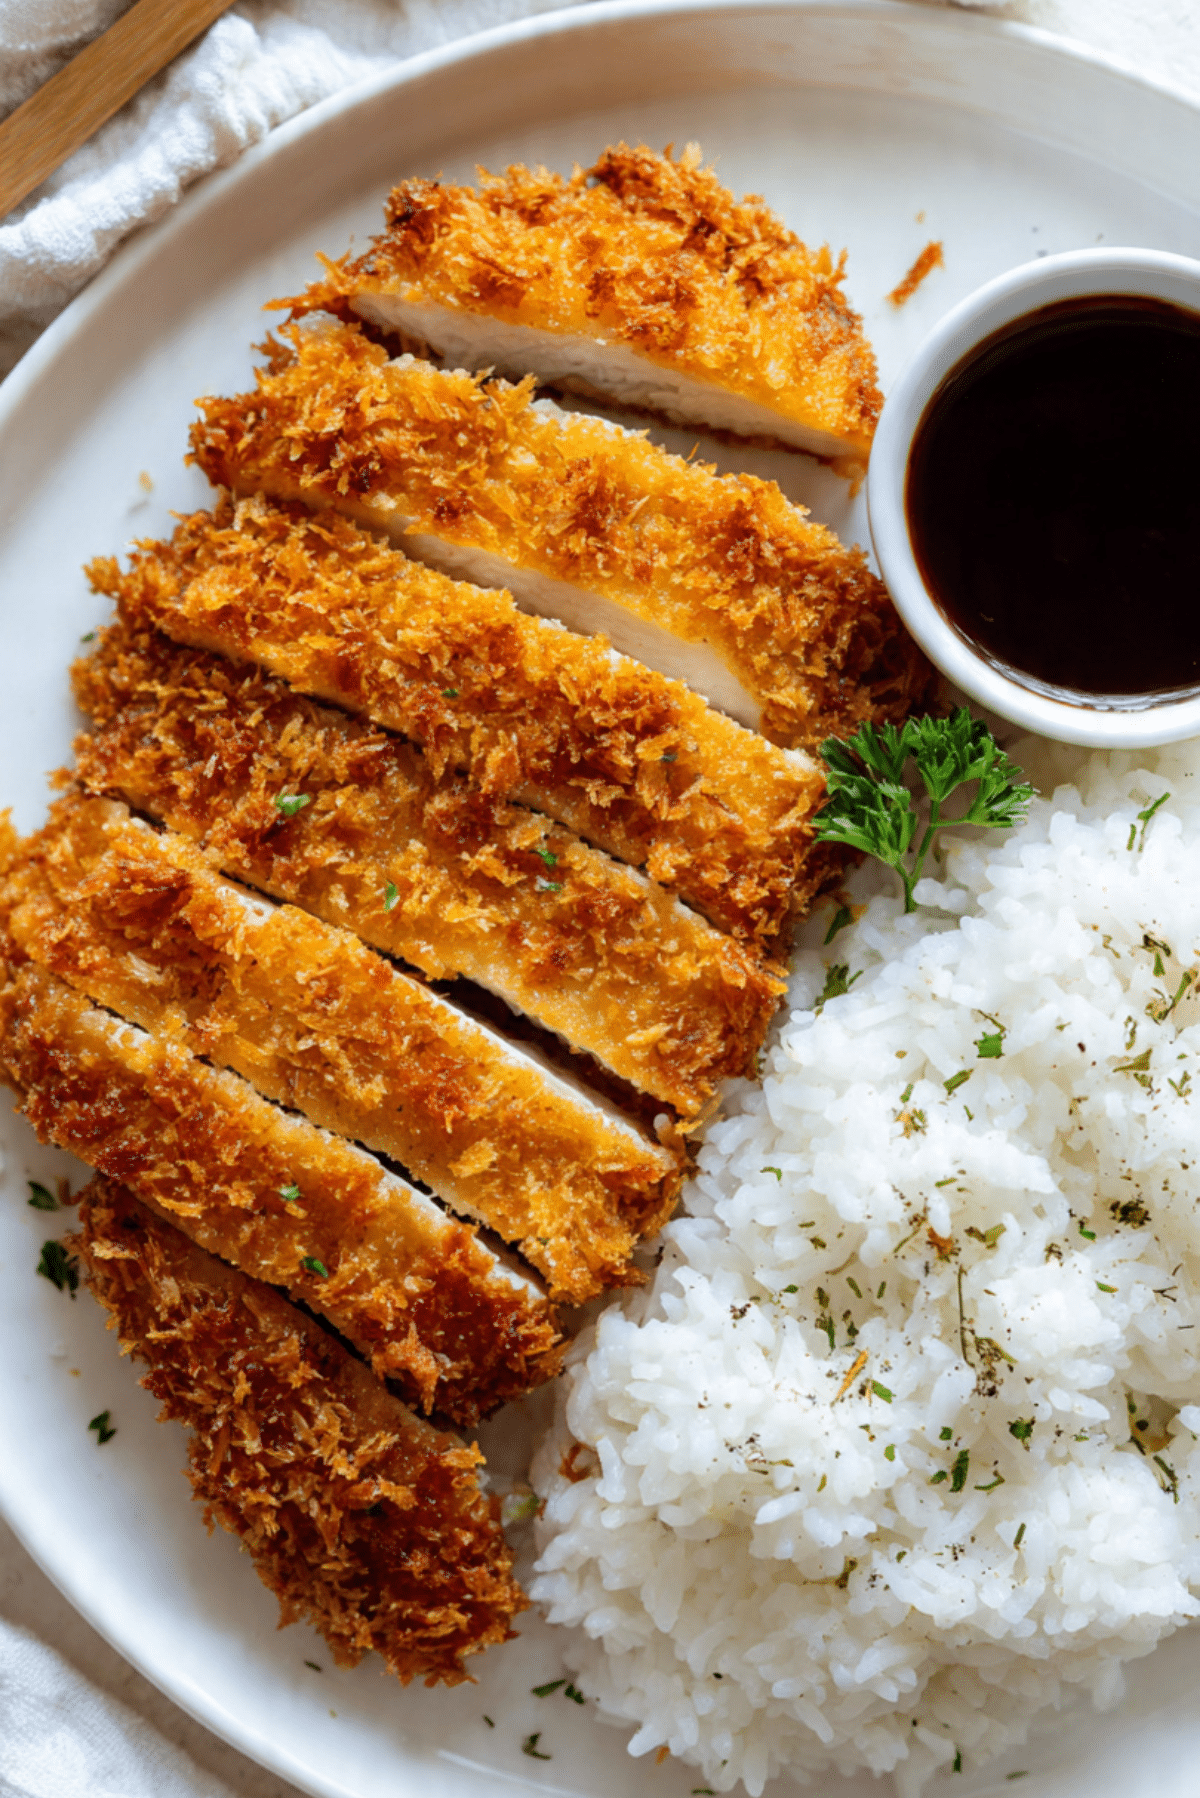
Mom’s 25-Minute Crispy Chicken Katsu
Some recipes instantly feel like home, and this one does exactly that. The moment that chicken hits the hot oil and starts to sizzle, the kitchen fills with a smell that brings back memories of quick dinners, shared plates, and that first crunchy bite everyone fights over. This dish is simple, comforting, and incredibly satisfying, the kind of meal that feels special even though it comes together fast. Trust me, you’re going to love this.
Why This Crispy Favorite Never Gets Old
There is something magical about that contrast between a golden, crunchy coating and juicy chicken inside. It feels indulgent but familiar, crisp without being heavy, and perfect for those nights when you want real comfort without spending hours cooking. This one’s a total game-changer for busy evenings.
A Little Background on Chicken Katsu
Chicken katsu is a Japanese-inspired comfort food that focuses on texture and balance. Breaded cutlets are fried until crisp and served with rice and a simple sauce that hits sweet and savory notes. Over time, it became a home-cooking favorite because it is approachable, quick, and deeply satisfying.
Why This Recipe Always Works
This recipe earns its place in the weekly rotation for many reasons.
Versatile: Great for dinner, leftovers, or even lunch boxes the next day.
Budget-Friendly: Uses simple pantry staples and affordable chicken.
Quick and Easy: Ready in about 25 minutes from start to finish.
Customizable: Easy to adjust seasoning or sauce sweetness.
Crowd-Pleasing: Crunchy, juicy, and familiar flavors everyone enjoys.
Make-Ahead Friendly: Chicken can be breaded ahead of time.
Great for Leftovers: Stays crispy when reheated properly.
Insider Tips Before You Start
A few small tips make all the difference. Patting the chicken dry helps the coating stick better. Keeping the oil at a steady medium heat ensures a golden crust without burning. And letting the chicken rest briefly after frying keeps it juicy inside.
Kitchen Tools You Will Need
Keeping the setup simple helps everything move smoothly.
Skillet: Wide enough for shallow frying.
Mixing bowls: For the breading station.
Tongs: Helpful for turning the chicken safely.
Paper towels: To drain excess oil.
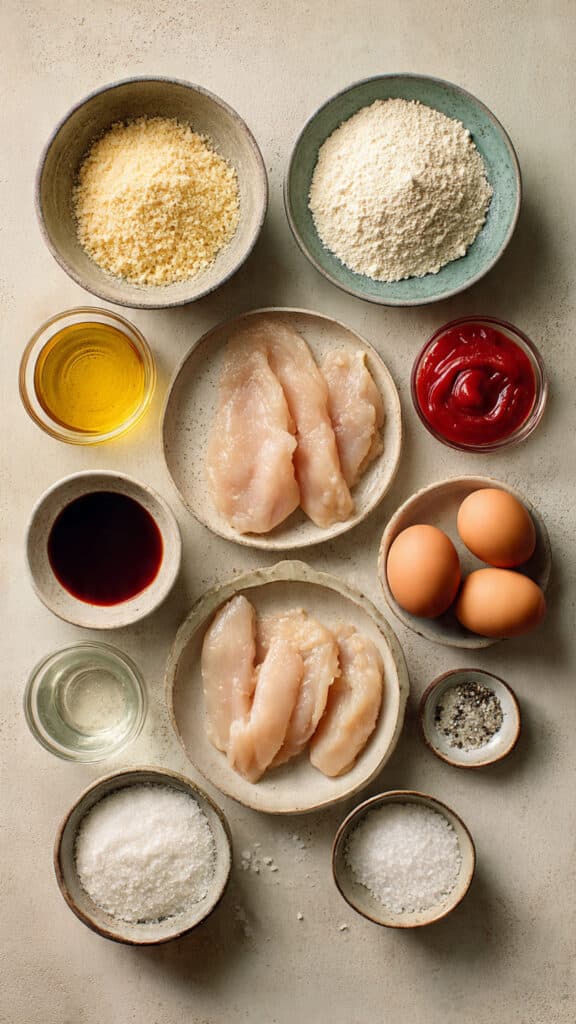
Ingredients You Will Need
Now let’s dive into the ingredients that make this dish shine.
- Chicken cutlets: 600 g, raw, thinly sliced for quick and even cooking.
- All-purpose flour: 80 g, helping the coating adhere.
- Eggs: 2 whole eggs, beaten, creating the binding layer.
- Panko breadcrumbs: 120 g, giving that signature crunch.
- Neutral cooking oil: 250 ml, for frying evenly.
- Uncooked white rice: 300 g, serving as the comforting base.
- Soy sauce: 4 tablespoons, adding savory depth to the sauce.
- Ketchup: 3 tablespoons, bringing sweetness and body.
- Sugar: 1 tablespoon, balancing the sauce.
- Salt: 1 teaspoon, seasoning the chicken.
- Black pepper: 0.5 teaspoon, adding gentle warmth.
Easy Ingredient Substitutions
This recipe is flexible if you need it to be.
Chicken cutlets: Boneless chicken thighs work with slightly longer cooking time.
Panko breadcrumbs: Regular breadcrumbs can work, though panko gives better crunch.
White rice: Short or medium grain rice both work well.
Ingredients That Make the Difference
Panko breadcrumbs: These create an airy, crisp coating that stays crunchy.
Chicken cutlets: Thin pieces cook quickly and stay juicy.
Let’s Start Cooking Together
Now let’s dive into the cooking process step by step.
- Preheat Your Equipment: Start cooking the rice according to package instructions and keep warm.
- Combine Ingredients: Season chicken cutlets evenly with salt and black pepper.
- Prepare Your Cooking Vessel: Set up three bowls with flour, beaten eggs, and panko breadcrumbs.
- Assemble the Dish: Dredge chicken in flour, dip into eggs, then coat thoroughly with panko.
- Cook to Perfection: Heat oil in a skillet and fry chicken until golden and cooked through, about 4 to 5 minutes per side.
- Finishing Touches: Remove chicken and let rest briefly, then slice into strips.
- Serve and Enjoy: Mix soy sauce, ketchup, and sugar, then serve chicken with rice and sauce.
Texture and Flavor Balance
The crust shatters lightly with each bite, giving way to tender, juicy chicken inside. The sauce adds a sweet and savory contrast, while the rice grounds everything with soft, comforting texture. Together, it just works.
Helpful Cooking Tips and Tricks
A few extra tips for perfect results.
- Keep oil at medium heat for even browning.
- Fry in batches to avoid overcrowding.
- Serve immediately for maximum crispiness.
What to Avoid
Small mistakes can affect the final result.
- Avoid oil that is too hot, which can burn the coating.
- Do not skip resting time after frying.
- Avoid pressing the chicken while cooking, which releases juices.
Nutrition Facts
Servings: 4
Calories per serving: 610
Note: These values are approximate.
Preparation Time
Prep Time: 10 minutes
Cook Time: 15 minutes
Total Time: 25 minutes
Make-Ahead and Storage Tips
You can bread the chicken a few hours ahead and keep it refrigerated. Leftovers store well in the fridge for up to two days. Reheat in the oven or air fryer to bring back the crisp texture.
How to Serve
Serve hot with fluffy rice and plenty of dipping sauce. A simple side of shredded cabbage or vegetables pairs beautifully.
Creative Leftover Transformations
Leftover chicken can be sliced into sandwiches, added to rice bowls, or chopped over salads for an easy next-day meal.
Additional Tips
Taste the sauce before serving and adjust sweetness if needed.
Make It a Showstopper
Slice the chicken cleanly and fan it over the rice for a classic presentation that looks as good as it tastes.
Variations to Try
- Add extra sugar to the sauce for a sweeter finish.
- Use whole wheat panko for a heartier crunch.
- Serve with curry-style sauce for a twist.
FAQ’s
1. Can I bake the chicken instead of frying?
Yes, but frying gives the crispiest result.
2. How do I keep the coating crispy?
Serve immediately and avoid covering with foil.
3. Can I make this gluten-free?
Use gluten-free flour and breadcrumbs.
4. Is this dish kid-friendly?
Very much so, flavors are mild and comforting.
5. Can I double the recipe?
Yes, fry in batches for best results.
6. What oil works best?
Any neutral oil with a high smoke point.
7. Can I prepare the sauce ahead?
Yes, it keeps well in the fridge.
8. Does this reheat well?
Yes, especially in an oven or air fryer.
9. Can I use chicken thighs?
Yes, adjust cooking time slightly.
10. Is this good for quick dinners?
Absolutely, that’s what it’s made for.
Conclusion
This recipe proves that simple food can still feel special. It is quick, comforting, and deeply satisfying, the kind of meal that brings everyone to the table fast. Let me tell you, it’s worth every bite, and once you make it, it will become a favorite you reach for again and again.
Print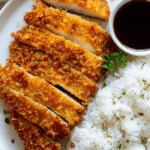
Mom’s 25-Minute Crispy Chicken Katsu
- Prep Time: 10 minutes
- Cook Time: 15 minutes
- Total Time: 25 minutes
- Yield: 4 servings
- Category: Dinner
- Method: Frying
- Cuisine: Japanese-inspired
- Diet: Low Fat
Description
A quick and comforting classic featuring ultra-crispy chicken cutlets, fluffy white rice, and a sweet savory dipping sauce, ready in just 25 minutes.
Ingredients
- 600 g chicken cutlets, raw
- 80 g all-purpose flour
- 2 whole eggs
- 120 g panko breadcrumbs
- 300 g uncooked white rice
- 250 ml neutral cooking oil
- 4 tablespoons soy sauce
- 3 tablespoons ketchup
- 1 tablespoon sugar
- 1 teaspoon salt
- 0.5 teaspoon black pepper
Instructions
- Cook the white rice according to package instructions and keep warm.
- Season the chicken cutlets evenly with salt and black pepper.
- Prepare a breading station with flour in one bowl, beaten eggs in another, and panko breadcrumbs in a third.
- Coat each chicken cutlet in flour, dip into the eggs, then press firmly into the panko breadcrumbs.
- Heat the neutral cooking oil in a skillet over medium heat.
- Fry the breaded chicken cutlets for 4 to 5 minutes per side until golden brown and fully cooked.
- Transfer chicken to a plate lined with paper towels and let rest briefly.
- Slice the chicken into strips.
- Mix soy sauce, ketchup, and sugar in a small bowl to make the dipping sauce.
- Serve the sliced chicken with white rice and dipping sauce.
Notes
- Let the chicken rest briefly after frying to keep it juicy.
- Maintain steady medium heat for even browning.
- Serve immediately for the crispiest texture.
Nutrition
- Serving Size: 1 plate
- Calories: 610
- Sugar: 6 g
- Sodium: 820 mg
- Fat: 24 g
- Saturated Fat: 4 g
- Unsaturated Fat: 18 g
- Trans Fat: 0 g
- Carbohydrates: 62 g
- Fiber: 2 g
- Protein: 38 g
- Cholesterol: 165 mg