Homemade Chocolate Croissant
Few things in life are as satisfying as tearing into a warm, golden chocolate croissant, the flaky layers giving way to silky melted chocolate. The aroma fills your kitchen with buttery sweetness, and that first bite—crispy, rich, and tender—feels like a little piece of Paris. Making them at home might sound like a challenge, but with this recipe, you’ll find it’s a joyful process that rewards you with bakery-worthy perfection.
Behind the Recipe
The inspiration for these croissants came from a trip to a cozy French café, where I first experienced the magic of pain au chocolat straight from the oven. I wanted to recreate that same moment of buttery bliss at home. After a few tries (and a few messy counters), I discovered that homemade croissants don’t need to be intimidating. It’s all about patience, good ingredients, and a bit of love folded into every layer.
Recipe Origin or Trivia
Croissants trace their origins back to Austria, where the kipferl was the ancestor of the modern version. When the French embraced it, they transformed it into the light, laminated pastry we know today. The chocolate croissant, or pain au chocolat, came later, featuring two rich sticks of dark chocolate wrapped in buttery dough. It’s a beloved breakfast pastry across Europe, often served warm with coffee. And now, it’s ready to shine in your kitchen.
Why You’ll Love Homemade Chocolate Croissant
This recipe brings the magic of a Parisian bakery to your own home.
Versatile: Perfect for breakfast, brunch, or dessert.
Budget-Friendly: Uses simple pantry ingredients for a luxurious result.
Quick and Easy: Store-bought puff pastry saves time without sacrificing flavor.
Customizable: Swap dark chocolate for milk or white chocolate if you like.
Crowd-Pleasing: Golden, flaky, and irresistible to anyone who walks by.
Make-Ahead Friendly: Prepare the night before and bake fresh in the morning.
Great for Leftovers: Reheat for that just-baked crispness any time.
Chef’s Pro Tips for Perfect Results
To make your croissants bakery-perfect, keep these little secrets in mind:
- Keep everything cold: Cold dough and butter ensure flaky layers.
- Use high-quality chocolate: The flavor truly makes a difference.
- Seal edges well: Prevents chocolate from leaking during baking.
- Don’t rush proofing: Letting the pastry rest helps it puff beautifully.
- Brush with egg wash twice: Once before baking for shine, once halfway for deep color.
Kitchen Tools You’ll Need
You don’t need a professional setup, just these essentials:
Rolling Pin: To flatten and shape the dough evenly.
Baking Sheet: For holding your croissants while baking.
Parchment Paper: Keeps them from sticking and helps even browning.
Pastry Brush: For applying that glossy egg wash.
Sharp Knife or Pizza Cutter: To cut clean, even pastry strips.
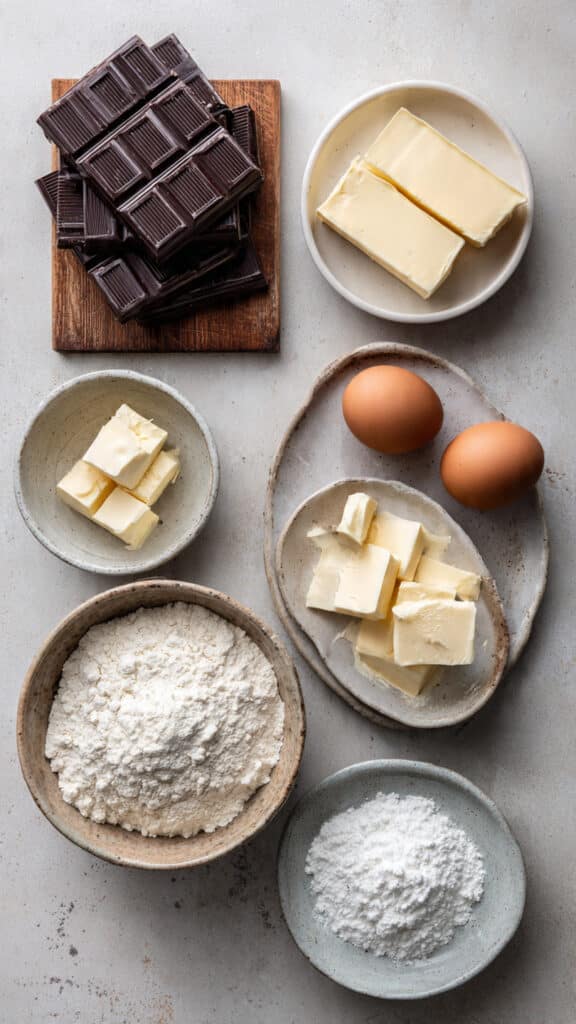
Ingredients in Homemade Chocolate Croissant
Each ingredient plays a delicious role in achieving that perfect flaky, chocolatey bite.
- Puff Pastry Sheets: 2 sheets (thawed if frozen) — The buttery base that gives your croissants their delicate, crispy texture.
- Dark Chocolate Bars: 4 ounces, cut into sticks or pieces — Melts perfectly into a smooth, rich filling.
- Unsalted Butter: 2 tablespoons, melted — Adds extra flavor and helps golden the pastry.
- Egg: 1 large (beaten) — Creates a shiny, bakery-style finish.
- Flour: for dusting — Keeps the dough from sticking while rolling.
Ingredient Substitutions
Need a few swaps? Here’s how to keep it easy:
Puff Pastry: Homemade laminated dough for an extra challenge.
Dark Chocolate: Use semi-sweet, milk, or even hazelnut chocolate.
Butter: Substitute with margarine or plant-based butter for dairy-free.
Egg: Brush with milk or cream instead for a lighter glaze.
Ingredient Spotlight
Puff Pastry: This miracle dough is made by folding butter into layers of dough, creating hundreds of delicate, airy layers that crisp beautifully when baked.
Dark Chocolate: The heart of the recipe, its rich, bittersweet flavor balances the buttery pastry perfectly.
Instructions for Making Homemade Chocolate Croissant
Here’s your easy path to golden perfection.
- Preheat Your Equipment:
Set your oven to 400°F (200°C) and line a baking sheet with parchment paper. - Combine Ingredients:
Lightly dust your counter with flour. Roll out puff pastry sheets slightly to smooth them. - Prepare Your Cooking Vessel:
Cut the pastry into rectangles (about 4×6 inches). Place a piece of chocolate near one short edge. - Assemble the Dish:
Roll the dough over the chocolate, tuck it in, then roll again until sealed. Place seam-side down on the baking sheet. - Cook to Perfection:
Brush each croissant with beaten egg. Bake for 15–20 minutes, until puffed and deep golden brown. - Finishing Touches:
Optional: brush with melted butter for extra shine or dust lightly with powdered sugar once cooled. - Serve and Enjoy:
Enjoy warm while the chocolate is still molten inside—trust me, it’s pure bliss.
Texture & Flavor Secrets
A perfect croissant is all about contrast. The outside should be crisp, flaky, and buttery, while the inside stays soft with gooey melted chocolate. The edges crunch delicately under your teeth, and the aroma of baked butter fills the air. That little bittersweet hit of chocolate at the center? Absolute perfection.
Cooking Tips & Tricks
Here are a few final touches that elevate your pastries:
- Don’t skip the egg wash: It gives the croissants that bakery sheen.
- Let them cool slightly: So the chocolate thickens just enough for that perfect texture.
- Reheat like a pro: A few minutes in the oven—not the microwave—keeps them crisp.
What to Avoid
Even simple recipes have a few pitfalls to watch for.
- Overfilling with chocolate: It can leak during baking.
- Warm pastry dough: Makes the layers stick together and flatten.
- Underbaking: Leaves the center doughy and the edges pale.
Nutrition Facts
Servings: 8
Calories per serving: 320
Note: These are approximate values.
Preparation Time
Prep Time: 15 minutes
Cook Time: 20 minutes
Total Time: 35 minutes
Make-Ahead and Storage Tips
You can assemble the croissants and refrigerate them overnight for a fresh morning bake. Once baked, store leftovers in an airtight container for up to two days. Reheat in a 350°F oven for 5 minutes to restore crispness. You can also freeze unbaked croissants and bake directly from frozen—just add 5 extra minutes to the bake time.
How to Serve Homemade Chocolate Croissant
Serve them fresh from the oven with a dusting of powdered sugar and a cup of coffee or hot cocoa. They also pair beautifully with fresh berries, whipped cream, or a drizzle of caramel sauce for dessert.
Creative Leftover Transformations
If you somehow have leftovers, here’s how to make them new again:
- Croissant bread pudding: Layer pieces in a baking dish with custard and bake.
- Ice cream sandwich: Split and fill with vanilla ice cream.
- Chocolate croissant French toast: Dip slices in egg batter and pan-fry for a decadent breakfast.
Additional Tips
- Chill the pastry 10 minutes before baking for a better rise.
- Use parchment paper instead of greasing the pan.
- Rotate the baking sheet halfway through for even browning.
Make It a Showstopper
For a café-style finish, serve your croissants on a marble board with a few dark chocolate chunks and a sprinkle of powdered sugar. Add a small espresso cup on the side—it’s simple elegance that never fails.
Variations to Try
Keep your baking fresh and fun with these twists:
- Almond Chocolate Croissant: Add a layer of almond paste before rolling.
- White Chocolate Raspberry: Replace dark chocolate with white and add raspberry jam.
- Nutella Dream: Use a spoonful of Nutella for a creamy filling.
- Mini Croissants: Make bite-sized versions for parties.
- Double Chocolate: Sprinkle cocoa powder into the dough layers.
FAQ’s
Q1: Can I use store-bought puff pastry?
A1: Yes, it’s the easiest shortcut and still gives you amazing results.
Q2: Can I use milk chocolate instead of dark?
A2: Absolutely—just use good quality chocolate for the best flavor.
Q3: Do I have to chill the dough?
A3: Chilling helps maintain flaky layers, so it’s worth it.
Q4: Can I freeze unbaked croissants?
A4: Yes, and bake them straight from frozen—just extend baking time slightly.
Q5: Why did my chocolate leak?
A5: It’s usually from loose sealing or overfilling—press gently to close seams.
Q6: Can I make them dairy-free?
A6: Use dairy-free puff pastry and plant-based butter.
Q7: What’s the best chocolate to use?
A7: Semi-sweet bars with at least 60% cocoa content melt beautifully.
Q8: How do I get that glossy finish?
A8: Double brush with egg wash—once before baking, once midway through.
Q9: Can I add fillings?
A9: Yes—try a bit of orange zest, nuts, or jam for creativity.
Q10: Can I make savory croissants with this dough?
A10: Definitely! Skip the chocolate and add cheese and ham instead.
Conclusion
Homemade Chocolate Croissants bring together the warmth of your own kitchen and the charm of a Parisian bakery. They’re buttery, crisp, and indulgent without being overly sweet. So next time you crave something special, roll up your sleeves, preheat that oven, and treat yourself to the simple joy of homemade perfection. Trust me, it’s worth every bite.

Homemade Chocolate Croissant
- Prep Time: 15 minutes
- Cook Time: 55 minutes
- Total Time: 1 hour 10 minutes
- Yield: 10 servings
- Category: Bread
- Method: Baking
- Cuisine: American
- Diet: Vegetarian
Description
Moist and flavorful persimmon bread made with ripe persimmons, warm spices, and optional walnuts. Perfect for breakfast, snacks, or dessert, this easy recipe delivers tender slices bursting with autumnal flavor.
Ingredients
- 2 cups ripe persimmons, mashed
- 2 cups all-purpose flour
- 1 cup granulated sugar
- 1/2 cup brown sugar
- 1 teaspoon baking soda
- 1/2 teaspoon salt
- 1 teaspoon ground cinnamon
- 1/2 teaspoon ground nutmeg
- 2 large eggs
- 1/2 cup vegetable oil
- 1 teaspoon vanilla extract
- 1/2 cup chopped walnuts (optional)
Instructions
- Preheat oven to 350°F (175°C). Grease a 9×5 inch loaf pan.
- In a large bowl, whisk together flour, baking soda, salt, cinnamon, and nutmeg.
- In another bowl, combine sugar, brown sugar, eggs, oil, vanilla extract, and mashed persimmons until smooth.
- Fold the dry ingredients into the wet ingredients gently until just combined.
- Fold in chopped walnuts if using.
- Pour the batter into the prepared loaf pan and smooth the top.
- Bake for 50–60 minutes, or until a toothpick inserted in the center comes out clean.
- Cool in the pan for 10 minutes, then transfer to a wire rack to cool completely before slicing.
Notes
- Use fully ripe persimmons for natural sweetness and moisture.
- Do not overmix to keep the bread tender.
- Store in an airtight container for up to 4 days or freeze for up to 2 months.
Nutrition
- Serving Size: 1 slice
- Calories: 220
- Sugar: 20g
- Sodium: 150mg
- Fat: 9g
- Saturated Fat: 1.5g
- Unsaturated Fat: 7g
- Trans Fat: 0g
- Carbohydrates: 34g
- Fiber: 2g
- Protein: 3g
- Cholesterol: 30mg