This Enchirito Recipe Is the Comfort Food You’ve Been Craving
The Enchirito Recipe isn’t just another dish; it’s a slice of my childhood wrapped in a warm tortilla and smothered with cheesy goodness. Welcome to homeasyrecipes.com, where family traditions meet everyday cooking. I’m Anna, the voice and hands behind this little corner of the internet. This site began as a love letter to my grandmother Mary—the woman who taught me that food is more than just nourishment. It’s laughter around the table, quiet conversations after long days, and recipes so good they get requested twice.
Here, I share recipes that work in real kitchens like yours—no hard-to-find ingredients or complicated steps. Just honest, hearty meals that turn ordinary nights into something special. From lightning-fast weeknight dinners to slow-cooked Sunday feasts and desserts worth every calorie, you’ll find a little of everything.
This Enchirito Recipe is one of those comforting classics that bridges generations. Whether you’re feeding a crowd or cooking for one, it’s the kind of dish that promises to bring people back for seconds—just like Grandma Mary did.
Table of Contents
Table of Contents
The Story Behind This Enchirito Recipe
How This Enchirito Recipe Became a Family Legend
Every family has a recipe that brings people together around the table.
For us, it’s this enchirito recipe. It began as a simple idea in my grandmother Mary’s kitchen, inspired by her love for Mexican flavors and her talent for turning leftovers into special meals. The first time she made it, no one said much—not because they didn’t like it, but because they couldn’t stop eating. By the time the last enchirito was taken from the dish, my grandfather was already asking when she’d make it again. And Grandma? She was smiling from ear to ear, saying, “Next week? You mean tomorrow. ”
This enchirito recipe has become a family favorite.
It smells comforting when it’s baking and tastes like a warm hug on your plate. It’s a dish that everyone—kids and adults—loves, which is why it’s been handed down through three generations and still going strong.
Why Grandma Asked for Seconds and Then Thirds
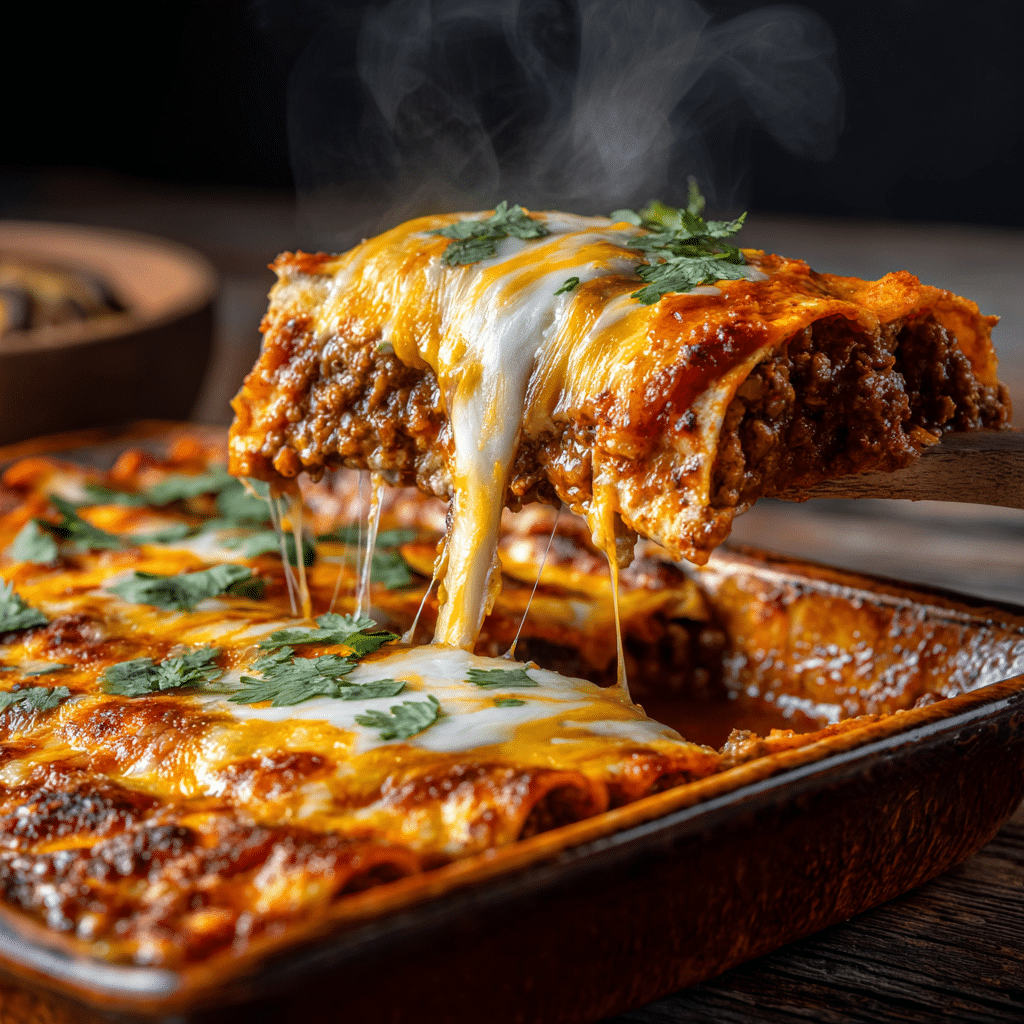
There’s something special about the layers of seasoned beef, creamy refried beans, and gooey cheese wrapped in soft tortillas, all covered in enchilada sauce.
That combination was so good that even my grandmother—someone who usually didn’t ask for seconds—couldn’t resist. She said it reminded her of enchiritos she once had at a diner in New Mexico, but “way better because it’s made with love. ” And maybe that’s the real secret ingredient in this recipe—the care that goes into every step, from cooking the beef to taking it out of the oven just right, so the cheese is bubbling and golden.
The Secret to Authentic Enchiritos Passed Down
So what makes this enchirito recipe so special?
It’s not just about the ingredients. It’s the balance of textures and flavors: the softness of the tortilla, the creaminess of the beans, the savory taste of the taco-seasoned beef, and the rich, melty cheese. This recipe doesn’t use shortcuts or canned ingredients for flavor. Every part has been tested and perfected over time to make it foolproof. When you make this at home, you’re not just making a meal—you’re continuing a tradition of food that’s meant to be shared.
What Makes an Enchirito Special?
Enchirito vs Enchilada: Understanding the Difference
If you’ve ever wondered what sets an enchirito apart from a traditional enchilada, you’re not alone. While both are smothered in savory sauce and covered in melted cheese, the enchirito recipe adds its own unique twist. Instead of corn tortillas, it uses soft flour tortillas that hold up beautifully to hearty fillings. This change makes it heartier and easier to roll, perfect for generously stuffing with seasoned beef and creamy beans.
Unlike enchiladas which often lean lighter and rely on layered textures, an enchirito offers a burrito-like fullness that feels more like a complete meal. It’s comfort food with a Tex-Mex soul—rich, filling, and deeply satisfying.
Print
This Enchirito Recipe Is the Comfort Food You’ve Been Craving
- Prep Time: 20 minutes
- Cook Time: 25 minutes
- Total Time: 45 minutes
- Yield: 6 servings
- Category: Main Course
- Method: Baking
- Cuisine: Tex-Mex
- Diet: Halal
Description
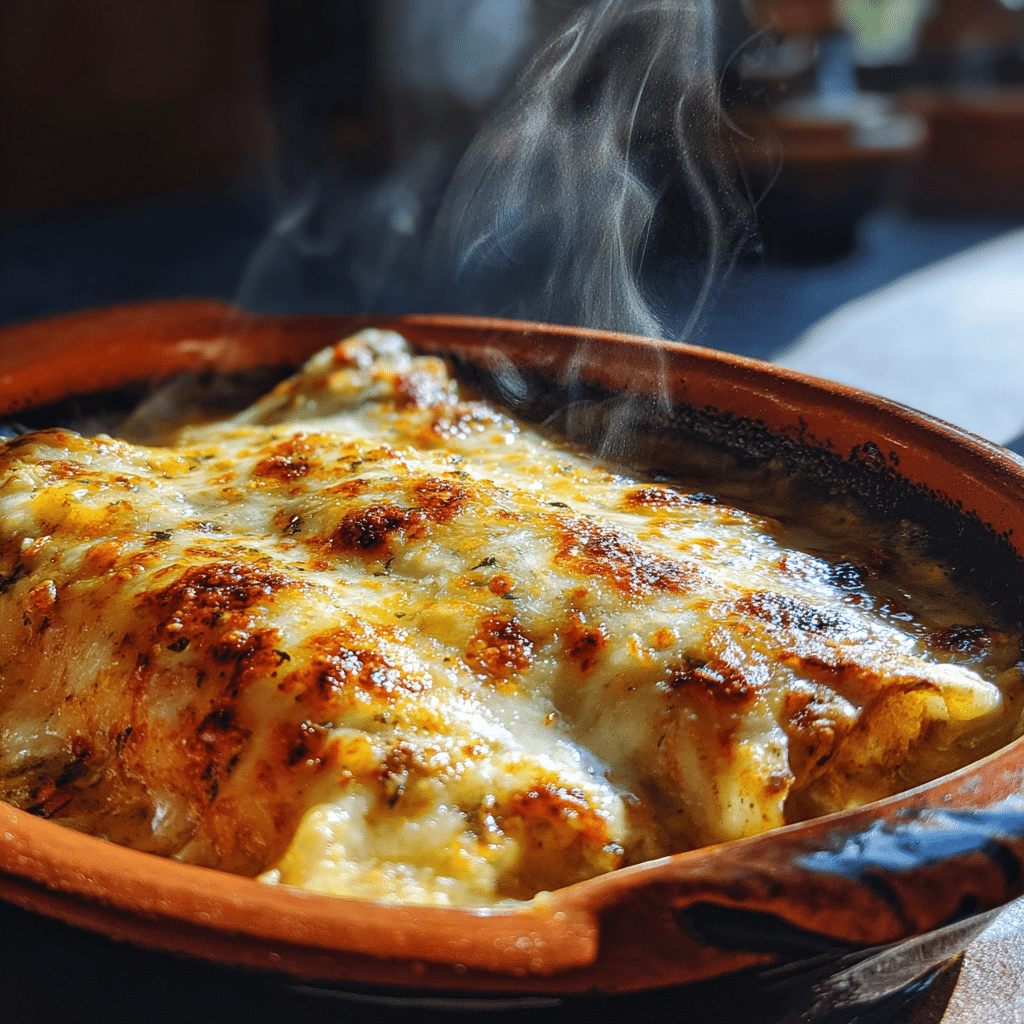
My grandmother’s favorite Enchirito recipe combines seasoned beef, creamy refried beans, and two types of cheese wrapped in soft flour tortillas, smothered with red enchilada sauce, and baked to melty perfection for a comforting Tex-Mex classic.
Ingredients
- 1 lb ground beef
- 1 can (16 oz) refried beans
- 1 packet taco seasoning
- 1/4 cup water
- 6 large flour tortillas
- 1 can (10 oz) red enchilada sauce
- 1 1/2 cups shredded cheddar cheese
- 1/2 cup shredded Monterey Jack cheese
- Optional: chopped onions, black olives, sour cream for topping
Instructions
- Brown ground beef in skillet; drain fat.
- Add taco seasoning and water; simmer for 2-3 minutes.
- Mix in refried beans until well combined.
- Preheat oven to 350°F (175°C). Spread a small amount of enchilada sauce in the bottom of a baking dish.
- Fill each tortilla with meat mixture, roll tightly, and place seam-side down in the dish.
- Pour remaining enchilada sauce over the rolled tortillas and sprinkle with cheddar and Monterey Jack cheeses.
- Bake uncovered for 20-25 minutes until cheese is bubbly and golden.
- Let rest for 5 minutes before serving. Add optional garnishes if desired.
Notes
- Toast tortillas lightly in a skillet before filling to prevent sogginess.
- Use rotisserie chicken or black beans as a variation for the filling.
- To freeze, assemble enchiritos without sauce and cheese, wrap tightly, and freeze for up to 3 months.
- For a spicier version, add diced jalapeños to the filling or use spicy enchilada sauce.
Nutrition
- Serving Size: 1 enchirito
- Calories: 420
- Sugar: 5g
- Sodium: 890mg
- Fat: 22g
- Saturated Fat: 10g
- Unsaturated Fat: 9g
- Trans Fat: 0.5g
- Carbohydrates: 35g
- Fiber: 4g
- Protein: 20g
- Cholesterol: 65mg
Ingredients for the Best Enchirito Recipe
To make this flavorful enchirito recipe that’s packed with nostalgia and comfort, gather the following fresh ingredients:
- 1 pound ground beef – lean or regular, depending on your preference for richness
- 1 can (16 oz) refried beans – smooth and creamy for the perfect filling base
- 1 packet taco seasoning – use your favorite brand or a homemade blend for deeper flavor
- 1/4 cup water – helps the seasoning coat the beef evenly
- 6 large flour tortillas – soft and pliable, ideal for wrapping your hearty filling
- 1 can (10 oz) red enchilada sauce – mild or medium, depending on your heat preference
- 1 ½ cups shredded cheddar cheese – sharp for that rich, gooey topping
- ½ cup shredded Monterey Jack cheese – adds creaminess and a mild buttery flavor
- Optional toppings – chopped onions, sliced black olives, sour cream for a fresh and vibrant finish
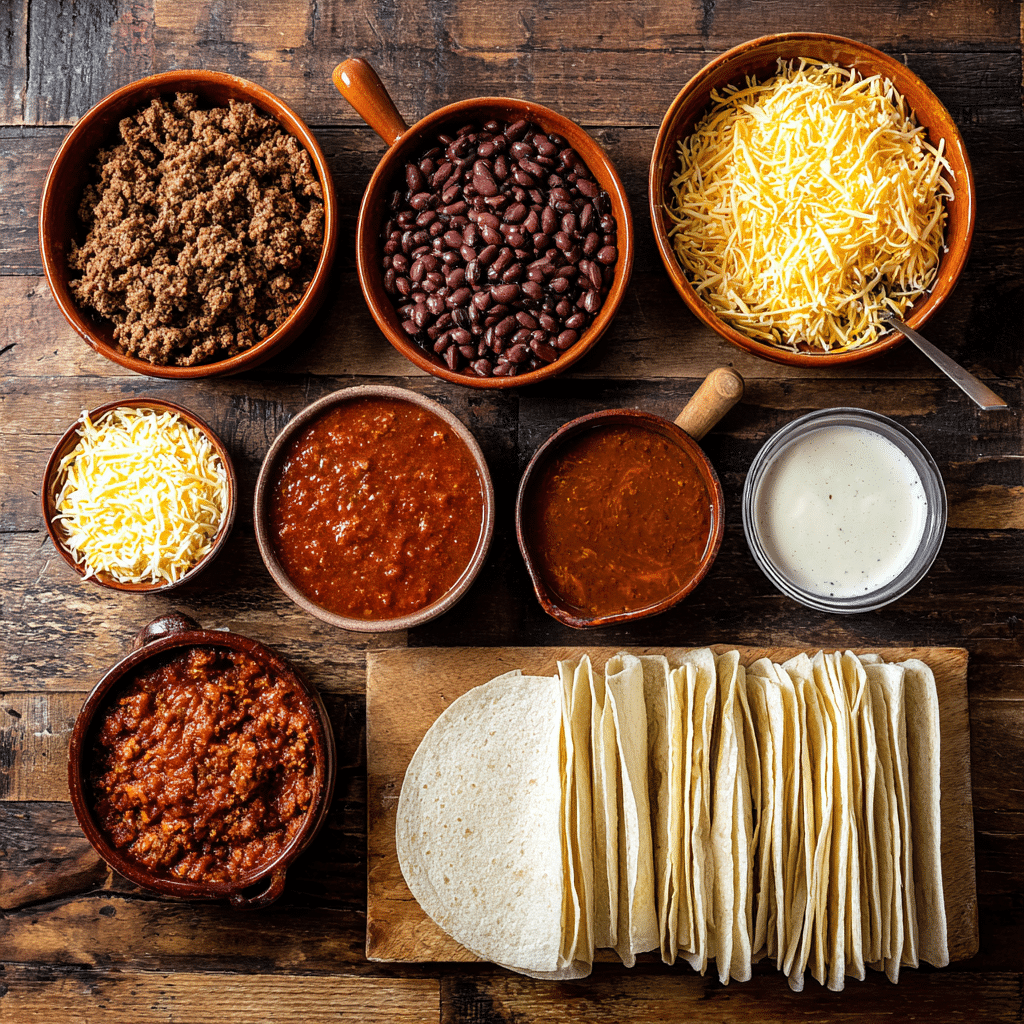
This ingredient list keeps it simple yet delicious, using pantry staples and fresh items that make this enchirito recipe feel like a warm hug in every bite.
Step-by-Step Guide to Crafting the Perfect Enchirito
Browning the Beef and Seasoning It Right
Start by heating a large skillet over medium heat. Add the ground beef and cook it until fully browned, breaking it up into small crumbles with a wooden spoon. Once browned, drain any excess fat to avoid a greasy filling. Sprinkle the taco seasoning over the beef and pour in ¼ cup of water. Stir thoroughly and let the mixture simmer for 2 to 3 minutes until the liquid reduces and the seasoning coats every bit of meat.
Next, stir in the refried beans directly into the skillet with the seasoned beef. Mix well until the beans are fully incorporated and the filling turns creamy and cohesive. Remove from heat and set aside.
Rolling Your Enchiritos Like a Pro
Preheat your oven to 350°F. Lightly grease a 9×13-inch baking dish or spread a thin layer of enchilada sauce across the bottom to prevent sticking.
Take one large flour tortilla and spoon a generous portion of the beef-bean mixture down the center. Roll it up tightly like a burrito and place it seam-side down in the prepared baking dish. Repeat with the remaining tortillas and filling until all are snugly arranged in the dish.
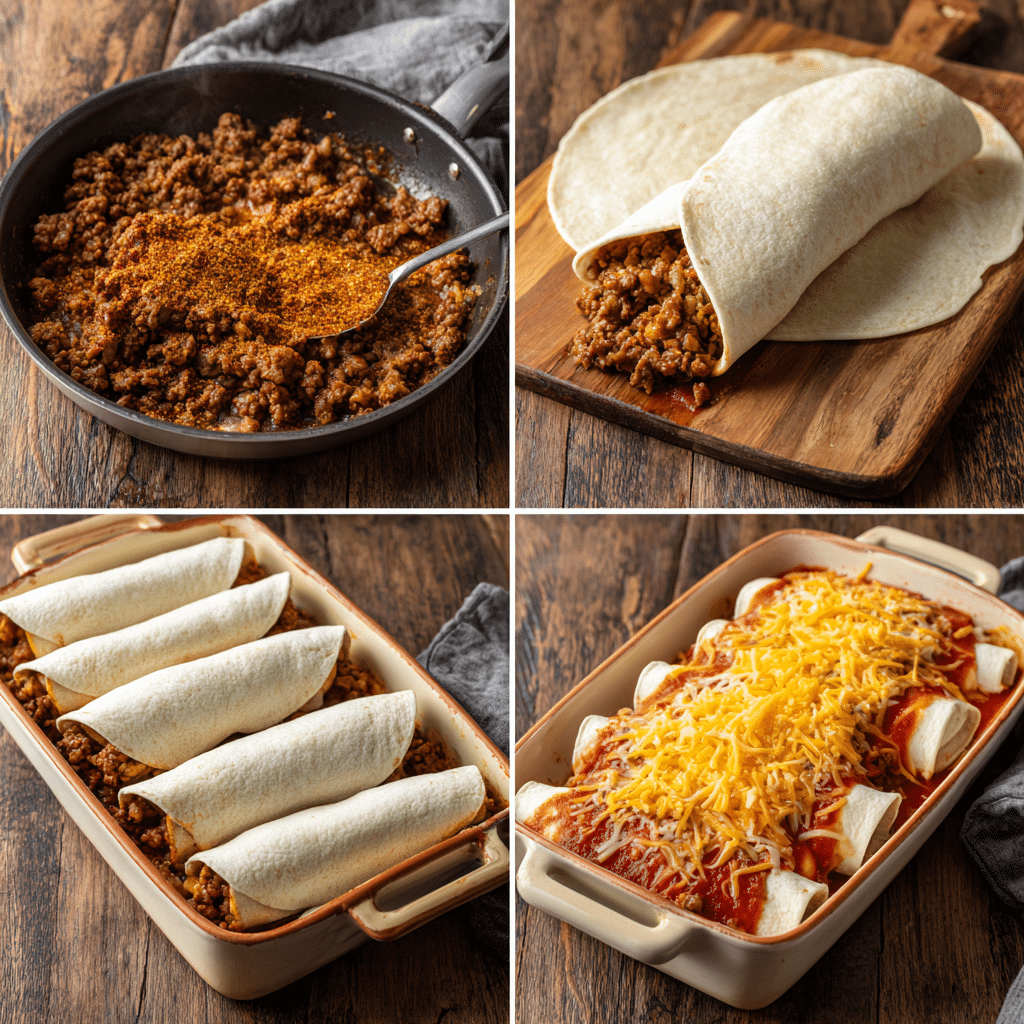
Baking for the Perfect Melt and Flavor Fusion
Pour the rest of the red enchilada sauce evenly over the rolled enchiritos, making sure each one is fully covered. Sprinkle the shredded cheddar and Monterey Jack cheeses over the top, creating a cheesy blanket that will bubble and brown beautifully in the oven.
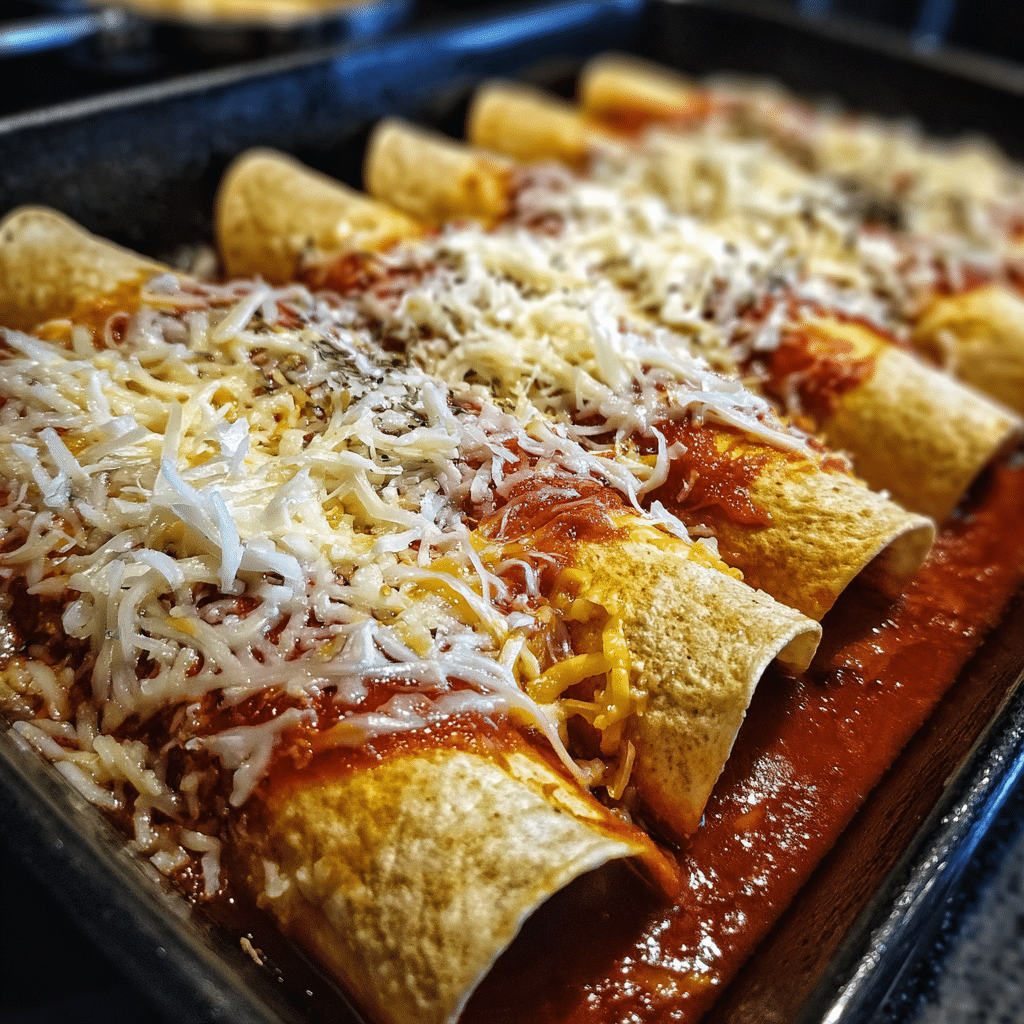
Bake uncovered for 20 to 25 minutes until the cheese is melted and slightly golden, and the sauce is hot and bubbly. Let the enchiritos rest for 5 minutes before serving to allow the flavors to settle.
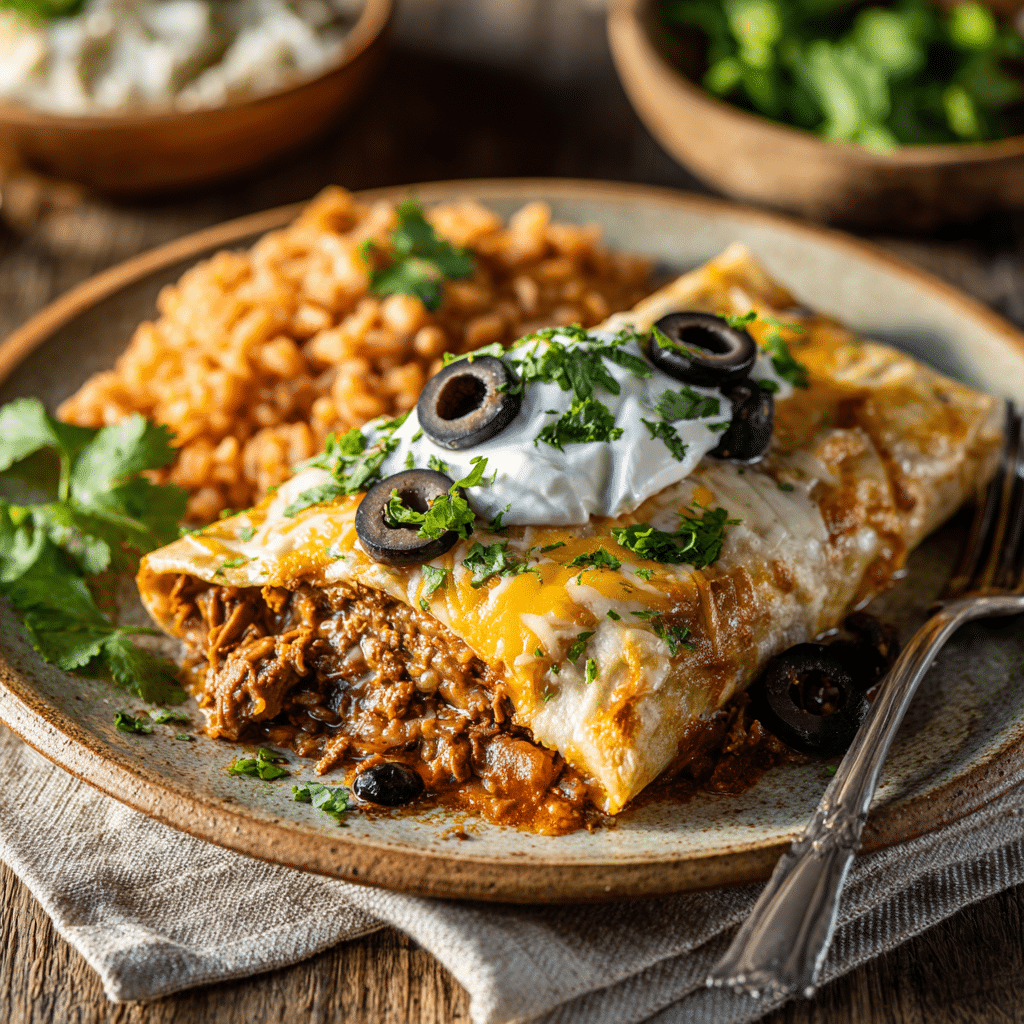
For an extra pop of flavor and texture, top each serving with sour cream, chopped onions, or sliced black olives right before serving.
Make-Ahead Tips and Storage Solutions
Can You Make These Ahead of Time? Absolutely
One of the best things about this enchirito recipe is how well it fits into a busy schedule. You can fully assemble the enchiritos the night before, cover the baking dish tightly with foil, and store it in the refrigerator. When ready to bake, just remove the foil and pop it straight into a preheated oven. This makes it a perfect meal for hectic weeknights or when you’re hosting guests and want to minimize last-minute kitchen time.
Many people also search for tips on meal prepping enchiritos for family gatherings. The secret? Keep the sauce separate until right before baking. This prevents the tortillas from soaking up too much liquid and turning soggy.
How to Keep Your Enchiritos from Getting Soggy
No one likes a soggy tortilla, and thankfully it’s easy to avoid. Here are a few tried-and-true tips:
- Toast the tortillas lightly in a dry skillet for a few seconds on each side before assembling. This creates a slight barrier to moisture.
- Ensure your beef and bean mixture isn’t too watery; simmer off excess liquid for a thicker filling.
- Apply a thin layer of sauce at the bottom of the dish and save the majority for the top.
These simple steps guarantee each enchirito comes out tender yet holds its shape beautifully.
Freezer-Friendly Instructions for Enchirito Lovers
This enchirito recipe isn’t just make-ahead friendly—it’s also freezer-friendly. After rolling the enchiritos, arrange them in a freezer-safe dish or tray and wrap them tightly with plastic wrap and foil. You can freeze them without sauce for up to three months.
When you’re ready to enjoy, place them directly into a baking dish, cover with enchilada sauce and cheese, and bake from frozen. Just add an extra 10 minutes to the bake time to ensure they heat through perfectly.
For many readers searching “Can you freeze enchiritos?” this method has been a game-changer for saving time and reducing food waste.
Common Mistakes When Making Enchiritos and How to Avoid Them
Overstuffing Tortillas: The #1 Pitfall
It’s tempting to pack as much filling as possible into your enchiritos, but this is one of the most common mistakes. Overstuffed tortillas are harder to roll and more likely to tear, causing the delicious filling to spill out during baking. To avoid this, use about ½ cup of the beef and bean mixture per tortilla. This keeps each enchirito neat and makes for even cooking.
Using Corn Tortillas: Can It Be Done?
A lot of home cooks wonder, “Can I use corn tortillas for an enchirito recipe?” While corn tortillas bring a classic flavor to dishes like enchiladas, they don’t hold up as well in enchiritos because of their smaller size and tendency to crack. If you’re set on using corn, make sure to warm them thoroughly and consider doubling them for added strength. Otherwise, stick with soft flour tortillas for a foolproof experience.
Preventing a Dry Enchirito with Sauce Layering
Dry enchiritos are another common problem, especially if not enough sauce is used. Remember to pour a thin layer of enchilada sauce on the bottom of your baking dish before adding the rolled tortillas. Then fully cover the tops with the remaining sauce so every bite stays moist and flavorful.
Many readers who searched “Why is my enchirito dry?” found this simple step completely transformed their results.
Variations to Try on This Classic Enchirito Recipe
Vegetarian Enchirito Version with Black Beans
For those wanting a meatless option, this enchirito recipe easily transforms into a vegetarian favorite. Swap out the ground beef for a mix of black beans, corn, and diced bell peppers sautéed with taco seasoning. The refried beans add a creamy base while the veggie mix keeps it hearty and satisfying. Even meat lovers won’t miss a thing with this flavorful twist.
Chicken Enchirito with Creamy Verde Sauce
Another delicious variation comes from using shredded rotisserie chicken instead of ground beef. Combine the chicken with a few spoonfuls of cream cheese or sour cream for extra richness. Top the rolled tortillas with a tangy green enchilada sauce (salsa verde) and a generous layer of Monterey Jack cheese. This lighter, zestier take is perfect for spring and summer meals.
Many readers searching “Can I make enchiritos with chicken?” will find this variation a perfect alternative.
Spicy Enchirito for Heat Lovers
If you’re a fan of spice, take this enchirito recipe up a notch by adding diced jalapeños or a few dashes of hot sauce to the beef and bean filling. For an even bolder flavor, try using a spicy enchilada sauce and pepper jack cheese on top. This variation brings the heat without overpowering the savory richness of the original recipe.
Pairings and Serving Suggestions
Best Side Dishes to Serve with Your Enchirito
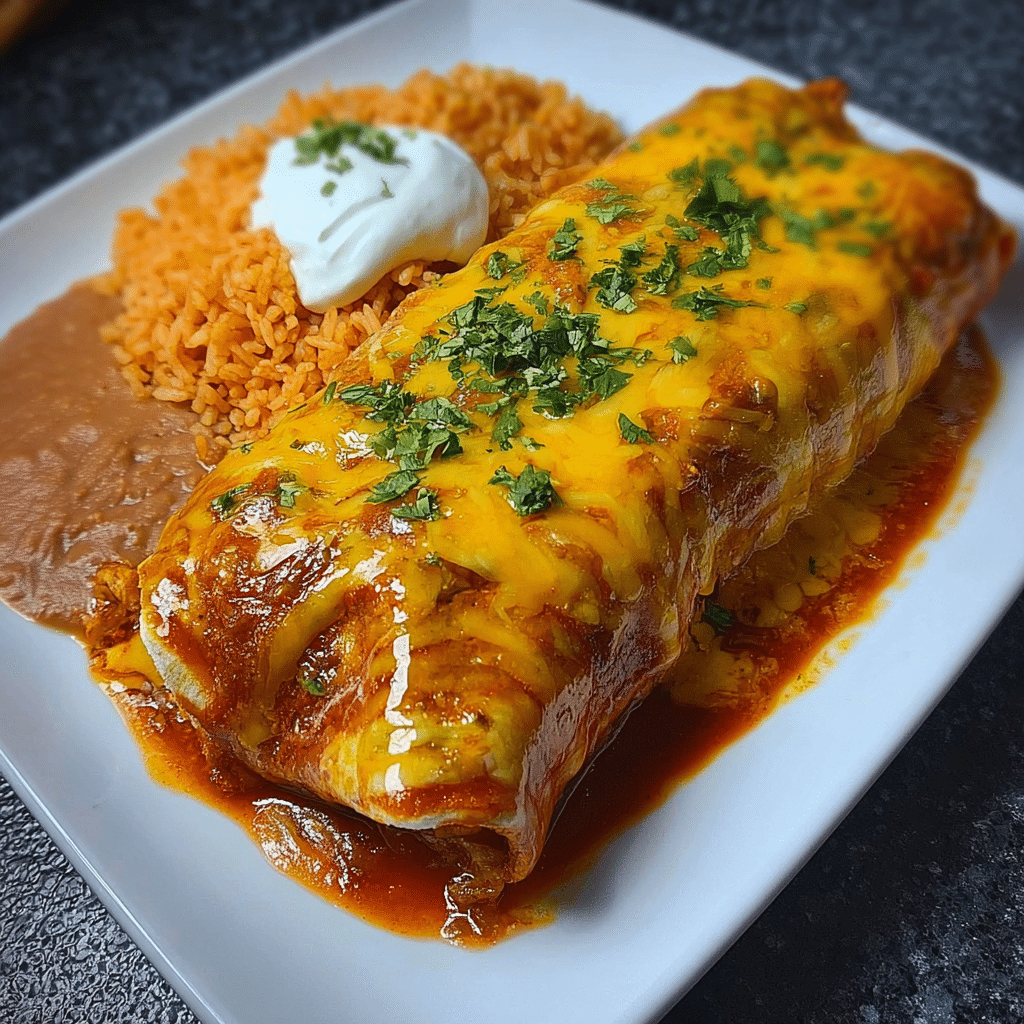
An enchirito recipe as rich and flavorful as this deserves the perfect supporting cast. Classic sides like Mexican rice or cilantro lime rice pair beautifully, soaking up the extra enchilada sauce. For added texture and flavor, try a side of refried beans or charro beans. A crisp green salad with a zesty vinaigrette also balances out the cheesy goodness of the enchiritos.
For those searching “What to serve with enchiritos?” these options provide the perfect variety to round out your meal.
Drinks That Complement the Rich Flavors
Pair your enchirito recipe with refreshing beverages like homemade horchata, a chilled glass of agua fresca, or even a tangy margarita if you’re hosting a festive gathering. For a non-alcoholic option, iced hibiscus tea adds a subtle floral note that cleanses the palate between bites.
Perfect Desserts After a Hearty Enchirito Meal
No meal is complete without dessert. Light options like fruit sorbet or a lime panna cotta make a refreshing finish. But if you’re going full comfort mode, consider serving churros with chocolate sauce or a slice of tres leches cake to keep the Tex-Mex theme alive.
Many readers also search “Best desserts after enchiritos”, and these choices ensure your dinner ends on a sweet high note.
If you loved this Tex-Mex classic, you’ll definitely want to check out our Mashed Potato Pancakes with Meat Filling for another comforting family favorite or discover great ideas like Strawberry Crunch Cheesecake when it’s time to satisfy your sweet tooth.
Is This Recipe Freezer-Friendly?
Absolutely. Assemble your enchiritos and place them in a freezer-safe dish but leave off the sauce and cheese. Wrap tightly with plastic wrap and foil then freeze for up to three months. When ready to bake add the sauce and cheese and place them directly in the oven from frozen adding about 10 extra minutes to the baking time. This makes the enchirito recipe an excellent choice for busy families or make-ahead meals.
Can I Use Corn Tortillas Instead?
You can but flour tortillas are highly recommended for this enchirito recipe. Flour tortillas are larger more flexible and less likely to tear when rolled with a generous filling. If you prefer corn tortillas warm them well and consider doubling up to prevent breakage. Just keep in mind that the texture and flavor will be slightly different.
How Can I Prevent Soggy Enchiritos?
To keep your enchirito recipe from becoming soggy toast the flour tortillas lightly in a dry skillet before assembling. Also make sure your beef and bean mixture isn’t too wet by simmering off excess liquid. Finally add the enchilada sauce just before baking instead of letting it sit overnight in the fridge. These simple steps will give you enchiritos that hold their shape and taste amazing.
Can I Make These Ahead of Time?
Yes absolutely. This enchirito recipe is perfect for making ahead. Assemble the enchiritos fully but hold off on adding the enchilada sauce and cheese. Cover the dish tightly and refrigerate for up to 24 hours. When you’re ready to serve, pour the sauce over the top, sprinkle with cheese, and bake as directed. This method keeps everything fresh and saves time when entertaining or meal prepping.
Conclusion: Why This Enchirito Recipe Will Become Your Family’s Favorite
This enchirito recipe isn’t just food; it’s tradition, comfort, and a little slice of nostalgia all rolled into one. From its hearty filling of seasoned beef and creamy beans to the gooey melted cheese and rich enchilada sauce, every bite feels like coming home. It’s the kind of meal that draws everyone to the table and keeps them there for seconds and even thirds—just like my grandmother Mary used to do.
Looking for inspiration from other home cooks? Explore similar recipes on Natasha’s Kitchen and don’t miss the Tex-Mex section at Olga’s Flavor Factory for more family-friendly favorites.
So preheat that oven, grab your ingredients, and bring this enchirito recipe to life in your own kitchen tonight. Your family will thank you—and probably ask for it again tomorrow.