Sandwich Bread
There is something deeply comforting about the smell of freshly baked sandwich bread drifting through the kitchen. It is warm, slightly sweet, and almost buttery even before you spread anything on it. When you slice into a loaf and see that soft, fluffy crumb inside, it feels like a small victory. This is the kind of bread that turns a simple sandwich into something special. Trust me, you’re going to love this.
And now that you can almost imagine that first warm slice, let’s talk about why baking your own loaf is such a rewarding experience.
The Simple Joy of Baking Your Own Everyday Bread
Store bought bread is convenient, but homemade bread has soul. The crust forms naturally in your oven, the texture is soft yet structured, and you know exactly what went into it.
This loaf is sturdy enough for sandwiches yet tender enough to toast beautifully. It slices cleanly, holds spreads without falling apart, and fills your home with that bakery aroma that makes everything feel cozy. Let me tell you, it’s worth every bite.
Before we move into technique, let’s appreciate the long tradition behind this humble loaf.
A Classic Loaf With Timeless Roots
Soft white sandwich bread has been a staple in kitchens for generations. It became popular because it was dependable, versatile, and easy to portion. Families relied on it for everything from breakfast toast to packed lunches.
Making it at home brings you back to that traditional method of kneading, rising, and baking. It is simple baking at its finest, and it never goes out of style.
And now let’s explore why this recipe works so reliably.
Why This Bread Recipe Never Fails
This loaf has earned its place in the regular rotation.
Versatile: Perfect for sandwiches, toast, French toast, or even homemade croutons.
Budget-Friendly: Uses simple pantry staples that cost very little.
Quick and Easy: Straightforward steps make it approachable even for beginners.
Customizable: Add seeds, brush with butter, or adjust sweetness slightly.
Crowd-Pleasing: Soft texture and mild flavor make it family friendly.
Make-Ahead Friendly: Bake ahead and slice as needed throughout the week.
Great for Leftovers: Slightly stale slices make excellent breadcrumbs or toast.
Now let’s talk about a few professional tips to ensure that perfect fluffy texture.
Pro Tips for a Soft and Fluffy Loaf
Small details matter when baking bread.
- Use warm, not hot, water to activate the yeast properly.
- Knead until the dough is smooth and elastic for the best structure.
- Allow enough rising time so the bread develops flavor and volume.
- Avoid over baking to keep the crumb tender.
With that in mind, let’s gather the tools you will need.
Essential Tools for Homemade Bread Success
You do not need a professional kitchen, just a few basics.
Large Mixing Bowl: For combining and kneading the dough.
Loaf Pan: Standard 9 by 5 inch pan for classic shape.
Measuring Cups and Spoons: For accuracy in baking.
Cooling Rack: Allows air circulation so the crust stays crisp.
Now let’s look at the ingredients that make this loaf so dependable.
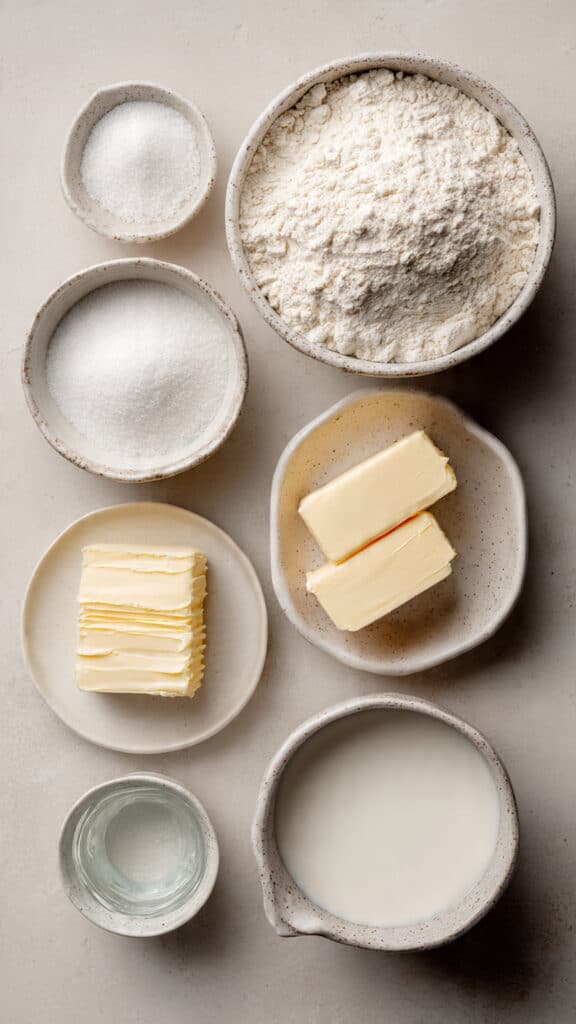
Ingredients You Will Need For This Soft Sandwich Bread
Each ingredient has an important role in structure and flavor.
- All Purpose Flour: 500 grams or 4 cups. Forms the structure of the bread.
- Instant Yeast: 2 1/4 teaspoons or 7 grams. Helps the dough rise.
- Granulated Sugar: 2 tablespoons. Feeds the yeast and adds slight sweetness.
- Salt: 1 1/2 teaspoons. Enhances flavor and balances sweetness.
- Unsalted Butter: 2 tablespoons, softened. Adds tenderness and richness.
- Whole Milk: 240 ml or 1 cup, warm. Adds softness and flavor.
- Warm Water: 120 ml or 1/2 cup. Hydrates the dough and activates yeast.
If you need flexibility, here are some easy substitutions.
Ingredient Swaps That Still Work Beautifully
Whole Milk: Use 2 percent milk if needed.
Unsalted Butter: Replace with neutral oil for a slightly different texture.
Granulated Sugar: Honey can be used for a softer crumb.
Now let’s highlight the true stars of the recipe.
The Key Ingredients That Make the Difference
Instant Yeast: Provides reliable rise and fluffy structure without needing to proof separately.
Whole Milk: Contributes to that soft, tender crumb that makes perfect sandwich slices.
And now it is time to bring it all together.
Let’s Bake This Classic Loaf
This is where the transformation happens.
- Preheat Your Equipment: Lightly grease a 9 by 5 inch loaf pan and set aside.
- Combine Ingredients: In a large bowl, mix flour, yeast, sugar, and salt. Add warm milk, warm water, and softened butter. Mix until a dough forms.
- Prepare Your Cooking Vessel: Knead the dough on a floured surface for 8 to 10 minutes until smooth and elastic. Place in a lightly greased bowl, cover, and let rise until doubled, about 1 hour.
- Assemble the Dish: Punch down the dough gently, shape into a loaf, and place into the prepared pan. Cover and let rise again until it reaches just above the rim of the pan, about 30 to 40 minutes.
- Cook to Perfection: Preheat oven to 180 C or 350 F. Bake for 25 to 30 minutes until golden brown and the loaf sounds hollow when tapped.
- Finishing Touches: Remove from pan and cool on a rack before slicing.
- Serve and Enjoy: Slice once fully cooled and enjoy with butter, jam, or your favorite sandwich fillings.
Now let’s talk about texture and flavor.
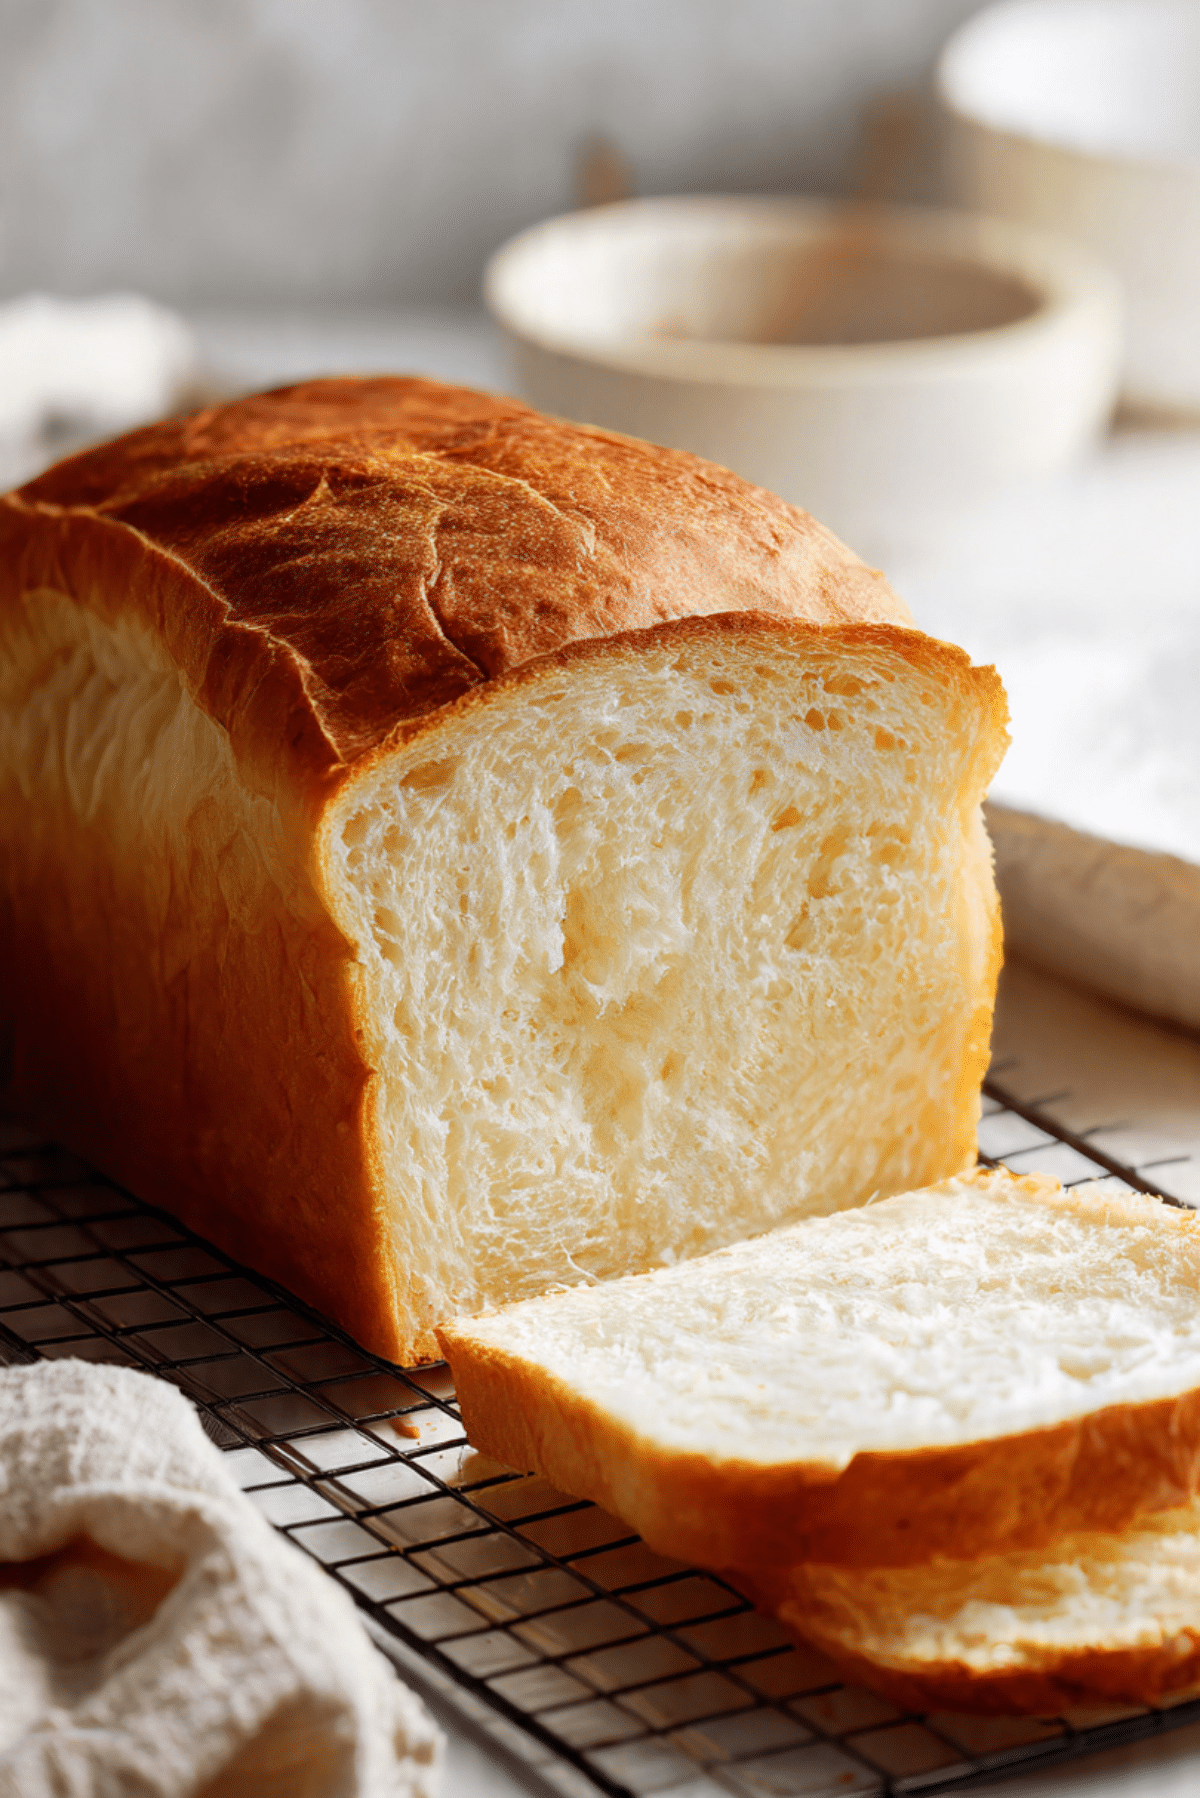
Soft Crumb, Golden Crust, Perfect Structure
The crust forms a light golden shell that gives just a gentle resistance when sliced. Inside, the crumb is soft, airy, and slightly sweet. It toasts beautifully, turning crisp on the outside while staying tender in the middle.
This one’s a total game changer for homemade sandwiches.
Helpful Baking Tips for Best Results
Keep these in mind as you bake.
- Measure flour accurately to avoid dense bread.
- Allow full rising time for better texture.
- Use a thermometer if unsure, internal temperature should be about 90 C.
Common Mistakes to Avoid
Even simple bread can go wrong if rushed.
- Using water that is too hot, which can kill the yeast.
- Under kneading, which leads to poor structure.
- Slicing while still hot, which can compress the crumb.
Nutrition Facts Per Serving
Servings: 12 slices
Calories per serving: Approximately 150
Note: These are approximate values.
Preparation Time Overview
Prep Time: 20 minutes
Cook Time: 30 minutes
Total Time: 1 hour 50 minutes including rising time
Make Ahead and Storage Tips
Store cooled bread in an airtight bag at room temperature for up to three days. For longer storage, slice and freeze for up to two months. Toast slices directly from frozen when needed.
How to Serve This Loaf
Use for classic sandwiches, grilled cheese, toast with butter and jam, or even homemade croutons.
Creative Ways to Use Leftovers
Turn stale slices into bread pudding. Cube and toast for stuffing. Blend into fresh breadcrumbs.
Extra Tips for Flavor and Freshness
Brush the top with melted butter after baking for a softer crust. Add a sprinkle of seeds before baking for extra texture.
Make It Look Bakery Worthy
Slice evenly with a serrated knife. Arrange slices slightly fanned out on a wooden board for a simple yet inviting presentation.
Variations to Try
- Add sesame seeds on top before baking.
- Replace part of the flour with whole wheat flour.
- Mix in dried herbs for savory bread.
- Swirl in a little cinnamon sugar for a sweeter twist.
FAQ’s
Q1: Can I use active dry yeast?
Yes, dissolve it in warm water first before mixing.
Q2: Why did my bread not rise?
Check that your yeast is fresh and water was not too hot.
Q3: Can I make this without milk?
Yes, use water, though texture will be slightly different.
Q4: How do I know when it is fully baked?
It should sound hollow when tapped and be golden brown.
Q5: Can I double the recipe?
Yes, divide into two loaf pans.
Q6: Can I knead with a mixer?
Yes, use a dough hook for about 6 to 8 minutes.
Q7: Why is my bread dense?
It may need more kneading or longer rising time.
Q8: Can I freeze the dough?
Yes, after the first rise, shape and freeze.
Q9: What flour works best?
All purpose flour works perfectly for soft texture.
Q10: How do I keep the crust soft?
Brush with butter after baking and store properly.
Conclusion
Baking your own sandwich bread is simpler than it seems and incredibly rewarding. From the warm aroma to the soft, fluffy slices, this loaf brings comfort to every meal. Once you taste it fresh from your own oven, it just might become a weekly ritual in your kitchen.
Print
Sandwich Bread
- Prep Time: 20 minutes
- Cook Time: 30 minutes
- Total Time: 1 hour 50 minutes
- Yield: 12 slices
- Category: Bread
- Method: Baking
- Cuisine: American
- Diet: Vegetarian
Description
Soft and fluffy homemade sandwich bread with a golden crust and tender crumb, perfect for toast, sandwiches, and everyday baking. Made with simple pantry ingredients and baked to warm, comforting perfection.
Ingredients
- 500 g (4 cups) all purpose flour
- 2 1/4 tsp (7 g) instant yeast
- 2 tbsp granulated sugar
- 1 1/2 tsp salt
- 2 tbsp unsalted butter, softened
- 240 ml (1 cup) whole milk, warm
- 120 ml (1/2 cup) warm water
Instructions
- Lightly grease a 9 by 5 inch loaf pan and set aside.
- In a large mixing bowl, combine flour, instant yeast, sugar, and salt.
- Add warm milk, warm water, and softened butter. Mix until a dough forms.
- Knead the dough on a lightly floured surface for 8 to 10 minutes until smooth and elastic.
- Place the dough in a lightly greased bowl, cover, and let rise for about 1 hour or until doubled in size.
- Punch down the dough gently, shape into a loaf, and place into the prepared loaf pan.
- Cover and let rise again for 30 to 40 minutes until the dough rises just above the rim of the pan.
- Preheat oven to 180 C or 350 F.
- Bake for 25 to 30 minutes until golden brown and the loaf sounds hollow when tapped.
- Remove from the pan and cool completely on a wire rack before slicing.
Notes
- Use warm, not hot, liquids to avoid damaging the yeast.
- Measure flour accurately for best texture.
- Allow bread to cool fully before slicing to maintain structure.
- Store in an airtight container for up to 3 days or freeze sliced for longer storage.
Nutrition
- Serving Size: 1 slice
- Calories: 150 kcal
- Sugar: 3 g
- Sodium: 220 mg
- Fat: 3 g
- Saturated Fat: 2 g
- Unsaturated Fat: 1 g
- Trans Fat: 0 g
- Carbohydrates: 26 g
- Fiber: 1 g
- Protein: 4 g
- Cholesterol: 8 mg