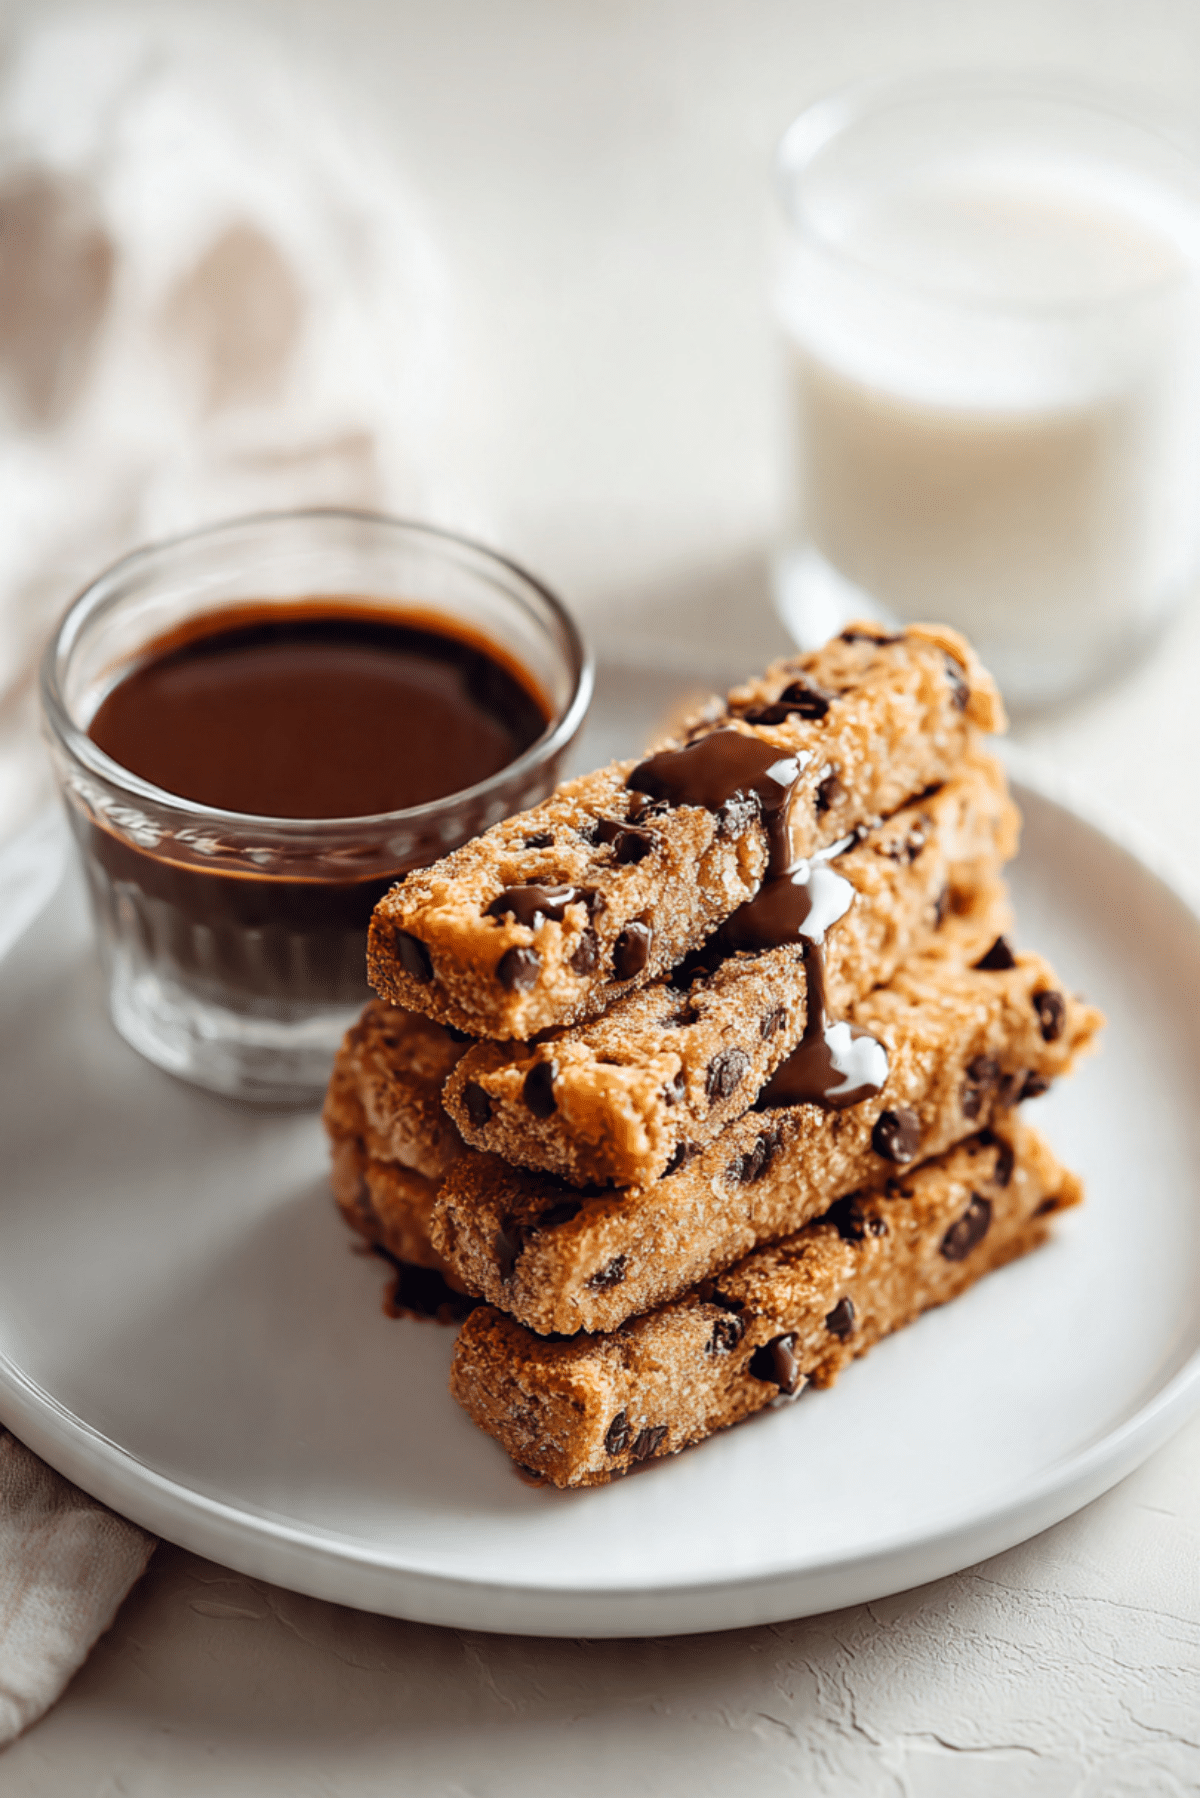
Chocolate Chip Cookie Fries
There is something ridiculously fun about turning a classic cookie into little golden sticks you can grab, dip, and snack on like dessert fries. These sweet treats come out buttery, soft in the middle, lightly crisp at the edges, and packed with melty chocolate in every bite. Trust me, you’re going to love this, especially when that warm cookie meets a silky chocolate dip on the side.
Why These Sweet Cookie Sticks Feel So Irresistible
Some desserts are nice, and some instantly make people smile the second they hit the table. This is one of those. The shape is playful, the flavor is familiar, and the texture is exactly what you want from a good cookie, tender, rich, and dotted with pockets of chocolate that stay soft and gooey.
What makes them even better is how easy they are to serve. You can stack them on a plate, pass around the dip, and suddenly a simple homemade dessert feels a little more special. Let me tell you, it’s worth every bite.
A Fun Twist on a Classic Cookie Favorite
The flavor inspiration here comes straight from the timeless chocolate chip cookie, which has been loved for generations in home kitchens and bakeries alike. That familiar mix of butter, brown sugar, vanilla, and chocolate is the heart of this dessert, but the fry shape gives it a playful, modern spin.
Desserts shaped like fries have become popular because they bring a little novelty without losing the comfort of the original treat. It still tastes like the cookie everyone knows, but the presentation makes it feel new, shareable, and just plain fun.
Reasons This Dessert Earns a Spot in Your Baking Rotation
This dessert has a way of winning people over fast, and now let’s dive into exactly why it works so well every single time.
Versatile: You can serve these warm with dip, pack them into lunchboxes, or dress them up for a party platter. They fit just as well at a casual movie night as they do on a dessert table.
Budget-Friendly: The ingredients are pantry staples, which means you probably have most of them already. That makes this one a total game-changer when you want something homemade without a big grocery run.
Quick and Easy: The dough comes together with simple mixing, and the bake time is pleasantly short. You get a bakery-style treat without spending all afternoon in the kitchen.
Customizable: You can swap the chocolate, add a little cinnamon, or serve with a different dip. It is easy to make these feel personal without changing the whole recipe.
Crowd-Pleasing: Kids love the fry shape, adults love the nostalgic cookie flavor, and everyone loves the chocolate. It disappears fast, so you might want to make a double batch.
Make-Ahead Friendly: The dough can be chilled in advance, and the baked sticks keep well for later. That makes planning ahead much easier.
Great for Leftovers: They stay delicious the next day and can be warmed slightly to bring back that fresh-baked softness. A little extra dip on the side makes leftovers feel brand new.
Smart Baking Secrets for the Best Batch
A few little tricks can take these from good to seriously memorable.
- Chill the dough briefly if it feels too soft, because firmer dough holds those clean fry-like shapes much better.
- Use mini chocolate chips when possible, because they distribute more evenly through the narrow cookie sticks.
- Do not overbake them, because they continue to set as they cool and you want the centers to stay tender.
- Slice them into even pieces, so they bake at the same pace and look neat when served.
- Let them cool for several minutes before moving, because warm cookie sticks are delicate right out of the pan.
Kitchen Tools That Make the Process Easier
Before the mixing starts, it helps to have a few basics ready so the whole process feels smooth and relaxed.
Mixing Bowl: For combining the dough evenly without making a mess.
Hand Mixer or Whisk: A hand mixer makes creaming the butter and sugars easier, but a sturdy whisk works too.
Measuring Cups and Spoons: Accurate measuring keeps the texture soft and balanced.
Rubber Spatula: Great for folding in the chocolate chips and scraping down the bowl.
Baking Pan: A square 8 x 8 inch pan helps create an even slab that can be sliced neatly into fry shapes.
Parchment Paper: Makes lifting and cutting much easier, and helps prevent sticking.
Knife: For cutting the baked slab into clean cookie sticks.
Small Heatproof Bowl: Useful for mixing the quick chocolate dipping sauce.
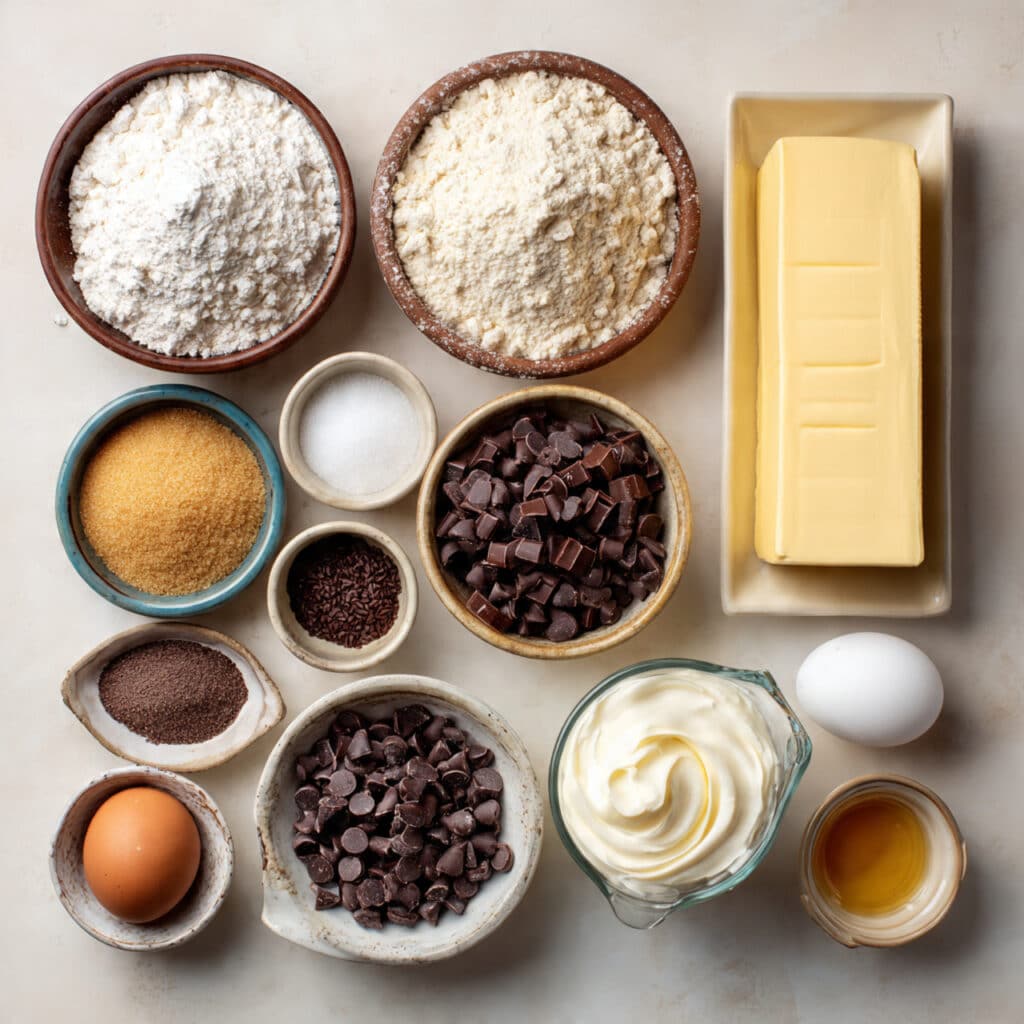
Ingredients That Bring It All Together
This is one of those simple ingredient lists where every item plays a real role. Butter brings richness, brown sugar adds that soft caramel note, and chocolate turns the whole thing into something completely craveable.
- All-purpose flour: 1 1/2 cups, this gives the cookie fries their structure while keeping them tender.
- Baking powder: 1 teaspoon, this helps create a light, soft bite instead of a dense bar.
- Salt: 1/4 teaspoon, this sharpens the sweetness and deepens the chocolate flavor.
- Unsalted butter: 1/2 cup, melted and slightly cooled, this adds richness and moisture.
- Light brown sugar: 1/2 cup, packed, this brings warmth and chewiness.
- Granulated sugar: 1/4 cup, this balances the brown sugar and helps the edges get lightly crisp.
- Large egg: 1, this binds the dough and keeps the texture soft.
- Vanilla extract: 2 teaspoons, this adds that classic cookie aroma that makes the kitchen smell amazing.
- Mini chocolate chips: 3/4 cup, these spread chocolate through every stick more evenly.
- Semi-sweet chocolate chips: 1/2 cup, these melt into the dipping sauce for a rich finish.
- Heavy cream: 1/4 cup, this turns the melted chocolate into a smooth, glossy dip.
Easy Swaps When You Need Flexibility
Even though the original version is lovely, there is always room to adjust based on what you already have in the pantry.
All-purpose flour: Use a 1 to 1 gluten-free baking blend.
Unsalted butter: Use salted butter and reduce the added salt slightly.
Light brown sugar: Dark brown sugar works for a deeper caramel flavor.
Mini chocolate chips: Regular chocolate chips can be chopped for better distribution.
Heavy cream: Whole milk can work for the dip, though the sauce will be a little thinner.
Vanilla extract: Vanilla bean paste gives an even richer bakery-style flavor.
The Standout Ingredients That Make the Magic Happen
A couple of ingredients really carry the personality of this dessert, and now let’s dive into why they matter so much.
Light Brown Sugar: This is what gives the cookie sticks that soft, almost caramel-like depth. It helps create a chewy center that feels warm and classic.
Mini Chocolate Chips: Because the sticks are narrow, mini chips fit beautifully into every bite. You get chocolate all the way through instead of a few random pockets.
Let’s Bake These Dessert Fries
This is the part where the kitchen starts to smell incredible. The steps are simple, and the payoff is a tray of buttery cookie sticks that look fun and taste even better.
- Preheat Your Equipment: Preheat your oven to 350°F and line an 8 x 8 inch baking pan with parchment paper, leaving a little overhang so you can lift the baked cookie slab out easily later.
- Combine Ingredients: In a medium bowl, whisk together the flour, baking powder, and salt. In a larger bowl, stir the melted butter, brown sugar, and granulated sugar until smooth. Add the egg and vanilla, then mix until glossy. Fold the dry ingredients into the wet mixture just until combined, then stir in the mini chocolate chips.
- Prepare Your Cooking Vessel: Press the dough evenly into the lined pan. Use a spatula or lightly damp fingertips to smooth the top so it bakes into an even layer.
- Assemble the Dish: Double-check that the dough is spread into the corners and level across the surface. This helps the cookie slab bake evenly and makes the final slices look more uniform.
- Cook to Perfection: Bake for 18 to 22 minutes, until the top looks set and the edges are lightly golden. The center should still look slightly soft, because it will firm up as it cools.
- Finishing Touches: Let the slab cool in the pan for about 15 minutes, then lift it out using the parchment. Cut into long fry-like sticks. For the dip, heat the heavy cream until warm, pour it over the semi-sweet chocolate chips, let it sit for 1 minute, then stir until smooth and glossy.
- Serve and Enjoy: Arrange the cookie sticks on a plate and serve with the warm chocolate dip. They are delicious slightly warm, when the chocolate is still soft and the edges have just a little bite.
The Texture and Flavor Story in Every Bite
What makes this dessert so satisfying is the contrast. The edges bake up lightly golden and just a little crisp, while the inside stays soft and tender. Then you get those little melted bits of chocolate tucked throughout, which make every bite feel richer.
The flavor builds in such a cozy way too. First comes the butter and vanilla, then the mellow sweetness of brown sugar, and finally that deep chocolate finish. Dip one into the warm sauce and the whole thing becomes extra luscious and dessert-table worthy.
Helpful Tricks for Even Better Results
A few extra pointers can make your baking session feel easier and more foolproof.
- Let the melted butter cool slightly before mixing, so it does not scramble the egg.
- Use parchment paper for clean lifting and easier slicing.
- Wipe the knife between cuts if you want tidy, bakery-style edges.
- Serve the dip slightly warm for the smoothest texture.
Common Slip-Ups and How to Avoid Them
Even easy bakes can go sideways with one or two little missteps, so here are the ones worth watching.
- Overmixing the dough can make the texture tougher, so stir just until the flour disappears.
- Overbaking can dry out the centers, so pull the pan when the middle still looks a touch soft.
- Cutting too soon can cause crumbling, so let the slab cool enough to hold its shape.
- Using too many large chocolate chunks can make slicing messy, so smaller pieces work best.
A Quick Look at the Nutrition
These numbers are approximate, but they give you a helpful snapshot before serving.
Servings: 8
Calories per serving: 285
Note: These are approximate values.
Time You’ll Want to Set Aside
This dessert feels special without taking over your day, which is always a win.
Prep Time: 15 minutes
Cook Time: 20 minutes
Total Time: 35 minutes
Make-Ahead and Storage Tips That Actually Help
If you like getting ahead, you can prepare the dough several hours in advance and keep it covered in the refrigerator until you are ready to bake. You can also bake the slab earlier in the day and slice it once fully cooled.
Store the cookie sticks in an airtight container at room temperature for up to 4 days. The dipping sauce can be refrigerated separately for up to 3 days and gently rewarmed before serving. For freezing, place the baked sticks in a freezer-safe container with parchment between layers and freeze for up to 2 months. Warm them briefly in the microwave or a low oven to bring back their softness.
How to Serve Them for Maximum Fun
These cookie sticks are already charming on their own, but serving can take them even further. Pile them into a cup or stack them on a plate beside the warm chocolate dip for a playful fries-and-sauce look.
They also pair beautifully with cold milk, hot coffee, or vanilla ice cream. For parties, you can set out a few dipping choices like chocolate sauce, caramel sauce, or whipped cream and let everyone build their own plate.
Clever Ways to Use Leftovers
Leftovers rarely last long, but when they do, you have options that feel fresh and fun.
Chop them over ice cream for a cookie sundae topping. Crumble them into yogurt for a sweet snack. Sandwich a little ice cream between two shorter pieces for a quick frozen treat. You can even warm them slightly and drizzle with extra chocolate for a dessert that feels brand new.
Extra Little Details That Make a Difference
Sometimes it is the small touches that make a homemade dessert taste extra polished. A sprinkle of flaky salt on the warm dip can make the chocolate flavor pop beautifully. A tiny dusting of powdered sugar can make the plate feel party-ready.
For the softest texture, store the cookie sticks once they are fully cool so trapped steam does not make them soggy. And for clean slices, use a sharp knife and a gentle sawing motion rather than pressing straight down.
Turn a Simple Batch Into a Real Showstopper
Presentation goes a long way here because the fry shape is already playful. Stack the cookie sticks neatly in rows, set the chocolate dip in a small cup beside them, and serve everything on a board or platter for that eye-catching dessert-fries look.
A few mini chocolate chips scattered over the top right before serving can make the plate feel extra inviting. This one’s a total game-changer when you want something that looks impressive without being fussy.
Fun Variations to Try Next Time
Once you have the base idea down, it is easy to play around with new flavors.
Double Chocolate: Add 2 tablespoons cocoa powder to the dough and keep the chocolate dip on the side for extra richness.
Peanut Butter Chip: Swap part of the mini chocolate chips for peanut butter chips for a sweet and salty twist.
Cookies and Cream: Stir crushed chocolate sandwich cookies into the dough for extra crunch and a fun cookies-and-cream vibe.
Cinnamon Sugar: Add 1/2 teaspoon cinnamon to the dough and dust the warm sticks lightly with cinnamon sugar.
Dark Chocolate Sea Salt: Use dark chocolate chips and finish with a tiny sprinkle of flaky salt on the dip.
FAQ’s
1. Can I make the dough ahead of time?
Yes, you can prepare the dough and refrigerate it for up to 24 hours before baking. Let it sit at room temperature for a few minutes if it feels too firm to spread.
2. Can I use regular chocolate chips instead of mini chips?
Yes, but chopping them first helps the cookie sticks slice more cleanly and keeps the chocolate evenly spread.
3. What if I do not have an 8 x 8 inch pan?
A similar small square pan works best. If you use a larger pan, the layer will be thinner and bake faster, so keep an eye on it.
4. How do I know when they are done baking?
Look for lightly golden edges and a top that looks set. The center can still seem a little soft, because it will firm up as it cools.
5. Can I skip the dipping sauce?
Absolutely. They are delicious on their own, but the dip makes them feel a little more special.
6. Can I freeze them after baking?
Yes, once cooled, freeze them in layers with parchment paper between each layer for easier storage.
7. Why did my cookie sticks crumble when I cut them?
They were probably still too warm. Letting the slab cool a bit more usually solves that problem.
8. Can I make them smaller for a party tray?
Yes, you can cut them into shorter sticks or even thin rectangles for bite-sized servings.
9. How should I reheat the chocolate dip?
Warm it gently in short microwave bursts or over a bowl of warm water, stirring often until smooth.
10. Can I add nuts or other mix-ins?
Yes, chopped walnuts or pecans can work well, but keep the total amount of mix-ins balanced so the dough still slices neatly.
Conclusion
If you are looking for a dessert that feels nostalgic, playful, and seriously satisfying, this is the one to make. The buttery cookie base, the soft chocolate-studded center, and that glossy dip on the side come together in a way that feels both cozy and fun. Trust me, you’re going to love this, and once you serve a batch, do not be surprised when everyone reaches for seconds.
Print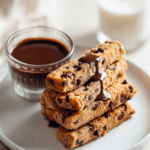
Chocolate Chip Cookie Fries
- Prep Time: 15 minutes
- Cook Time: 20 minutes
- Total Time: 35 minutes
- Yield: 8 servings
- Category: Dessert
- Method: Baking
- Cuisine: American
- Diet: Vegetarian
Description
Soft, buttery cookie sticks loaded with mini chocolate chips and served with a smooth chocolate dipping sauce. This playful dessert brings all the comfort of a classic cookie in a fun fry-shaped form that is perfect for sharing.
Ingredients
- 1 1/2 cups all-purpose flour
- 1 teaspoon baking powder
- 1/4 teaspoon salt
- 1/2 cup unsalted butter, melted and slightly cooled
- 1/2 cup light brown sugar, packed
- 1/4 cup granulated sugar
- 1 large egg
- 2 teaspoons vanilla extract
- 3/4 cup mini chocolate chips
- 1/2 cup semi-sweet chocolate chips
- 1/4 cup heavy cream
Instructions
- Preheat the oven to 350°F and line an 8 x 8 inch baking pan with parchment paper.
- In a medium bowl, whisk together the flour, baking powder, and salt.
- In a large bowl, stir together the melted butter, brown sugar, and granulated sugar until smooth.
- Add the egg and vanilla extract, then mix until glossy and well combined.
- Fold the dry ingredients into the wet ingredients just until combined.
- Stir in the mini chocolate chips.
- Press the dough evenly into the prepared pan and smooth the top.
- Bake for 18 to 22 minutes, until the edges are lightly golden and the center is just set.
- Cool in the pan for 15 minutes, then lift out and cut into long fry-like sticks.
- To make the dipping sauce, warm the heavy cream, pour it over the semi-sweet chocolate chips, let sit for 1 minute, then stir until smooth.
- Serve the cookie sticks with the warm chocolate dip.
Notes
- Mini chocolate chips work best for even distribution in the cookie sticks.
- Do not overbake, because the centers will continue to set as they cool.
- Let the slab cool slightly before slicing for cleaner edges.
- The dipping sauce can be rewarmed gently if it thickens.
Nutrition
- Serving Size: 1 serving
- Calories: 285
- Sugar: 21g
- Sodium: 110mg
- Fat: 14g
- Saturated Fat: 8g
- Unsaturated Fat: 5g
- Trans Fat: 0g
- Carbohydrates: 37g
- Fiber: 1g
- Protein: 3g
- Cholesterol: 42mg