Cheesy Tortilla Stacks
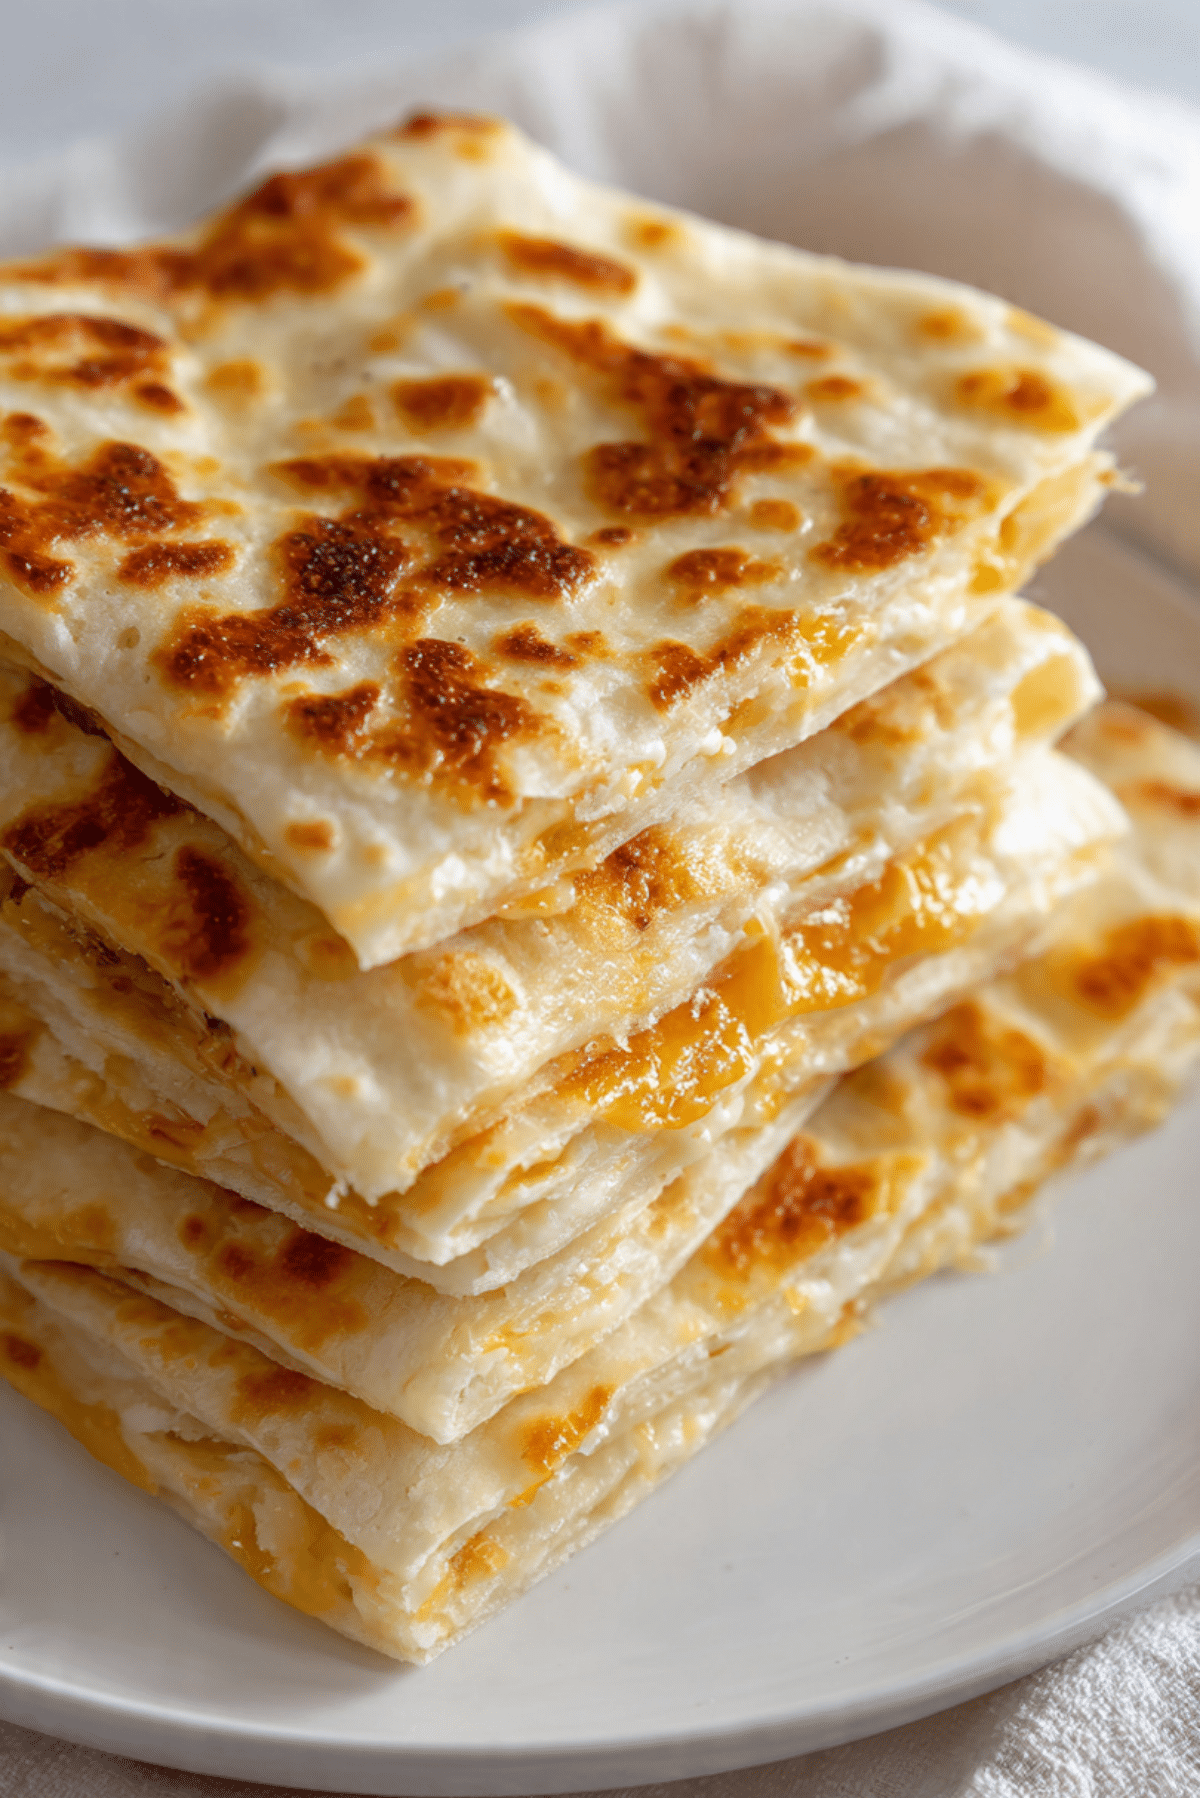
There is something deeply comforting about layers of tortillas and melted cheese baked together until golden and crisp at the edges. The first time I pulled a pan of Cheesy Tortilla Stacks from the oven, the smell alone had everyone drifting into the kitchen. Warm, toasty, rich, and just a little bit indulgent. Trust me, you’re going to love this.
Each slice reveals beautiful layers of soft tortillas and gooey cheese pressed together, with lightly crisped edges that add just the right amount of texture. It is simple, satisfying, and honestly one of those dishes that disappears faster than you expect. This one’s a total game-changer for easy dinners or crowd friendly snacks.
Why These Stacks Always Hit the Spot
There is a reason layered tortilla dishes are so popular. They combine the comfort of melted cheese with the structure of bread, giving you something hearty without being complicated.
Cheesy Tortilla Stacks feel like a cross between a grilled cheese and a baked casserole. You get crispy edges, stretchy centers, and that golden top that practically begs to be sliced. They are easy to scale up, easy to serve, and even easier to eat.
And before we get into the step by step process, let’s take a quick look at the inspiration behind this layered favorite.
The Comfort Food Roots Behind Layered Tortillas
Layered tortilla dishes have long been part of home kitchens where simple ingredients were turned into filling meals. By stacking tortillas with cheese and baking them, home cooks created something that felt special without requiring complicated techniques.
It is the kind of cooking that relies on texture and balance. Crisp edges, tender centers, and melty layers in between. Over time, this style evolved into countless variations, but the heart of it remains the same. Simple ingredients, layered thoughtfully.
Now let’s talk about why this version works so beautifully every single time.
What Makes This Recipe So Reliable and Loved
Before we head into the kitchen, here is why these Cheesy Tortilla Stacks deserve a regular spot in your meal rotation.
Versatile: Serve as a main dish, slice into smaller squares for appetizers, or pair with soup for a cozy meal.
Budget-Friendly: Flour tortillas and cheese are affordable staples that stretch far.
Quick and Easy: Minimal prep and straightforward baking make it stress free.
Customizable: You can adjust the cheese blend or seasoning to suit your taste.
Crowd-Pleasing: Warm, cheesy layers appeal to kids and adults alike.
Make-Ahead Friendly: Assemble ahead and bake when ready to serve.
Great for Leftovers: Slices reheat beautifully and stay flavorful.
Now let’s make sure yours come out perfectly golden and layered.
Pro Tips for Perfectly Layered Stacks
A few small details can elevate the texture and flavor.
- Use freshly shredded cheese for better melt and smoother layers.
- Lightly butter each tortilla to encourage crisp edges.
- Press the layers gently before baking to keep everything compact.
- Allow a few minutes of resting time before slicing for clean cuts.
With that in mind, let’s gather the tools.
Essential Kitchen Tools for Success
You do not need anything fancy, just reliable basics.
8×8 Inch Baking Dish: Helps maintain thick, defined layers.
Pastry Brush: Useful for spreading melted butter evenly.
Sharp Knife: Ensures clean slices through the stacked layers.
Mixing Bowl: For combining cheeses and seasonings.
Now comes the heart of the dish, the ingredients.
Ingredients You Will Need For Cheesy Tortilla Stacks
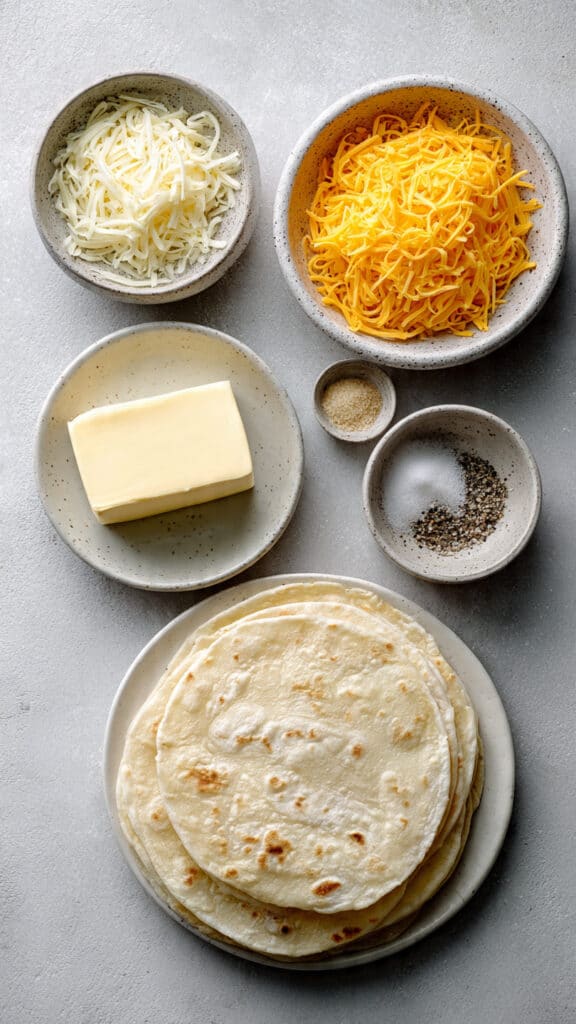
These simple components work together to create that golden, layered goodness.
- Flour Tortillas: 6 large tortillas, about 8 inches each, form the structure of the stacks.
- Shredded Cheddar Cheese: 2 cups, sharp and flavorful for bold taste.
- Shredded Mozzarella Cheese: 1 1/2 cups, adds stretch and creamy melt.
- Butter: 3 tablespoons, melted, helps crisp and brown the tortillas.
- Salt: 1/2 teaspoon, enhances overall flavor.
- Black Pepper: 1/4 teaspoon, adds gentle warmth.
Each ingredient plays its role, building flavor and texture layer by layer. And if you want to adjust things slightly, you absolutely can.
Flexible Ingredient Swaps
Cooking should always feel adaptable.
Cheddar Cheese: Swap with Monterey Jack for a milder flavor.
Mozzarella Cheese: Use Colby Jack for a slightly richer melt.
Butter: Substitute with olive oil if preferred.
Now let’s highlight what really makes this dish shine.
Spotlight on the Flavor Makers
Shredded Cheddar Cheese: Provides that bold, savory depth that defines the stacks.
Butter: Encourages golden crisp edges and adds richness to every layer.
And now, let’s bring it all together.
Let’s Build and Bake It Step by Step
This is where the magic happens.
- Preheat Your Equipment: Preheat your oven to 375°F and lightly grease an 8×8 inch baking dish.
- Combine Ingredients: In a bowl, mix the shredded cheddar, shredded mozzarella, salt, and black pepper until evenly blended.
- Prepare Your Cooking Vessel: Brush the bottom of the baking dish lightly with melted butter.
- Assemble the Dish: Place one tortilla in the dish, brush lightly with butter, and sprinkle a generous layer of cheese mixture. Repeat with remaining tortillas, finishing with cheese on top.
- Cook to Perfection: Bake for 20 to 25 minutes, until the top is golden and the cheese is fully melted.
- Finishing Touches: Remove from the oven and let rest for 5 minutes to firm up.
- Serve and Enjoy: Slice into squares or rectangles and serve warm while the cheese is still beautifully melty.
Texture and Flavor in Every Bite
The top becomes golden and slightly crisp, while the interior remains soft and stretchy. The cheddar gives sharp richness, and the mozzarella adds creamy pull. Each bite is warm, savory, and deeply comforting.
Helpful Cooking Tips and Tricks
A few small adjustments can make a big difference.
- Rotate the dish halfway through baking for even browning.
- Use even layers of cheese to prevent uneven melting.
- Press gently before baking to keep stacks compact.
What to Avoid for Best Results
Even simple recipes benefit from attention to detail.
- Do not overload with too much cheese in one layer.
- Avoid skipping the resting time before slicing.
- Do not bake at too high a temperature, as the top can brown too quickly.
Nutrition Facts at a Glance
Servings: 6 slices
Calories per serving: 390
Note: These are approximate values.
Preparation Time Breakdown
Prep Time: 10 minutes
Cook Time: 25 minutes
Total Time: 35 minutes
Make-Ahead and Storage Tips
You can assemble the stacks ahead of time, cover tightly, and refrigerate for up to 24 hours before baking. Leftovers can be stored in an airtight container in the refrigerator for up to 3 days. Reheat in the oven to restore crispness.
Serving Ideas to Complete the Meal
Serve alongside a fresh green salad or a bowl of tomato soup for a comforting pairing. You can also top slices with a spoonful of salsa or a dollop of sour cream for extra flavor.
Creative Leftover Transformations
Cut leftovers into strips and dip into marinara sauce for a snack style twist. You can also cube the stacks and add them to a breakfast scramble for a hearty start to the day.
Additional Tips for Flavor Boost
Sprinkle a pinch of paprika on top before baking for color and subtle warmth. Add a light brush of butter to the top layer for extra golden finish.
Make It a Showstopper
Slice neatly and stack the pieces slightly offset on a serving plate so the layers are visible. The golden top and melty interior make for an inviting presentation that feels far more impressive than the effort required.
Variations to Try
Add thinly sliced jalapeños between layers for gentle heat.
Mix in a handful of chopped herbs for freshness.
Use whole wheat tortillas for a nuttier flavor.
Create mini stacks in a muffin tin for individual portions.
FAQ’s
Q1: Can I use corn tortillas?
Yes, though the texture will be slightly different and less soft.
Q2: How do I prevent sogginess?
Lightly buttering and baking fully helps maintain structure.
Q3: Can I freeze it?
It is best enjoyed fresh, but you can freeze and reheat in the oven.
Q4: What is the best cheese blend?
A combination of cheddar and mozzarella provides balance of flavor and melt.
Q5: Can I add vegetables?
Yes, thinly sliced peppers or spinach work well.
Q6: How do I get clean slices?
Let the dish rest before cutting and use a sharp knife.
Q7: Can I double the recipe?
Yes, use a larger baking dish and adjust baking time slightly.
Q8: Is this suitable for kids?
Absolutely, it is simple and familiar in flavor.
Q9: Can I make it dairy free?
You would need a plant based cheese alternative designed for melting.
Q10: How do I reheat leftovers?
Warm in the oven at 350°F until heated through for best texture.
Conclusion
Cheesy Tortilla Stacks are proof that a handful of everyday ingredients can create something warm, comforting, and deeply satisfying. With golden layers and stretchy melted cheese, this dish brings simple joy to the table. Let me tell you, once you slice into that first stack and see those layers pull apart, you will want to make it again and again.
Print
Cheesy Tortilla Stacks
- Prep Time: 10 minutes
- Cook Time: 25 minutes
- Total Time: 35 minutes
- Yield: 6 slices
- Category: Main Dish
- Method: Baking
- Cuisine: American
- Diet: Vegetarian
Description
Golden layered tortillas baked with cheddar and mozzarella until perfectly melted and lightly crisped at the edges, creating a comforting, sliceable dish that is cheesy, warm, and deeply satisfying.
Ingredients
- 6 large flour tortillas, about 8 inches each
- 2 cups shredded cheddar cheese
- 1 1/2 cups shredded mozzarella cheese
- 3 tablespoons butter, melted
- 1/2 teaspoon salt
- 1/4 teaspoon black pepper
Instructions
- Preheat the oven to 375°F and lightly grease an 8×8 inch baking dish.
- In a mixing bowl, combine shredded cheddar, shredded mozzarella, salt, and black pepper until evenly mixed.
- Brush the bottom of the baking dish lightly with melted butter.
- Place one tortilla in the dish and brush lightly with butter.
- Sprinkle an even layer of the cheese mixture over the tortilla.
- Repeat layering tortillas, butter, and cheese until all ingredients are used, finishing with cheese on top.
- Bake for 20 to 25 minutes, until the top is golden and the cheese is fully melted.
- Remove from the oven and let rest for 5 minutes before slicing.
- Cut into 6 slices and serve warm.
Notes
- Use freshly shredded cheese for the best melt and texture.
- Allow the dish to rest before cutting to maintain clean layers.
- Reheat leftovers in the oven to restore crisp edges.
Nutrition
- Serving Size: 1 slice
- Calories: 390
- Sugar: 2g
- Sodium: 520mg
- Fat: 24g
- Saturated Fat: 14g
- Unsaturated Fat: 8g
- Trans Fat: 0g
- Carbohydrates: 30g
- Fiber: 2g
- Protein: 15g
- Cholesterol: 65mg