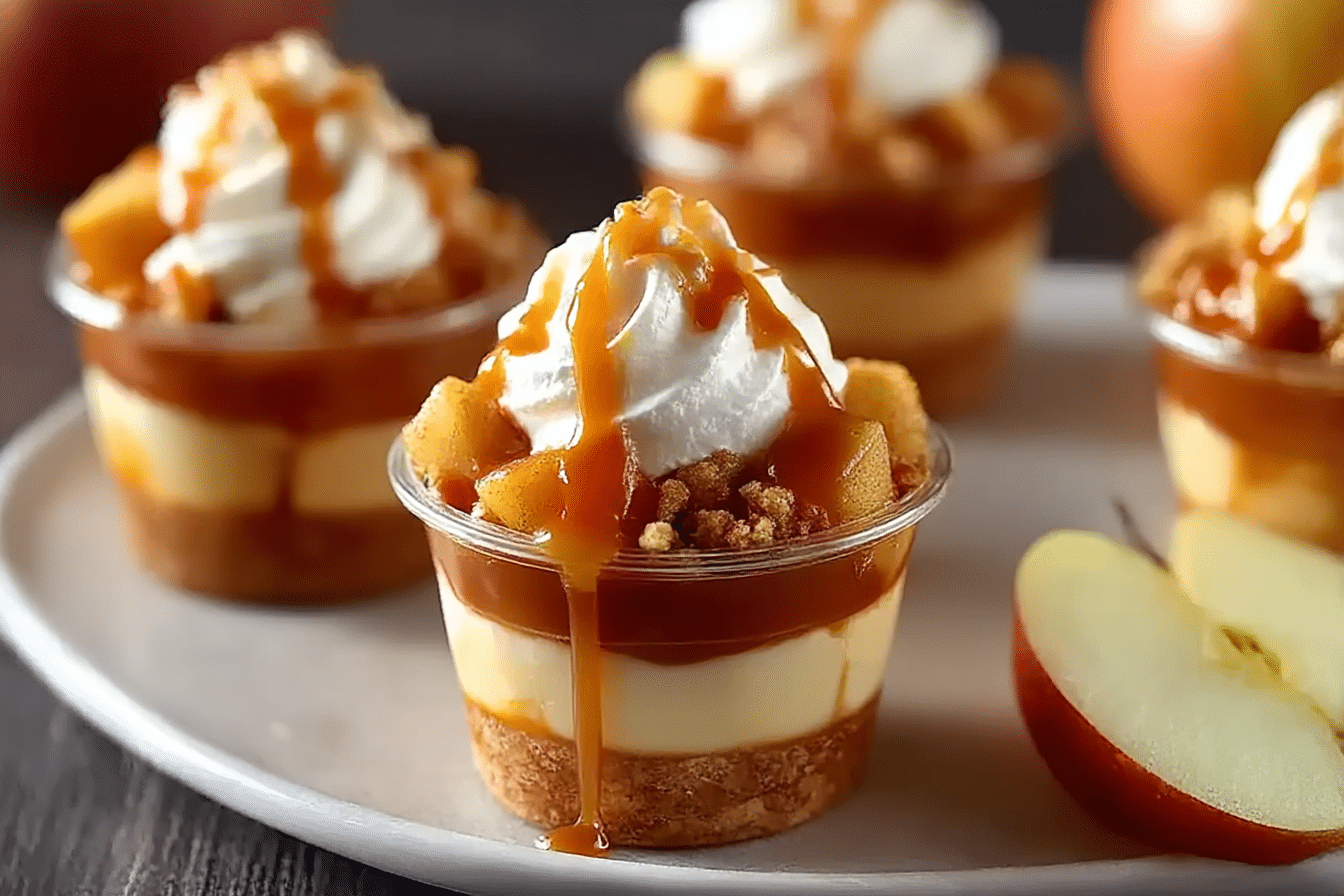
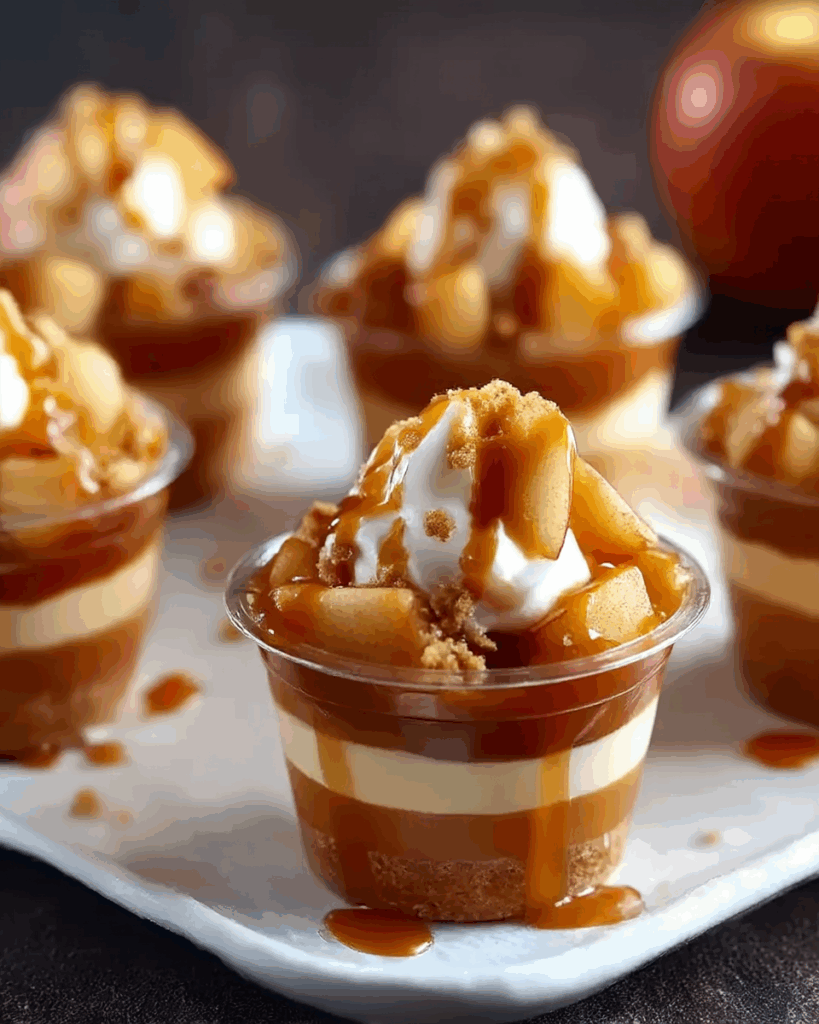
Caramel Apple Dessert Cups
Imagine warm spiced apples layered over crumbled cookies and rich caramel, then topped with fluffy whipped cream — all tucked into an adorable little dessert cup. Caramel Apple Dessert Cups are the perfect single-serve treat that delivers cozy fall flavor in every spoonful. They’re easy, elegant, and downright irresistible for holidays, parties, or weeknight indulgence.
Behind the Recipe
This recipe came together during a family gathering when we had leftover apple pie filling and a craving for something a little lighter and faster than a whole pie. By layering the flavors in mini cups, each person got their own bite of heaven — sweet apples, silky caramel, and a soft crunch from buttery cookies. Let me tell you, it’s worth every bite — and then some.
Recipe Origin or Trivia
Caramel apples have been a seasonal favorite since the early 1900s, originally created as a candy treat for fall festivals. Turning those classic flavors into a layered dessert cup takes the mess out of eating them and adds a whole new dimension. These dessert cups borrow elements from trifles and parfaits, creating a modern, spoonable version of a nostalgic classic.
Why You’ll Love Caramel Apple Dessert Cups
This treat checks all the right boxes — here’s why:
Versatile: Great for dessert tables, lunchboxes, or festive dinners.
Budget-Friendly: Uses simple pantry ingredients and fresh apples.
Quick and Easy: Ready in under 30 minutes with no baking needed.
Customizable: Swap cookies, use different apples, or add nuts.
Crowd-Pleasing: Everyone loves caramel and apples — especially in layers.
Make-Ahead Friendly: Chill well in advance and serve when ready.
Great for Leftovers: Repack and refrigerate for a second round of yum.
Print
Caramel Apple Dessert Cups
- Prep Time: 15 minutes
- Cook Time: 10 minutes
- Total Time: 25 minutes
- Yield: 6 cups
- Category: Dessert
- Method: No-Bake
- Cuisine: American
- Diet: Vegetarian
Description
Layered with spiced apples, rich caramel, whipped cream, and buttery cookie crumbs, these Caramel Apple Dessert Cups are a quick, elegant treat perfect for any occasion.
Ingredients
- 3 medium Apples, peeled and diced
- 2 tablespoons Unsalted Butter
- ¼ cup Brown Sugar
- 1 teaspoon Cinnamon
- ¼ teaspoon Nutmeg
- Pinch of Salt
- ½ cup Caramel Sauce
- 1 ½ cups Whipped Cream
- 1 cup Crushed Shortbread or Graham Crackers
- Optional: Extra caramel, chopped pecans, cinnamon for garnish
Instructions
- In a medium saucepan, melt butter over medium heat.
- Add diced apples, brown sugar, cinnamon, nutmeg, and salt. Cook for 8–10 minutes until apples are tender and syrupy.
- Let apples cool slightly while preparing dessert cups or jars.
- Layer crushed cookies at the bottom of each cup.
- Spoon warm apple mixture over the cookie base.
- Drizzle with caramel sauce and top with whipped cream.
- Repeat layers if desired. Garnish with extra caramel, chopped nuts, or cinnamon.
- Serve immediately or chill for later.
Notes
- Use a mix of sweet and tart apples for balanced flavor.
- Cool apples slightly before layering to prevent melting cream.
- Use piping bags for neater layers.
- Assemble just before serving for best presentation.
Nutrition
- Serving Size: 1 cup
- Calories: 285
- Sugar: 25g
- Sodium: 110mg
- Fat: 15g
- Saturated Fat: 9g
- Unsaturated Fat: 5g
- Trans Fat: 0g
- Carbohydrates: 36g
- Fiber: 2g
- Protein: 2g
- Cholesterol: 30mg
Chef’s Pro Tips for Perfect Results
These easy tips make your dessert cups truly unforgettable:
- Use a mix of sweet and tart apples for balance and depth.
- Chop apples evenly so they cook at the same rate.
- Layer while the apples are still warm for melty caramel magic.
- Whip your cream fresh or use stabilized whipped topping if storing.
- Use clear dessert cups for that show-stopping layered look.
Kitchen Tools You’ll Need
Minimal tools make this recipe even more tempting:
Medium Saucepan: For cooking down apples with spices.
Mixing Bowls: To whip cream and prep other layers.
Rubber Spatula: For folding and scooping without deflating.
Clear Dessert Cups or Jars: To show off the layers.
Hand Mixer (optional): Speeds up whipped cream prep.
Ingredients in Caramel Apple Dessert Cups
Each layer adds texture and flavor to create a complete dessert experience:
1. Apples: 3 medium, peeled and diced — The juicy, sweet-tart base.
2. Unsalted Butter: 2 tablespoons — Helps caramelize the apples.
3. Brown Sugar: ¼ cup — Sweetens and creates a syrupy glaze.
4. Cinnamon: 1 teaspoon — Brings warmth and classic fall aroma.
5. Nutmeg: ¼ teaspoon — Adds depth and spice.
6. Salt: A pinch — Balances the sweetness.
7. Caramel Sauce: ½ cup — Rich, gooey sweetness layered in.
8. Whipped Cream: 1 ½ cups — Light and fluffy topper.
9. Shortbread or Graham Crackers: 1 cup, crushed — Adds buttery crunch.
10. Optional Toppings: Extra caramel drizzle, chopped pecans, or cinnamon dust.
Ingredient Substitutions
Make it your own with these easy swaps:
Apples: Pears work beautifully too.
Brown Sugar: Use maple syrup or coconut sugar.
Butter: Substitute with coconut oil for a dairy-free version.
Whipped Cream: Use coconut whipped cream or store-bought whipped topping.
Shortbread: Swap with gingersnaps, vanilla wafers, or granola.
Ingredient Spotlight
Apples: Choose a mix like Honeycrisp and Granny Smith for sweet-tart complexity and soft-but-firm bites.
Caramel Sauce: Opt for a thick, buttery caramel — homemade or store-bought — to give your layers that luscious richness.
Instructions for Making Caramel Apple Dessert Cups
Now it’s time to build this cozy layered dessert, step by step.
1. Preheat Your Equipment:
No oven needed — just grab a medium saucepan and clear cups for layering.
2. Combine Ingredients:
In a saucepan, melt butter over medium heat. Add chopped apples, brown sugar, cinnamon, nutmeg, and salt. Cook for 8–10 minutes, stirring occasionally, until apples are tender and syrupy.
3. Prepare Your Cooking Vessel:
While apples cool slightly, prepare the cups by adding a layer of crushed cookies at the bottom.
4. Assemble the Dish:
Spoon a layer of warm apples over the cookie base. Drizzle caramel sauce over apples, then add a generous dollop of whipped cream.
5. Cook to Perfection:
No actual baking, but allow the layers to rest for 5–10 minutes so flavors meld. If desired, repeat layers for double the indulgence.
6. Finishing Touches:
Top with extra caramel, chopped nuts, or a sprinkle of cinnamon.
7. Serve and Enjoy:
Serve immediately for warm apples and cold cream contrast — or chill and serve cold for a parfait-style dessert.
Texture & Flavor Secrets
The soft, spiced apples melt into the caramel while the buttery cookie base adds crunch and richness. Light whipped cream balances the sweetness, and the layers play off each other with warm and cool textures that keep every bite interesting.
Cooking Tips & Tricks
These quick tips make a big difference:
- Let apples cool slightly so whipped cream doesn’t melt.
- Use a piping bag for cleaner whipped cream layers.
- Layer in jars with lids for portable, picnic-ready treats.
- Double the recipe for parties — they go fast!
What to Avoid
Avoid these easy-to-make mistakes:
- Don’t overcook apples — they should be tender but hold their shape.
- Don’t skimp on caramel — it ties everything together.
- Don’t layer too hot — it’ll melt the cream and get messy.
- Don’t forget texture — the cookie layer is essential for contrast.
Nutrition Facts
Servings: 6
Calories per serving: 285
Note: These are approximate values.
Preparation Time
Prep Time: 15 minutes
Cook Time: 10 minutes
Total Time: 25 minutes
Make-Ahead and Storage Tips
You can prep all layers separately ahead of time. Store cooked apples and whipped cream in airtight containers in the fridge. Assemble just before serving, or prep full cups and store covered for up to 24 hours. For longer storage, layer without cream and add topping just before eating.
How to Serve Caramel Apple Dessert Cups
Serve chilled or at room temperature in clear cups, mini mason jars, or even hollowed-out apples for a fun twist. Garnish with mini spoons, a cinnamon stick, or a drizzle of caramel art for added charm.
Creative Leftover Transformations
Use your leftover ingredients or cups in new ways:
- Spoon over pancakes or waffles.
- Serve with pound cake or angel food for a plated dessert.
- Blend into milkshakes for a fall-inspired treat.
- Layer into a breakfast parfait with yogurt and granola.
Additional Tips
Want to wow your guests?
- Add a splash of bourbon or vanilla extract to the apples.
- Use cinnamon sugar for extra cookie layer crunch.
- Sprinkle edible gold flakes for a festive holiday look.
- Make mini cups for party platters or tasting menus.
Make It a Showstopper
Present in mini glasses on a tiered tray, drizzle caramel art on the inside of the cup before filling, or top with a caramel-dipped apple slice as garnish. Add a dusting of cinnamon or powdered sugar for a photo-ready finish.
Variations to Try
Here are some ways to switch it up:
- Salted Caramel Apple: Add a pinch of sea salt to the caramel.
- Apple Cheesecake Cups: Add a cream cheese layer under the whipped topping.
- Spiced Pear Parfait: Use pears instead of apples with cardamom.
- Ginger Snap Crunch: Use crushed gingersnaps for added spice.
- Caramel Apple Crumble: Add toasted oats or crisp topping for crunch.
FAQ’s
Q1: Can I make these in advance?
A1: Yes, but add whipped cream just before serving for best texture.
Q2: Can I use canned apple pie filling?
A2: You can, though fresh apples give better texture and flavor.
Q3: Can I make this vegan?
A3: Yes — use vegan butter, coconut whipped cream, and dairy-free caramel.
Q4: What apples work best?
A4: Honeycrisp, Granny Smith, and Fuji offer a great balance of tart and sweet.
Q5: Can I serve these warm?
A5: Absolutely — just add whipped cream after layering to avoid melting.
Q6: How long do they keep?
A6: Up to 24 hours if fully assembled, or 3–4 days if layering later.
Q7: Can I make this sugar-free?
A7: Use sugar-free caramel and swap in stevia or monk fruit in the apples.
Q8: Do I need to peel the apples?
A8: Peeling is recommended for the softest texture, but optional.
Q9: Can I freeze them?
A9: Not ideal — the texture will suffer upon thawing.
Q10: Are they gluten-free?
A10: Yes, if using gluten-free cookies for the base.
Conclusion
Caramel Apple Dessert Cups bring all the joy of fall baking into a fast, no-fuss format that’s sweet, satisfying, and absolutely stunning. Whether you’re entertaining or simply indulging, these little cups pack a big flavor punch — and once you taste them, you’ll know exactly why they’re a hit every time.