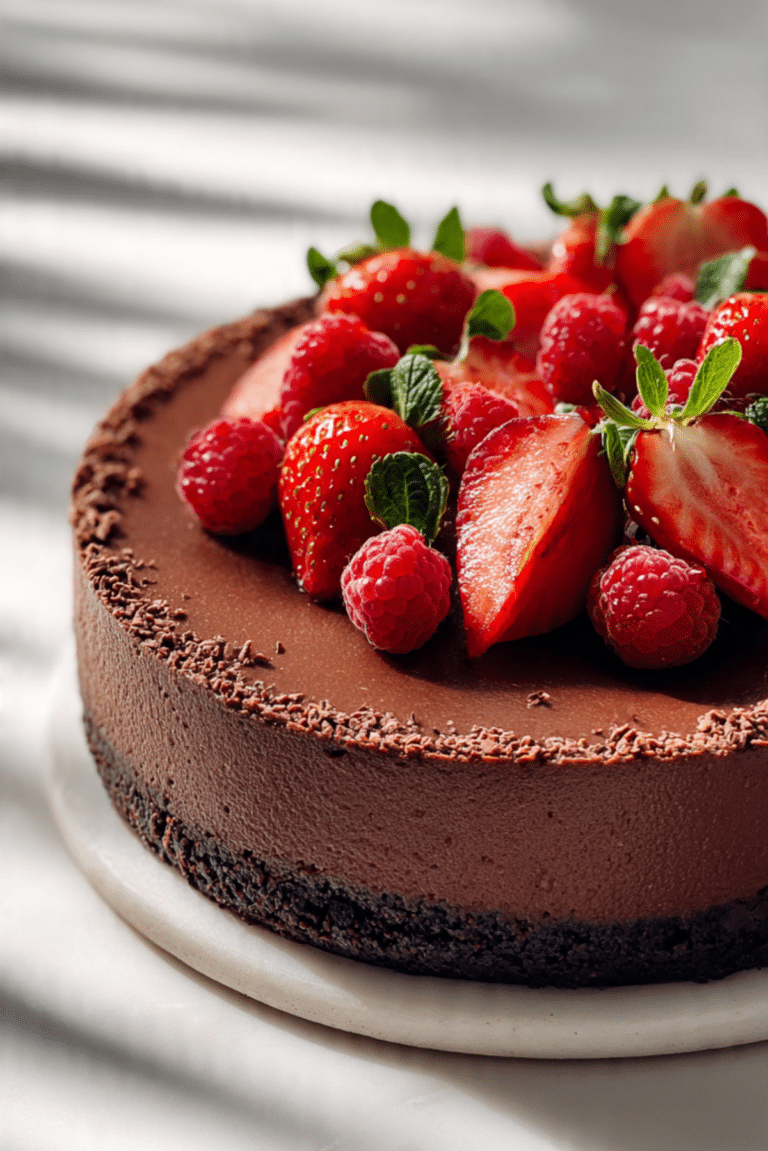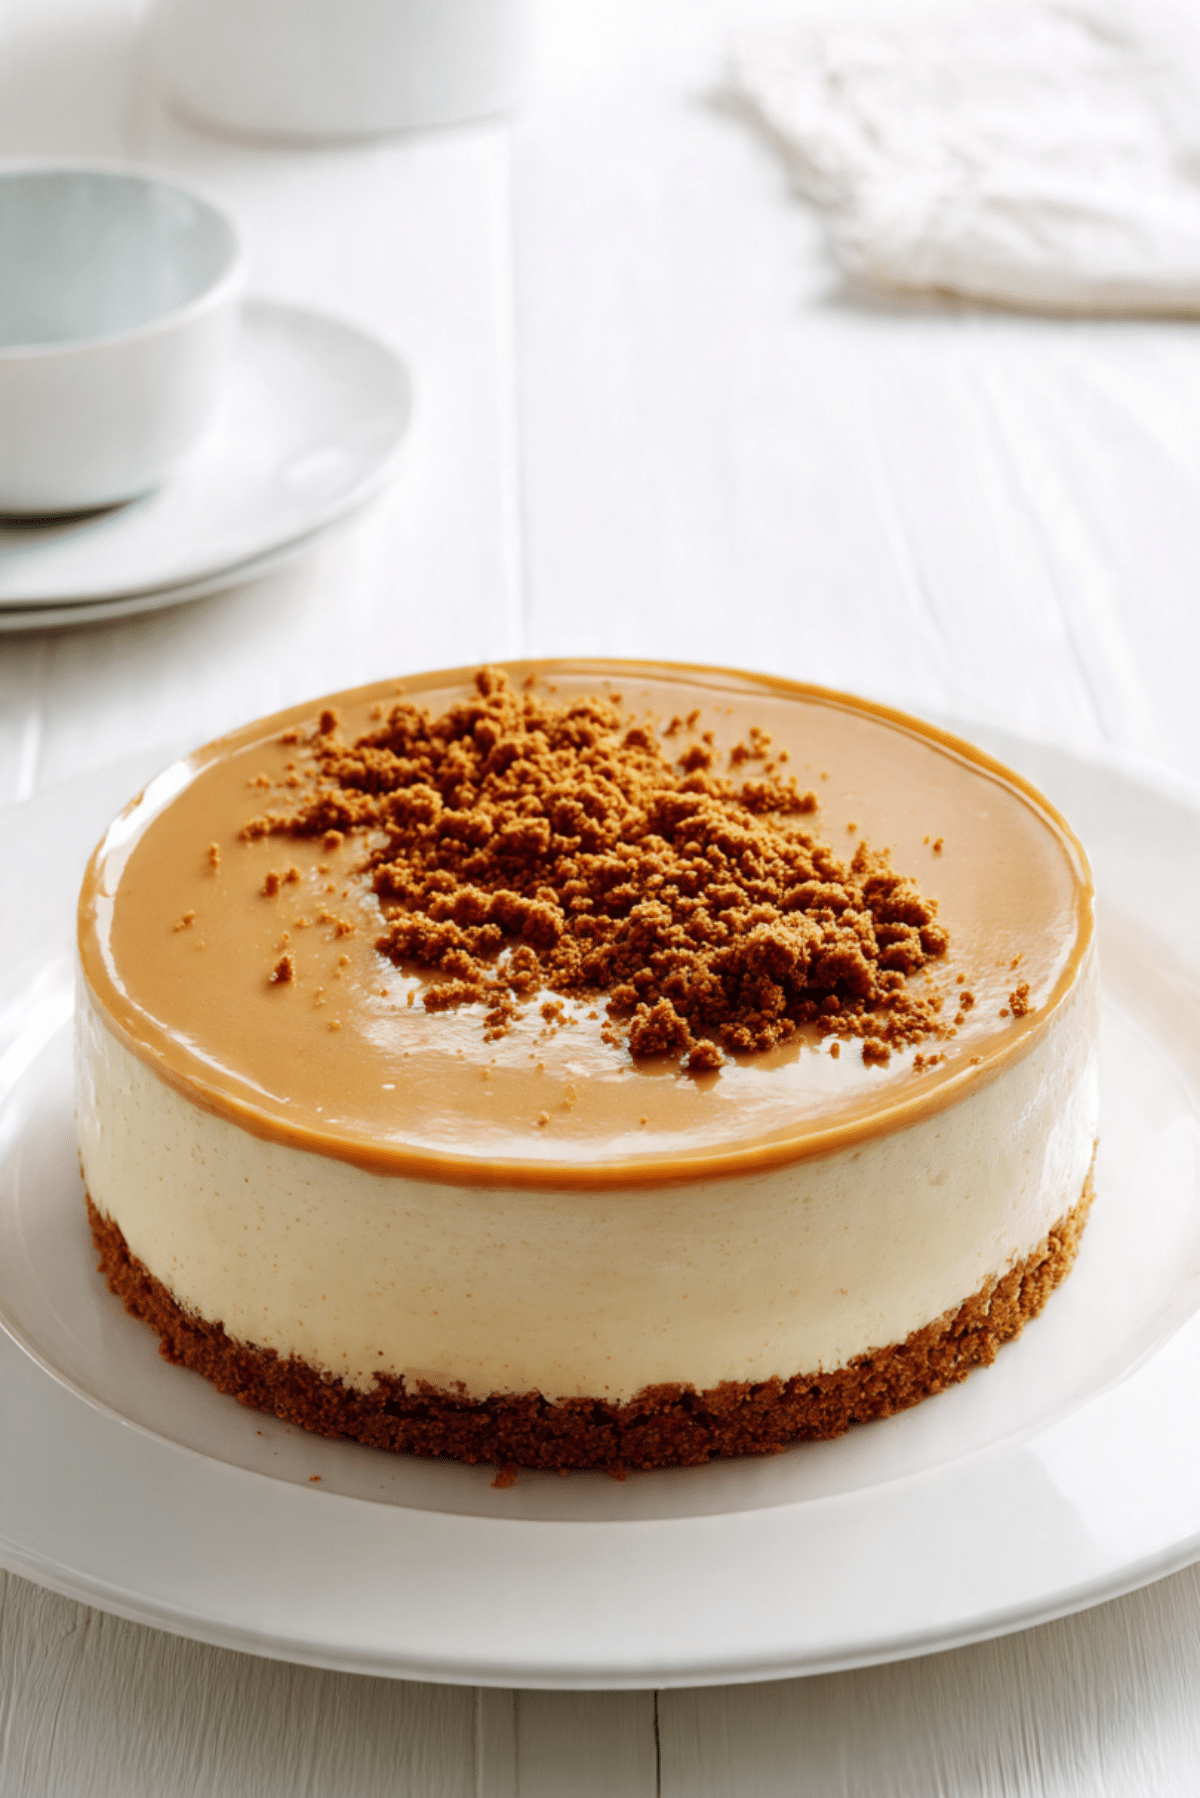
Biscoff Mousse Cake
The moment you take your first bite of this Biscoff mousse cake, it feels like everything just pauses for a second. That creamy, airy mousse paired with the warm, spiced sweetness of Biscoff spread creates something that honestly feels a little magical. It is smooth, rich, and just indulgent enough without being overwhelming. Trust me, you’re going to love this.
A dessert that feels like a hug in every bite
There is something about this cake that makes it instantly comforting. The buttery biscuit base gives a slight crunch, while the mousse melts softly on your tongue. It is the kind of dessert you bring out when you want people to go quiet for a moment, just enjoying what is on their plate.
And now let’s dive into where this beauty comes from and why it has become such a favorite.
The story behind that irresistible Biscoff flavor
Biscoff, also known as speculoos, has its roots in Europe, especially Belgium where it is often enjoyed with coffee. The flavor comes from warm spices like cinnamon and caramelized sugar, which gives it that deep, cozy taste.
Over time, this humble biscuit turned into a creamy spread, and from there, desserts like this mousse cake were born. It is a modern twist on a classic flavor, and let me tell you, it is worth every bite.
Why this recipe just works every single time
Before we get into the details, here is why this dessert deserves a spot in your kitchen.
Versatile: You can serve it as a full cake, mini cups, or even layered desserts in jars.
Budget-Friendly: The ingredients are simple and easy to find without breaking the bank.
Quick and Easy: No complicated techniques, just simple steps that come together beautifully.
Customizable: You can adjust sweetness or add chocolate layers if you like.
Crowd-Pleasing: Everyone loves that Biscoff flavor, it is always a hit.
Make-Ahead Friendly: Perfect for preparing the day before any gathering.
Great for Leftovers: It stores well and tastes even better the next day.
A few chef secrets to make it perfect
Once you understand a few small tricks, everything becomes easier.
- Use room temperature cream cheese for a smoother mousse
- Whip the cream just until soft peaks, not too stiff
- Fold gently to keep the mousse light and airy
- Chill long enough so the layers set properly
Tools that make everything smoother
You do not need fancy equipment, but these help a lot.
Springform Pan: Helps release the cake cleanly.
Mixing Bowls: For preparing different layers easily.
Electric Mixer: Makes whipping faster and more consistent.
Spatula: Essential for folding without losing air.
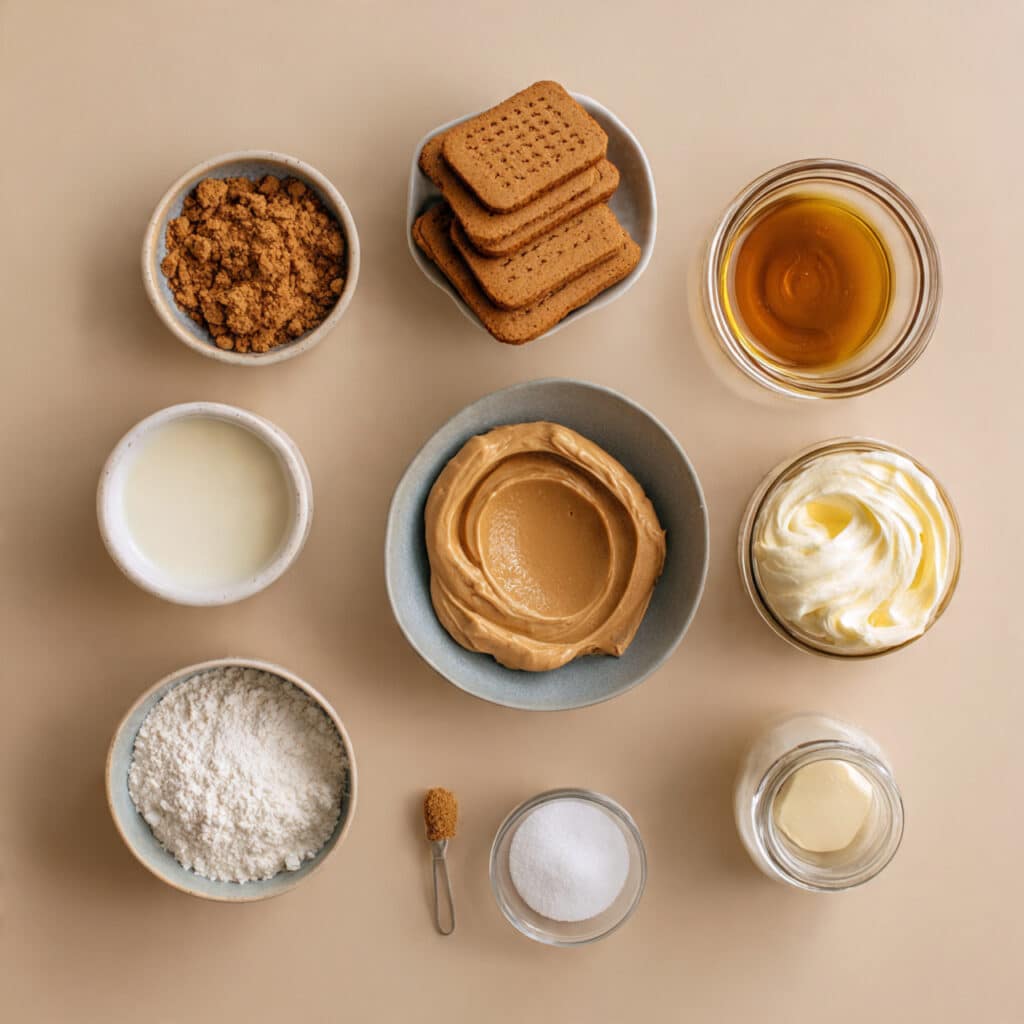
Ingredients that build every layer of flavor
Everything here works together so nicely, each ingredient plays its part.
- Biscoff biscuits: 200 g, crushed, forms the crunchy base
- Unsalted butter: 100 g, melted, binds the base together
- Biscoff spread: 250 g, gives the signature flavor
- Cream cheese: 200 g, adds richness and structure
- Heavy cream: 300 ml, whipped for a light mousse texture
- Powdered sugar: 50 g, adds gentle sweetness
- Gelatin: 1 tablespoon, helps the mousse set properly
- Warm water: 3 tablespoons, to bloom the gelatin
Easy swaps if you want to tweak things
Sometimes you want to adjust, and that is totally fine.
Biscoff biscuits: Use graham crackers as an alternative
Cream cheese: Mascarpone can make it even richer
Gelatin: Agar agar works for a vegetarian option
The stars of the show
Let’s highlight what really makes this dessert shine.
Biscoff spread: That deep caramelized flavor is what defines the entire cake
Heavy cream: It creates that soft, cloud-like texture that makes each bite irresistible
Let’s get into the fun part, making it step by step
Here are the steps you are going to follow.
- Preheat Your Equipment: No baking needed, but prepare your pan and line it if needed
- Combine Ingredients: Mix crushed biscuits with melted butter until evenly coated
- Prepare Your Cooking Vessel: Press the mixture firmly into the base of the pan and chill
- Assemble the Dish: Beat cream cheese, Biscoff spread, and sugar until smooth
- Cook to Perfection: Dissolve gelatin in warm water, then mix into the cream mixture and fold in whipped cream
- Finishing Touches: Pour over the base and smooth the top, then chill for at least 4 hours
- Serve and Enjoy: Slice gently and enjoy that creamy, dreamy texture
That perfect balance of texture and flavor
The base gives a subtle crunch that contrasts beautifully with the silky mousse. As it chills, the flavors deepen and blend together, creating that smooth, slightly spiced sweetness that keeps you coming back for more.
A few extra tips to make it even better
- Chill overnight for the best texture
- Use a warm knife for clean slices
- Do not rush the setting time
What to avoid while making this dessert
It is simple, but a few mistakes can change the result.
- Overwhipping the cream can make the mousse heavy
- Skipping chill time will prevent proper setting
- Not dissolving gelatin fully can cause lumps
Nutrition snapshot you should know
Servings: 8
Calories per serving: 420
Note: These are approximate values.
Timing everything just right
Prep Time: 20 minutes
Cook Time: 0 minutes
Total Time: 4 hours 20 minutes
Planning ahead and storing it right
This cake is perfect for making ahead. Store it in the fridge covered for up to 3 days. You can also freeze it, just thaw slowly in the fridge before serving.
Serving ideas that make it shine
Serve it chilled with a drizzle of melted Biscoff or a few crushed biscuits on top for texture. A cup of coffee on the side makes it even better.
Turning leftovers into something new
Leftover slices can be turned into parfaits. Just layer them with whipped cream in glasses and you have a whole new dessert.
Extra tips for best results
Keep everything at the right temperature and do not rush the process. Good desserts take a little patience.
Make it look as good as it tastes
Use a smooth spatula for the top and clean edges before serving. A glossy topping adds that final wow factor.
Fun variations you can try
Try adding a chocolate ganache layer, or mix in crushed biscuits into the mousse for extra texture. You can even make it in mini cups for individual servings.
FAQ’s
Q1: Can I make it without gelatin?
Yes, but it will be softer and less stable.
Q2: Can I freeze it?
Yes, just thaw it slowly before serving.
Q3: How long does it last?
Up to 3 days in the fridge.
Q4: Can I use whipped topping instead of cream?
Yes, but the texture will be slightly different.
Q5: Can I make it in advance?
Absolutely, it is even better the next day.
Q6: What pan size works best?
An 8 inch pan works perfectly.
Q7: Can I reduce the sweetness?
Yes, adjust the sugar to taste.
Q8: Can I add chocolate?
Yes, it pairs beautifully.
Q9: Why is my mousse not setting?
It may need more chill time or properly dissolved gelatin.
Q10: Can I make it in cups?
Yes, perfect for individual servings.
Conclusion
This one is a total game-changer. It is creamy, rich, and packed with that irresistible Biscoff flavor that makes every bite feel special. Let me tell you, it is worth every bite, and once you try it, it will quickly become a favorite in your kitchen.
Print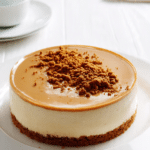
Biscoff Mousse Cake
- Prep Time: 20 minutes
- Cook Time: 0 minutes
- Total Time: 4 hours 20 minutes
- Yield: 8 servings
- Category: Dessert
- Method: No-Bake
- Cuisine: European
- Diet: Vegetarian
Description
A creamy and indulgent no-bake Biscoff mousse cake with a buttery biscuit base and smooth, airy mousse layers.
Ingredients
- 200 g Biscoff biscuits
- 100 g unsalted butter, melted
- 250 g Biscoff spread
- 200 g cream cheese
- 300 ml heavy cream
- 50 g powdered sugar
- 1 tablespoon gelatin
- 3 tablespoons warm water
Instructions
- Crush the Biscoff biscuits and mix with melted butter until well combined.
- Press the mixture firmly into the base of a springform pan and chill.
- Beat cream cheese, Biscoff spread, and powdered sugar until smooth.
- Dissolve gelatin in warm water and mix into the cream mixture.
- Whip heavy cream to soft peaks and gently fold into the mixture.
- Pour the mousse over the base and smooth the top.
- Chill for at least 4 hours until set, then slice and serve.
Notes
- Chill overnight for best texture
- Use a warm knife for clean slicing
- Do not overwhip the cream
Nutrition
- Serving Size: 1 slice
- Calories: 420
- Sugar: 22 g
- Sodium: 180 mg
- Fat: 28 g
- Saturated Fat: 16 g
- Unsaturated Fat: 10 g
- Trans Fat: 0 g
- Carbohydrates: 35 g
- Fiber: 1 g
- Protein: 5 g
- Cholesterol: 75 mg