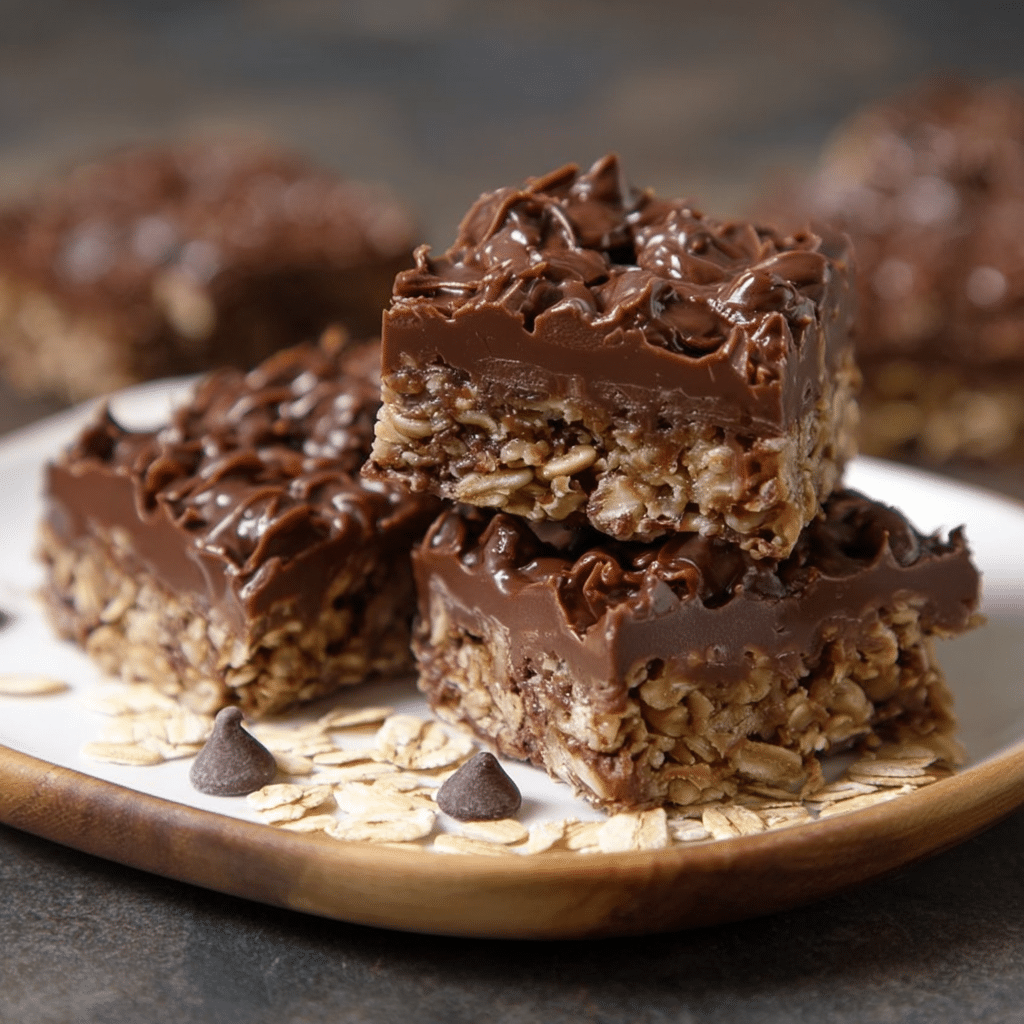
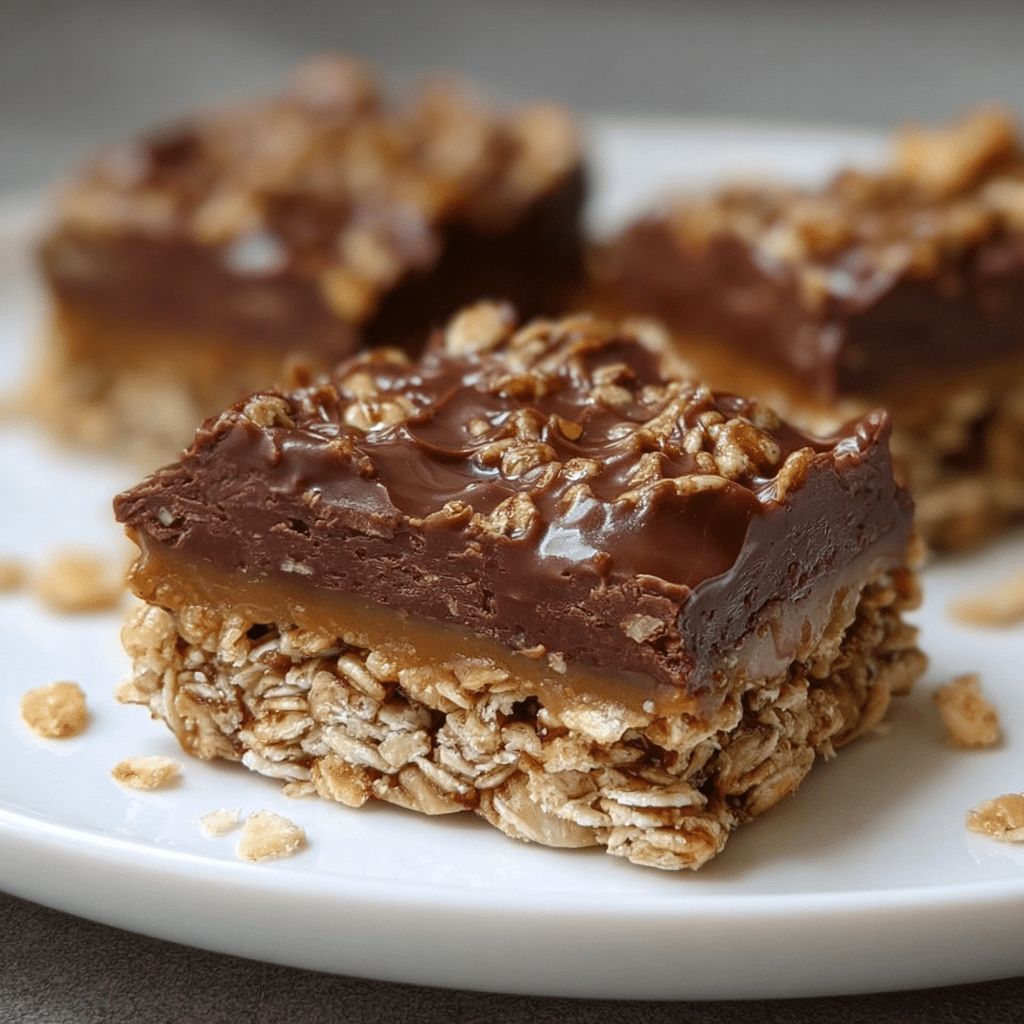
No-Bake Chocolate Oat Bars: The Ultimate Easy Dessert for All Seasons
No-Bake Chocolate Oat Bars are more than just a sweet fix—they’re the ultimate fusion of comfort and convenience. And here at HomeasyRecipes.com, we’re all about keeping things simple and tasty.
WELCOME TO homeasyrecipes.com – Where Tradition Meets Taste
Hello! I’m Anna, the heart behind HomeasyRecipes, a cozy corner dedicated to celebrating timeless recipes and the warmth of shared meals. Inspired by my beloved grandmother, Mary, this site is a tribute to her wisdom, love, and the unforgettable flavors she brought to our family table. If you’re anything like me, you love a good recipe that actually works—the kind that doesn’t leave you drowning in dishes or hunting down ingredients you’ve never heard of.
That’s what this site is all about. Real recipes. Real life. No fluff. I started homeasyrecipes.com because I wanted to make home cooking feel less like a chore and more like something to look forward to. You’ll find everything here—from quick 20-minute meals to comfort food for those slow Sundays. Oh, and plenty of desserts, because… priorities.
I’m not a professional chef—I’m just a home cook who’s learned (sometimes the hard way) how to make tasty, doable meals that don’t break the bank or your spirit. So, whether you’re cooking for one, feeding a family, or just trying to figure out what to do with that leftover chicken, I’ve got you.
Today, we’re diving into a treat that checks all the boxes—easy, affordable, freezer-friendly, and absolutely irresistible. Let’s break down what makes No-Bake Chocolate Oat Bars your new go-to dessert.
Looking for inspiration? Try our gooey butter cake bars if you crave rich, oven-baked indulgence.
Table of Contents
Table of Contents
The Allure of No-Bake Chocolate Oat Bars
What Makes No-Bake Desserts So Popular?
No-bake desserts like these oat bars are perfect for busy families, summer days when turning on the oven sounds criminal, or anytime you want a quick sweet bite without much effort. The minimal ingredients, short prep time, and flexible flavors make them an instant favorite.
Why Oats and Chocolate Work Together
Oats bring chewiness, fiber, and structure, while chocolate delivers that deep, rich satisfaction we all crave. Add peanut butter into the mix? Now you’ve got a trifecta of taste and texture that’s hard to beat.
Don’t miss our no-bake rhubarb cheesecake for a tangy twist on classic chilled treats.
Common Variations You’ll Love
While this version focuses on semisweet chocolate and peanut butter, you can easily add:
- Chopped nuts or almonds for crunch
- Shredded coconut
- White chocolate swirls
- Dried cranberries for a festive spin
No-Bake Chocolate Oat Bars: The Ultimate Easy Dessert for All Seasons
- Prep Time: 10 minutes
- Cook Time: 5 minutes
- Total Time: 35 minutes
- Yield: 16 bars 1x
- Category: Dessert
- Method: No-Bake
- Cuisine: American
- Diet: Gluten Free
Description
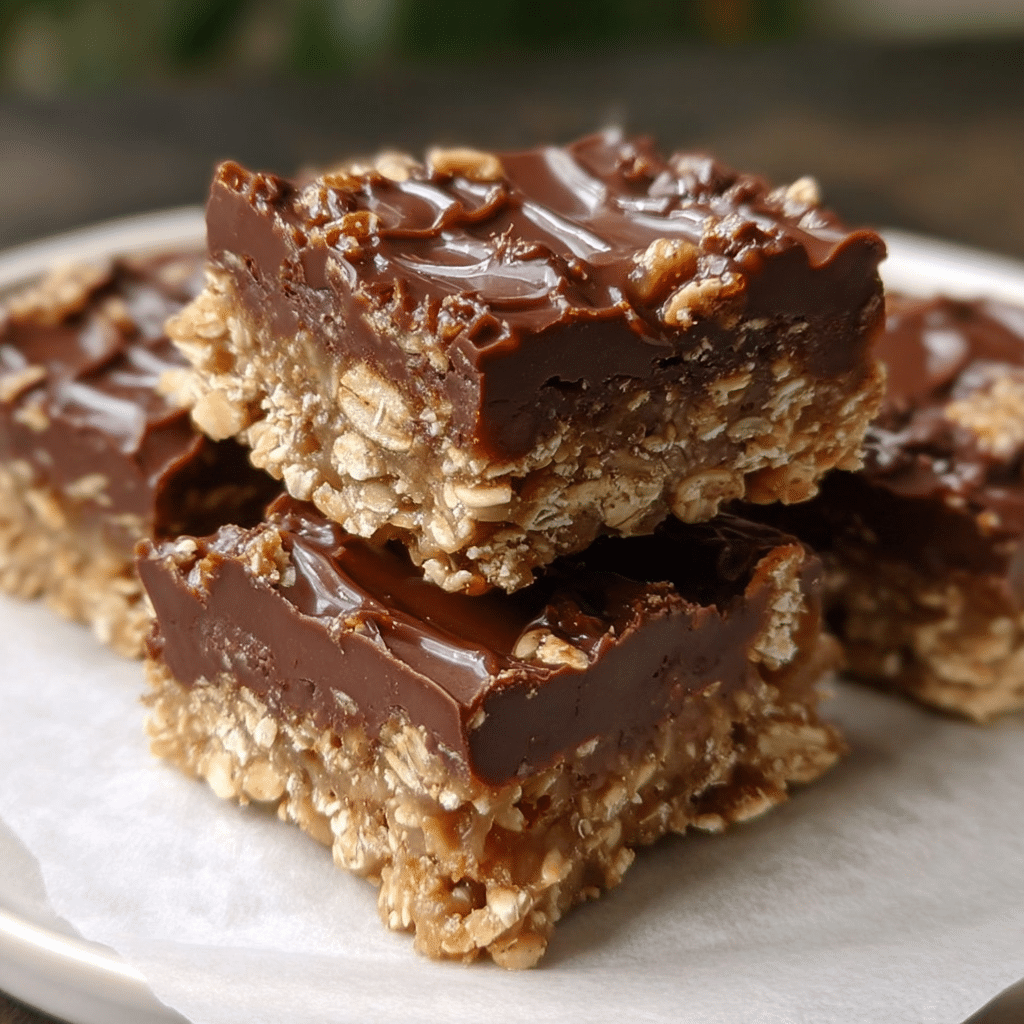
These No-Bake Chocolate Oat Bars are thick, chewy, and delicious with only five ingredients. They’re perfect for a quick snack or dessert and require no oven time.
Ingredients
- 3 cups rolled oats
- 1 1/2 cups chocolate chips
- 1 cup peanut butter
- 1/2 cup maple syrup
- 1/4 cup coconut oil (can substitute with butter)
Instructions
- Line an 8 x 8-inch baking dish or deep baking tray with parchment paper and set aside.
- Add rolled oats into a large mixing bowl and set aside.
- In a microwave-safe bowl or on the stovetop, combine the chocolate chips, peanut butter, maple syrup, and coconut oil. Heat until melted.
- Remove from heat and whisk until smooth and fully incorporated.
- Pour the chocolate/peanut butter mixture over the oats and mix until evenly coated.
- Transfer the mixture into the lined baking dish and spread evenly.
- Refrigerate for at least 30 minutes or until firm.
- Remove from fridge and cut into bars. Serve and enjoy!
Notes
- Use certified gluten-free oats for a gluten-free version.
- Store bars in the fridge for up to 7 days or freeze for up to 2 months.
- Swap coconut oil for butter if desired.
- Line the dish with parchment paper for easy removal.
Nutrition
- Serving Size: 1 bar
- Calories: 190
- Sugar: 12g
- Sodium: 40mg
- Fat: 11g
- Saturated Fat: 5g
- Unsaturated Fat: 5g
- Trans Fat: 0g
- Carbohydrates: 21g
- Fiber: 2g
- Protein: 4g
- Cholesterol: 0mg
Keywords: No-Bake Chocolate Oat Bars, chocolate oat bars, no bake desserts, easy oat bars, peanut butter chocolate bars
Ingredients Breakdown + Nutritional Benefits
Simple Pantry Ingredients That Make Magic
One of the best things about No-Bake Chocolate Oat Bars is the accessibility of the ingredients. You likely have most of these items in your pantry right now. Here’s what you’ll need:
| Ingredient | Quantity | Role |
|---|---|---|
| Butter | 1 cup | Acts as the binding fat that holds the bars together and enhances flavor |
| Brown Sugar | ½ cup packed | Adds rich molasses sweetness and chewy texture |
| Vanilla Extract | 1 tsp | Rounds out the flavor with warmth |
| Quick Cooking Oats | 3 cups | Base of the bars, provides chewiness and structure |
| Semisweet Chocolate Chips | 1 cup | Delivers the rich, chocolatey core |
| Peanut Butter | ½ cup | Adds creaminess, protein, and depth to the chocolate filling |
Each ingredient complements the others, building layers of flavor and texture. It’s a harmony of crunch, creaminess, and chocolatey smoothness—all without ever touching the oven.
Discover more chocolate bar inspiration in this no-bake crispy Snickers bars recipe.
Nutritional Breakdown of the Bars
While No-Bake Chocolate Oat Bars aren’t diet food, they offer a decent blend of carbs, fats, and a touch of protein—making them a better choice than heavily processed snacks. Here’s an estimated nutritional snapshot per bar (based on a 16-bar yield):
| Nutrient | Amount per bar |
|---|---|
| Calories | ~180-200 |
| Total Fat | 10g |
| Saturated Fat | 5g |
| Carbohydrates | 23g |
| Sugar | 12g |
| Protein | 3-4g |
| Fiber | 2g |
Thanks to oats and peanut butter, these bars offer slow-releasing energy and a touch of fiber—great for a quick breakfast or post-lunch treat.
Healthier Swaps If You’re Watching Calories
Want to make them slightly lighter? Try these ingredient swaps:
- Butter → Coconut oil (for a dairy-free version)
- Brown Sugar → Maple syrup or honey
- Peanut Butter → Almond butter
- Semisweet Chips → Dark chocolate chunks (70% cacao)
These modifications can slightly reduce the sugar and saturated fat while increasing nutritional value.
Step-by-Step Instructions to Make No-Bake Chocolate Oat Bars Like a Pro
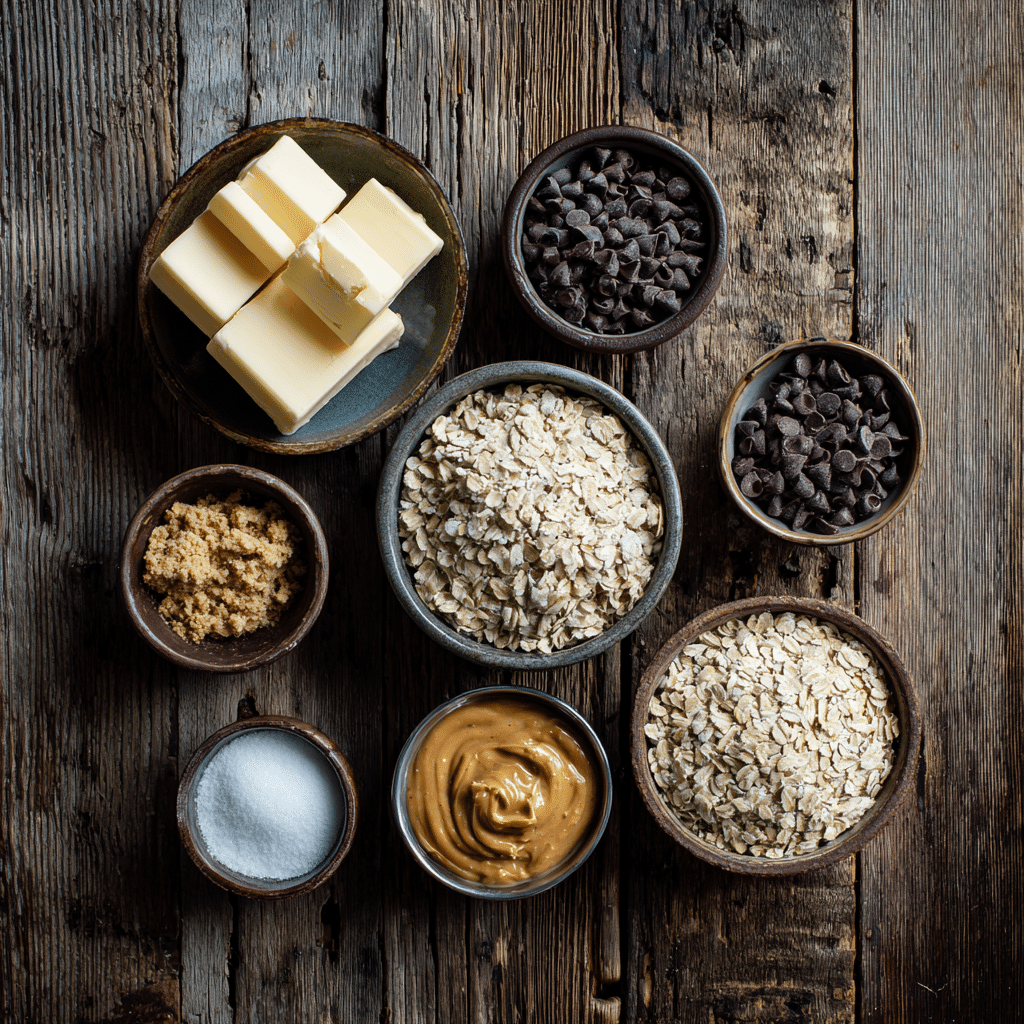
Step 1: Gather and Prep Your Ingredients
Start by measuring all your ingredients and lining a square 8×8 or 9×9 inch baking pan with parchment paper. This helps the bars lift out cleanly once they’re chilled. No baking means fewer dishes and no preheating required—a win from the start.
Step 2: Cook the Oat Layer
In a medium saucepan, melt 1 cup of butter over medium heat. Once melted, stir in ½ cup packed brown sugar and 1 teaspoon vanilla extract. Mix until the sugar dissolves.
Next, add 3 cups of quick cooking oats. Stir frequently for about 2–3 minutes until the oats are fully coated and the mixture thickens slightly.
Pro Tip: Do not overcook the oats. You want them warm and softened—not toasted or dry.
Step 3: Press the Base
Press half of the oat mixture firmly into the bottom of your prepared pan using the back of a spoon or a spatula. This forms your base layer.
Don’t miss our tip-packed guide for layering and texture in gooey butter cake bars—perfect for anyone who loves structured desserts.
Step 4: Melt Chocolate + Peanut Butter
In a small heavy-bottom saucepan, melt together:
- 1 cup semisweet chocolate chips
- ½ cup peanut butter
Stir constantly over low heat until the mixture is smooth and glossy. This luscious filling is the heart of your bars.
Alternative Tip: Use a microwave in 30-second bursts, stirring between each, to avoid burning the chocolate.
Step 5: Spread and Top
Pour the warm chocolate-peanut butter mixture over the pressed oat layer. Use a knife or spoon to spread it evenly across the surface.
Now, crumble the remaining oat mixture over the top. Gently press it into the chocolate so it sticks, but don’t smush it too much—you want those bits to stay slightly textured.
Step 6: Chill and Cut
Cover the pan and refrigerate for 2 to 3 hours or overnight for best results. Bring to room temperature before slicing into bars. This helps the chocolate layer soften slightly, so the bars cut cleanly without cracking.
| Step | Action |
|---|---|
| 1 | Melt butter + mix sugar, vanilla, oats |
| 2 | Press half into pan |
| 3 | Melt chocolate + peanut butter |
| 4 | Spread chocolate, top with oats |
| 5 | Chill and slice |
Craving more chill-and-serve ideas? Try our creamy no-bake rhubarb cheesecake for something fruity and elegant.
Storage Tips + Freezing Guide for Make-Ahead Magic
How to Store No-Bake Chocolate Oat Bars
Once your bars are fully chilled and sliced, proper storage ensures they stay fresh, chewy, and satisfying. Here’s how to keep them tasting bakery-fresh for days:
- In the fridge: Store in an airtight container with layers separated by wax or parchment paper. They’ll stay good for up to 7 days.
- Room temperature: If your kitchen isn’t too warm, you can keep them at room temp for 2–3 days. They’ll be softer and slightly gooier—just how some folks like them.
Pro Storage Tip: Always store bars in a single layer if possible to prevent sticking and smudging of the chocolate layer.
How to Freeze for Long-Term Sweet Tooth Satisfaction
Want to keep a batch handy for last-minute guests, potlucks, or late-night cravings? These bars freeze beautifully.
Freezing Instructions:
- Cut bars into desired portions.
- Wrap each bar individually in plastic wrap.
- Place all wrapped bars in a freezer-safe zip bag or airtight container.
- Label with date—best enjoyed within 2 months.
To thaw: Simply let the bars sit at room temperature for about 20 minutes or place them in the fridge for an hour.
Tips for Batch-Freezing and Meal Prep
If you’re the meal-prep type, make a double batch and split it:
- Half for the week ahead (refrigerated)
- Half for freezing (future-you will thank you)
These bars are perfect for:
- School or work lunches
- After-gym energy snacks
- Dessert trays for events
Check out our favorite freezer-friendly treats like no-bake crispy Snickers bars for more prep-ahead dessert inspiration.
Creative Twists and Flavor Variations
Fun Add-Ins to Elevate Your Bars
The beauty of No-Bake Chocolate Oat Bars lies in how customizable they are. Whether you’re a purist or like things a bit extra, here are popular flavor boosters:
- Chopped nuts: Walnuts, almonds, or pecans for crunch
- Dried fruit: Cranberries, cherries, or raisins add chew and tartness
- Shredded coconut: Toasted or sweetened, it pairs beautifully with chocolate
- Sea salt: Sprinkle a bit on top before chilling for that salty-sweet combo
- Mini marshmallows: Stir into the top oat layer for a rocky road feel
- Crushed pretzels: Adds texture and a salty edge to balance the sweet
Looking for inspiration? Try these rich chocolate chip cookie dough bars for more sweet layering ideas.
Flavor Variations You’ll Want to Try Next
Once you master the base recipe, try one of these fun flavor spins:
1. Mocha Fudge Bars
Add 1 teaspoon of instant espresso powder to the chocolate-peanut butter mixture for a rich mocha twist.
2. Almond Joy Style
Use almond butter instead of peanut butter, mix in shredded coconut, and top with sliced almonds.
3. S’mores Bars
Mix graham cracker crumbs into the oat layer and add mini marshmallows on top with dark chocolate chunks.
4. Mint Chocolate Crunch
Use mint chocolate chips in place of semisweet chips and stir in crushed mint cookies or candies.
5. Pumpkin Spice Chocolate Bars
Add ½ teaspoon cinnamon and ¼ teaspoon nutmeg to the oat mixture in fall. You can also swirl a tablespoon of pumpkin puree into the chocolate layer.
| Variation | Key Ingredients |
|---|---|
| Mocha Fudge | Espresso powder, dark chocolate |
| Almond Joy | Almond butter, coconut, almonds |
| S’mores | Graham crumbs, marshmallows |
| Mint Crunch | Mint chips, crushed candies |
| Pumpkin Spice | Pumpkin, cinnamon, nutmeg |
These twists make it easy to tailor your No-Bake Chocolate Oat Bars to holidays, seasons, or your own taste buds.
Don’t miss our creative comfort bakes in gooey butter cake bars for even more seasonal magic.
Kid-Friendly & Allergy-Friendly Alternatives
Making No-Bake Chocolate Oat Bars Kid-Approved
When it comes to snacks for little ones, these bars check all the boxes: sweet, fun, and mess-free. But you can make a few tweaks to better suit tiny taste buds and picky eaters.
Sweet but Safe for Small Appetites
- Cut bars into mini squares or fingers for portion control
- Use milk chocolate chips instead of semisweet for a milder flavor
- Add colorful sprinkles or mini M&M’s for a fun twist
School-Safe Swaps (Nut-Free)
Many schools are nut-free zones, so here’s how to keep the flavor without the peanut butter:
- Sunflower seed butter – a creamy, nut-free alternative
- Soy nut butter – tastes close to peanut butter, but safe for allergies
- Cookie butter (Biscoff) – for a dessert-like indulgent option
Allergy-Friendly Tweaks for Common Sensitivities
Here’s how to adapt the bars for dietary restrictions without losing the chewy, chocolatey goodness:
| Allergen | Swap Suggestion |
|---|---|
| Dairy | Use vegan butter or coconut oil, and dairy-free chocolate chips |
| Gluten | Use certified gluten-free oats |
| Nuts | Sub in sunflower butter, tahini, or oat-based spreads |
| Soy | Choose soy-free chocolate and peanut butter alternatives |
Learn more about creative allergen-free treats like our upcoming nut-free oatmeal fudge bars (orphan link placeholder).
Vegan-Friendly Option
To make the recipe 100% plant-based:
- Swap butter → coconut oil or plant-based margarine
- Use vegan chocolate chips (check label for dairy-free status)
- Ensure oats are processed in a gluten- and dairy-free facility
These small adjustments turn your No-Bake Chocolate Oat Bars into a dessert anyone can enjoy—regardless of dietary needs.
Serving Ideas & Occasions for Every Season
Everyday Moments That Deserve a Chocolate Oat Bar
No-Bake Chocolate Oat Bars aren’t just for holidays or potlucks—they’re perfect for life’s little cravings. Here are everyday ways to enjoy them:
- Afternoon pick-me-up: Pair with iced coffee or herbal tea
- After-school snack: Serve in lunchboxes or with a glass of cold milk
- Post-workout treat: Oats + peanut butter = quick energy and protein
- Late-night sweet fix: Keep chilled squares in the fridge for guilt-free cravings
Looking for inspiration? Try one of our best crowd-pleasers, the no-bake rhubarb cheesecake, for a dessert that feels fancier but is just as easy.
Seasonal Serving Suggestions That Wow
Make your bars festive for any occasion with just a few fun tweaks:
Spring
- Add pastel-colored sprinkles on top
- Serve chilled with fresh strawberries or raspberries on the side
Summer
- Layer into an ice cream sundae—crumble bars on top of vanilla or chocolate scoops
- Freeze and eat like a chocolate oat ice cream sandwich
Fall
- Dust the top with cinnamon or pumpkin pie spice
- Pair with hot apple cider for the coziest combo
Winter
- Drizzle white chocolate and crushed peppermint on top
- Serve warm from room temp with hot cocoa
| Season | Flavor Twist | Serving Style |
|---|---|---|
| Spring | Berries, sprinkles | As dessert bites with fruit |
| Summer | Coconut, frozen | As a sundae topper or sandwich |
| Fall | Cinnamon, pumpkin spice | With cider or tea |
| Winter | Peppermint, white chocolate | With cocoa or milk |
Party-Ready Presentation Ideas
When serving to a crowd, presentation is key:
- Stack bars pyramid-style on a wood board with parchment between layers
- Cut bars into triangles for an elegant twist
- Place each square in a mini cupcake liner for grab-and-go ease
- Dust with powdered sugar right before serving
Discover great ideas like no-bake crispy Snickers bars for dessert trays that impress at any gathering.
Can I bake chocolate oatmeal bars?
Technically yes—but then they wouldn’t be no-bake anymore.
If you’re looking for a baked version, you can repurpose the ingredients into a classic baked oatmeal bar. Increase the oats slightly, add an egg and baking powder, and bake at 350°F for about 25 minutes. However, the gooey chocolate center and soft crumb texture will be completely different from this no-bake version.
This specific recipe is designed for chilling, not heating—giving it that signature chew and fudge-like consistency that’s tough to recreate in the oven.
Are these healthy?
That depends on your definition of healthy—but they can absolutely be part of a balanced diet.
These bars contain:
Whole grain oats for fiber and lasting energy
Peanut butter for healthy fats and protein
Chocolate, which in moderation adds antioxidants and satisfaction
While they do include sugar and butter, the recipe avoids artificial preservatives or highly processed ingredients. You can also reduce the sugar, sub dark chocolate, or use natural nut butters for a healthier spin.
Are these gluten-free?
Not automatically—but they can be made gluten-free with a simple ingredient swap.
Most oats are naturally gluten-free. However, due to processing in facilities that also handle wheat, cross-contamination can occur. To ensure your No-Bake Chocolate Oat Bars are safe for a gluten-free diet, use certified gluten-free oats. Also double-check your chocolate chips and peanut butter labels to make sure there are no hidden gluten additives.
Final Thoughts + Bonus Tips for Perfect Bars Every Time
Why These Bars Deserve a Permanent Spot in Your Recipe Box
No-Bake Chocolate Oat Bars are the ultimate treat: easy to make, endlessly adaptable, and loved by all ages. Whether you’re a beginner in the kitchen or a seasoned home cook, this recipe delivers consistently tasty results without the need for fancy tools or time-consuming steps.
From casual snacks to holiday trays, freezer prep to allergy-safe tweaks—this dessert checks all the boxes.
Bonus Tips for Foolproof Results
Want to make sure your bars are the best on the block? Here are a few insider tips:
- Use parchment paper for easy lifting and clean cuts. No sticking, no mess.
- Press the base layer firmly, but don’t pack the top layer too hard—let it stay crumbly for texture.
- Cool completely before slicing to avoid gooey layers pulling apart.
- Store in a single layer, especially if it’s warm out—stacked bars may melt together.
- Add toppings before chilling (like sprinkles or sea salt) so they set nicely into the chocolate.
Don’t miss our full collection of no-bake favorites starting with no-bake rhubarb cheesecake.
Conclusion
No-Bake Chocolate Oat Bars are proof that simple ingredients, when combined with a bit of love and the right steps, can become something unforgettable. Whether you’re trying to satisfy a weeknight sweet craving, whip up a quick dessert for guests, or stock your freezer with grab-and-go treats, these bars deliver every time.
They’re endlessly versatile—go classic with chocolate and peanut butter or remix the flavors for holidays, picky kids, or dietary needs. The no-bake process keeps things low-stress and high-reward, especially when your time and energy are limited.
Here at HomeasyRecipes.com, this kind of recipe is exactly why I started the site: easy, joyful cooking with results you can count on. Inspired by my grandmother’s timeless kitchen magic, I hope these bars become one of your go-to favorites too.
Try them once, and they’ll earn a permanent spot in your dessert rotation.